
After decades of standing over glowing embers and perfecting the art of the backyard feast, I have come to one undeniable conclusion: the secret to the most magnificent smoked chicken thighs lies not in complex machinery, but in the patient application of salt and the gentle kiss of wood smoke. You see, dear reader, there is a profound difference between a piece of chicken that has merely been cooked and one that has been transformed by the slow, aromatic dance of a well-tended fire.
I want you to take a deep breath and set aside any worries about “perfect” temperatures or intimidating equipment. We are going back to the basics, where the quality of the meat and the sincerity of the cook are the most important ingredients in the recipe.
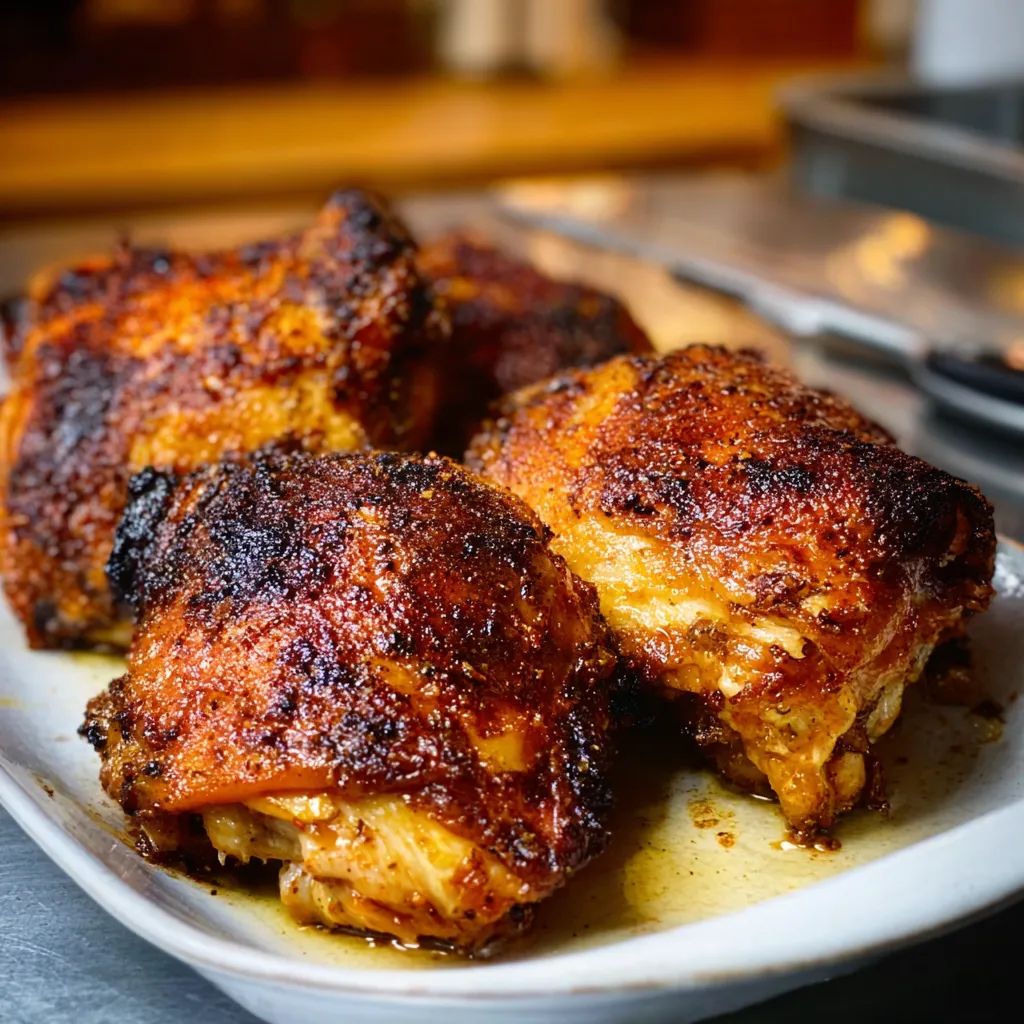
This method I’m sharing with you today is the result of countless Sunday afternoons and more than a few scorched apron strings. It is a method designed to give you that elusive combination of bite-through skin and meat so tender it nearly falls away from the bone with a sigh.
What Makes This Special
- The Power of the Dry Brine: Salting your chicken hours before it hits the grates allows the seasoning to penetrate deep into the fibers, ensuring every bite is seasoned to perfection.
- Fruitwood over Hardwood: While hickory and oak have their place, the delicate nature of poultry shines brightest when paired with the subtle sweetness of apple or cherry wood.
- The Higher Heat Finish: We smoke low to infuse flavor, but we finish with a bit of a roar to ensure the skin is rendered and crisp, rather than rubbery and tough.
The Essentials
In my kitchen, I’ve always believed that you cannot produce a silk purse from a sow’s ear. This means we must start with the best ingredients we can find, for the smoker will only amplify the natural flavors already present in the bird.
When you go to the butcher, look for thighs that are plump and have a healthy, clear color. I always insist on bone-in and skin-on, because the bone acts as an insulator, keeping the meat moist, and the skin provides the fat necessary to baste the meat from the outside in.
Here is what you will need to gather on your counter before we begin our journey:
- 8 Bone-in, Skin-on Chicken Thighs: (The bone keeps the meat succulent and prevents it from drying out during the long smoke).
- Kosher Salt: (The coarse grains are easier to control and draw out the moisture to create a perfect surface for the rub).
- Coarse Ground Black Pepper: (This provides a foundational heat that balances the richness of the chicken fat).
- Smoked Paprika: (This adds a beautiful sunset hue and a hint of earthiness that echoes the wood fire).
- Garlic Powder: (It provides a savory, aromatic depth that permeates the meat more evenly than fresh garlic in a dry rub).
- Onion Powder: (This offers a subtle sweetness and a well-rounded savory note that complements the poultry perfectly).
- Light Brown Sugar: (The molasses content helps with caramelization, giving the skin a gorgeous mahogany finish).
- Dried Thyme: (A classic herb for poultry that brings a touch of the garden to the smoky profile).
- Bbq Sauce: (A high-quality sauce acts as the final glaze, sealing in the juices and adding a layer of tangy sweetness).
- Apple Wood Chunks: (The mild, fruity smoke doesn’t overwhelm the chicken like stronger woods might).
Simple Swaps
Now, don’t you worry if your pantry isn’t stocked exactly like mine. A good cook is always adaptable, and part of the joy of cooking is making a recipe work with what you have on hand.
If you find yourself missing an item, consider these reliable alternatives:
- If you don’t have brown sugar, a bit of maple syrup or honey brushed on toward the end will provide that same lovely sweetness.
- In place of smoked paprika, regular sweet paprika or even a tiny pinch of cayenne can work, though the color will be slightly different.
- Dried oregano can stand in for thyme if you prefer a more Mediterranean flair to your barbecue.
- If you are out of onion powder, simply double the garlic powder; the results will still be absolutely delicious.
- For the wood, if apple isn’t available, cherry or pecan are wonderful, gentle alternatives that treat the chicken with kindness.
Ways to Change It Up

Once you have mastered the basic technique, you might feel the urge to experiment. I always encourage my friends to play with their food, as that is how new family traditions are born.
You might try a “Spicy Southern” version by adding a teaspoon of cayenne pepper and a dash of dried mustard to your rub. This creates a slow heat that builds beautifully with the smoke.
Alternatively, a “Herb Orchard” variation uses plenty of dried rosemary and sage, skipping the sugar entirely for a more savory, roast-like flavor profile. This is particularly lovely in the cooler months.
I often think of these variations as cousins to my Chicken Thighs recipe that I make in the oven. The foundational principles of seasoning remain the same, but the smoker adds a layer of complexity that the oven simply cannot replicate.
For those who want to go all out for a big celebration, you can serve these thighs alongside a Smoked Prime Rib Roast. It creates a “surf and turf” of the smoker world that will have your guests talking for years to come.
The Process
Now, let us roll up our sleeves and get to the heart of the matter. Cooking is a ritual, and each step should be performed with care and attention.
Step 1: The Preparation and Brine
The night before you plan to cook—or at least four hours prior—pat your chicken thighs dry with a paper towel. Moisture is the enemy of crisp skin, so we want them as dry as possible.
Sprinkle a generous amount of Kosher salt over both sides of the thighs, making sure to get a little bit under the skin where you can. Place them on a wire rack over a baking sheet and leave them in the refrigerator, uncovered.
This process, which I call a dry brine, allows the salt to pull the moisture out, season the meat deeply, and then re-absorb, leaving the skin primed for the smoker. It is a step you simply cannot skip if you want the best results.
Step 2: Applying the Flavor
When you are ready to cook, take the chicken out of the refrigerator and let it sit for about thirty minutes to take the chill off. While the meat rests, mix your pepper, paprika, garlic powder, onion powder, brown sugar, and thyme in a small bowl.
Apply the rub liberally to all sides of the chicken. I like to use my hands to really press the spices into the skin so they stay put during the long hours in the smoke.
Don’t be afraid to be generous with the rub. Much of it will meld with the rendering fat to create a “bark” or crust that is the hallmark of truly great barbecue.
Step 3: Preparing the Fire
Prepare your smoker to hold a steady temperature of 225°F (107°C). I find this is the “sweet spot” where the fat has time to render slowly without the meat becoming tough.
Add your apple wood chunks once the coals are glowing and the smoke is running “blue”—which is to say, thin and almost invisible. Thick white smoke can leave a bitter, creosote taste on the delicate chicken skin.
Patience is your best friend here. Let the smoker stabilize for at least fifteen to twenty minutes before you even think about putting that chicken on the grates.
Step 4: The Slow Smoke
Place the chicken thighs on the grates, skin-side up. I like to leave a little space between each piece so the smoke can circulate freely around every nook and cranny.
Close the lid and resist the urge to peek! Every time you open the lid, you lose heat and smoke, and as I always say, “If you’re lookin’, you ain’t cookin’.”
We are going to let them bathe in that beautiful smoke until the internal temperature reaches about 145°F (63°C). This usually takes about an hour and a half, depending on the size of your thighs and the quirks of your smoker.
Step 5: The Glaze and the Finish
Once we hit that middle temperature mark, it is time to add the finishing touches. I like to increase the smoker temperature to 300°F (149°C) if possible, or move the chicken to a hotter part of the grill.
Brush your chicken with a thin layer of sauce. This is where the magic happens, as the heat sets the sauce into a sticky, glossy lacquer that is simply irresistible.
Continue cooking until the internal temperature reaches 175°F (79°C). While 165°F is technically safe, thighs have a lot of connective tissue that only truly melts and becomes tender at those higher temperatures.
Tips for Best Results
Why is it recommended to use fruitwood like apple or cherry instead of stronger woods for smoking chicken?
Fruitwoods provide a subtle sweetness that complements the delicate nature of poultry, whereas stronger woods like hickory or oak can easily overwhelm the flavor of the bird.
What is the benefit of ‘dry brining’ the chicken thighs before they hit the smoker?
Dry brining involves salting the chicken hours before cooking to allow the seasoning to penetrate deep into the fibers and draw out moisture, which is essential for achieving seasoned meat and crisp skin.
At what internal temperature should smoked chicken thighs be finished for the best texture?
While 165°F is the standard safety temperature, chicken thighs should be cooked to 175°F. This higher temperature is necessary to melt the connective tissue, making the meat exceptionally tender.
How do you prevent the chicken skin from becoming rubbery during the smoking process?
To avoid rubbery skin, the recipe suggests a ‘higher heat finish.’ After smoking at 225°F, increase the temperature to 300°F once the meat hits 145°F to help render the fat and crisp the skin.
Best Smoked Chicken Thighs
Ingredients
Equipment
Method
- Pat the chicken thighs thoroughly dry with paper towels to remove all surface moisture.
- Sprinkle Kosher salt over both sides of the chicken and underneath the skin.
- Place the salted chicken on a wire rack over a baking sheet and refrigerate uncovered for at least 4 hours, or overnight, for a dry brine.
- Remove the chicken from the refrigerator 30 minutes before cooking to allow it to come closer to room temperature.
- In a small bowl, mix the black pepper, smoked paprika, garlic powder, onion powder, brown sugar, and dried thyme.
- Apply the dry rub liberally to all sides of the chicken thighs, pressing the spices into the skin firmly.
- Preheat your smoker to 225°F (107°C) and add apple wood chunks once the coals are ready and the smoke is thin and blue.
- Arrange the chicken thighs on the smoker grates skin-side up, ensuring there is space between each piece for smoke circulation.
- Smoke the chicken with the lid closed until the internal temperature reaches 145°F (63°C), approximately 60 to 90 minutes.
- Increase the smoker temperature to 300°F (149°C) to help render the fat and crisp the skin.
- Brush a thin, even layer of BBQ sauce onto the thighs to create a glossy glaze.
- Continue cooking until the internal temperature reaches 175°F (79°C) to ensure the connective tissue is fully tender.
- Remove the chicken from the smoker and let it rest for 5-10 minutes before serving.


