
Velvet is a texture we usually associate with fabric, but today we’re bringing that same luxurious, impossibly smooth feeling straight to the dessert bowl. This isn’t just another peanut butter recipe; it’s a transformation of a pantry staple into something ethereal and sophisticated, using a technique that feels like a little bit of kitchen alchemy.
What you’ll create is a cloud of pure peanut butter bliss—intensely flavorful yet astonishingly light, melting on your tongue with a creamy, dreamy finish. It’s the kind of dessert that silences a room, a simple yet elegant treat that tastes like it took hours but comes together with surprising ease.
What Makes This Special
- Incredibly Airy Texture: This isn’t a dense pudding or heavy fudge. We whip air into this mousse until it’s unbelievably light, creating a cloud-like consistency that dissolves on your tongue.
- Intense Peanut Butter Flavor: By using high-quality creamy peanut butter and just a few complementary ingredients, the nutty, savory-sweet flavor shines through without being overly sweet.
- Elegant Yet Effortless: This recipe looks and tastes like it belongs in a fancy restaurant, but it’s a no-bake dessert that comes together with minimal effort and no special equipment required.
Gather Your Supplies
The beauty of this recipe lies in its simplicity. We’re using a handful of common pantry and refrigerator staples to create something truly spectacular. No need for a complicated shopping trip; you likely have most of these ingredients already.
Here’s what you’ll need to bring this dreamy mousse to life:
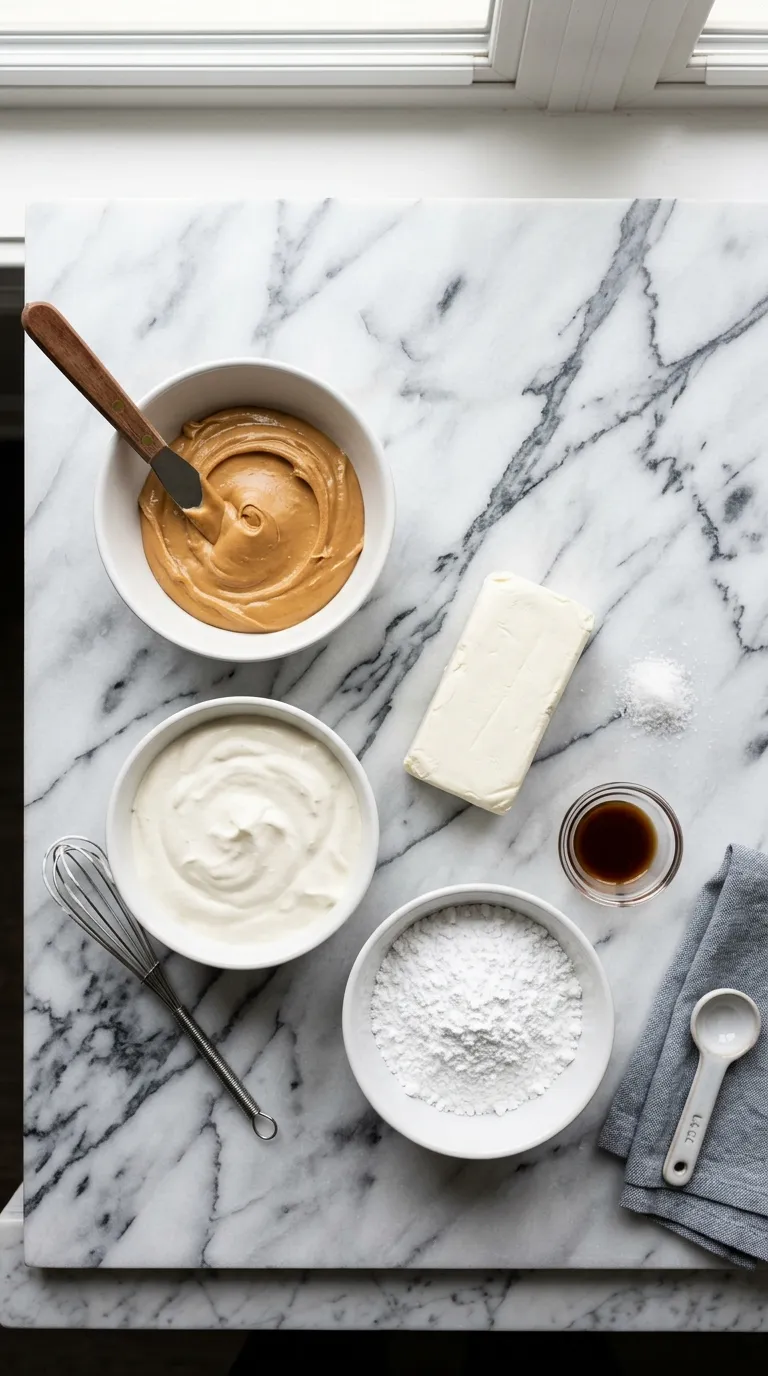
- Heavy Whipping Cream: (This is the absolute key to the mousse’s light, airy structure. It must be very cold to whip up properly.)
- Cream Cheese: (Use a full-fat, block-style cream cheese, brought to room temperature. This provides stability and a subtle, delightful tang that cuts through the richness.)
- Creamy Peanut Butter: (The star of the show! Use a standard commercial brand like Jif or Skippy. Avoid natural peanut butters that separate, as their oiliness can ruin the texture.)
- Powdered Sugar: (Also known as confectioners’ sugar, it dissolves instantly into the base, ensuring a perfectly smooth, non-grainy sweetness.)
- Vanilla Extract: (A small amount enhances all the other flavors, adding a layer of warmth and depth.)
- Fine Sea Salt: (Just a pinch is needed to balance the sweetness and intensify the peanut butter flavor, making it taste more like itself.)
If you’re a true peanut butter fanatic, you know how versatile it is. This mousse is a sophisticated take, but for a classic cookie experience, you can’t beat these Peanut Butter Blossoms. For an even simpler treat, this Peanut Butter Fudge is a must-try.
Pantry Alternatives
Don’t have exactly what’s on the list? No problem. This recipe is quite forgiving, and a few simple swaps can work in a pinch.
- For Cream Cheese: If you don’t have cream cheese, you can substitute it with mascarpone cheese for an even richer, more decadent result. It will have less tang but will be incredibly creamy.
- For Heavy Cream: For a dairy-free option, you can use the solid cream from the top of a can of chilled, full-fat coconut milk. The texture will be slightly different but still delicious.
- For Powdered Sugar: If you’re out of powdered sugar, you can make your own by blending granulated sugar in a high-speed blender until it’s a fine powder. You can also use maple syrup, but start with a smaller amount as it will add more liquid.
- For Peanut Butter: Feel free to experiment with other nut butters! Creamy almond butter or cashew butter would work beautifully here, each offering a unique flavor profile.
Fun Variations to Try
Once you’ve mastered the basic recipe, you can start playing with flavors and textures. Think of this mousse as a perfect canvas for your culinary creativity.
Chocolate Peanut Butter Dream
This is a classic for a reason. After your mousse is fully mixed, gently fold in a half cup of mini chocolate chips for a bit of texture. Or, for a more dramatic look, melt 1/4 cup of dark chocolate, let it cool slightly, and drizzle it over the peanut butter base before folding in the whipped cream. One or two gentle folds will create beautiful chocolate ribbons throughout the mousse. The combination is reminiscent of these decadent Chocolate Peanut Butter Valentine Hearts.Salty & Sweet Pretzel Crunch
For a delightful textural contrast, create a simple pretzel crust. Crush about 1 cup of pretzels into fine crumbs and mix with 4 tablespoons of melted butter. Press this mixture firmly into the bottom of your serving dishes or glasses before spooning the mousse on top. The salty crunch against the smooth, sweet mousse is absolutely irresistible.Classic PB & J
Bring back a childhood favorite in a grown-up way. Fill your serving glasses halfway with the peanut butter mousse, add a spoonful of high-quality raspberry or strawberry jam, and then top with the remaining mousse. Garnish with a fresh berry for a beautiful finish.How to Make Peanut Butter Mousse
The process is straightforward and focuses on two key components: the flavorful peanut butter base and the light-as-air whipped cream. The magic happens when we combine them.
Step 1: Create the Peanut Butter Base
First, make sure your block of cream cheese is truly at room temperature. This is the most important step for a smooth, lump-free result. In a large bowl, use an electric hand mixer (or a stand mixer with the paddle attachment) to beat the softened cream cheese until it’s completely smooth and creamy.Add the powdered sugar, creamy peanut butter, vanilla extract, and salt to the bowl. Start mixing on low speed to incorporate the sugar without creating a cloud of dust, then increase to medium-high speed. Beat for about 2-3 minutes, scraping down the sides of the bowl occasionally, until the mixture is light, fluffy, and well combined. Set this bowl aside.
Step 2: Whip the Heavy Cream
In a separate, chilled bowl, pour in your very cold heavy whipping cream. Chilling the bowl and the beaters for about 15 minutes in the freezer beforehand will help the cream whip up faster and create more stable peaks.Using clean beaters, whip the cream on medium-high speed. It will go through stages: first bubbly, then thickened, then soft peaks. Keep whipping until you reach stiff peaks. You’ll know you’re there when you can lift the beaters out of the cream and the peak that forms holds its shape without flopping over. Be careful not to over-whip, or you’ll start making butter!
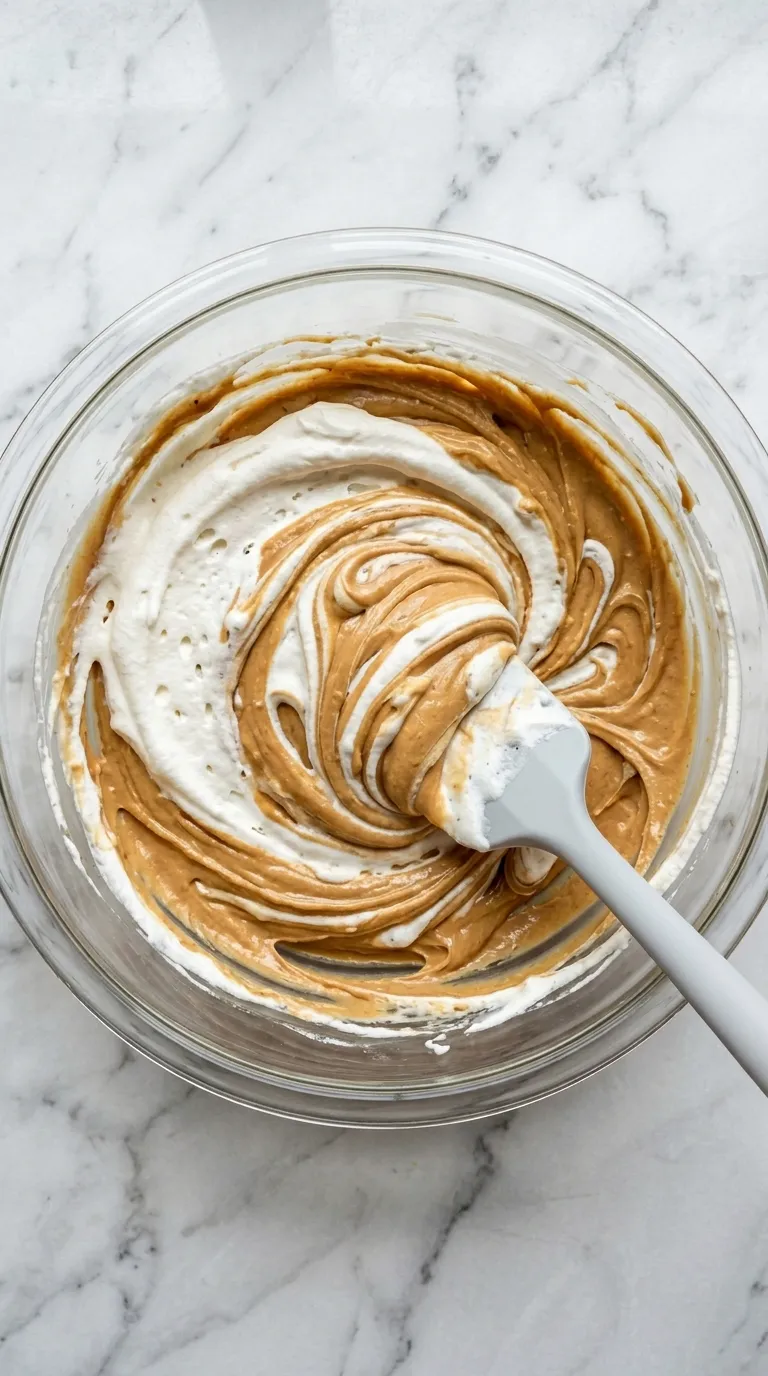
Step 3: Gently Fold Everything Together
Now for the most delicate part of the process. Take about one-third of your whipped cream and add it to the peanut butter base. Use a spatula to stir it in gently. This initial addition is meant to lighten the peanut butter mixture, making it easier to incorporate the rest of the cream without deflating it.Add the remaining whipped cream to the bowl. Now, switch from stirring to folding. Use your spatula to cut down through the center of the mixture, scrape along the bottom of the bowl, and bring the mixture up and over itself. Rotate the bowl a quarter turn and repeat. Continue this gentle folding motion just until no white streaks remain. The goal is to maintain as much of that beautiful air as possible. If you love simple, no-bake peanut butter treats like this, you should also try these amazing Peanut Butter Bites.
Step 4: Chill and Set
Spoon or pipe the finished mousse into your desired serving dishes. You can use small bowls, ramekins, wine glasses, or small jars. Cover them with plastic wrap and transfer them to the refrigerator to chill for at least 4 hours, or preferably overnight. This chilling time is crucial; it allows the mousse to set up firmly and for the flavors to meld together beautifully. Do not skip this step!Expert Tips for Success
- Room Temperature is Key: I can’t stress this enough! Your cream cheese must be soft. If it’s even slightly cool, it will create tiny lumps in your base that are impossible to get rid of later.
- Use Full-Fat Ingredients: This is a rich dessert, and now is not the time for low-fat substitutes. Full-fat block cream cheese and heavy whipping cream are essential for the proper texture and stability.
- Taste as You Go: Before you fold in the whipped cream, give the peanut butter base a taste. You can adjust the sweetness or add another tiny pinch of salt to perfectly suit your palate.
Serving Suggestions
Presentation can elevate this simple mousse into a show-stopping dessert. Once it’s fully chilled and set, it’s ready for its finishing touches.
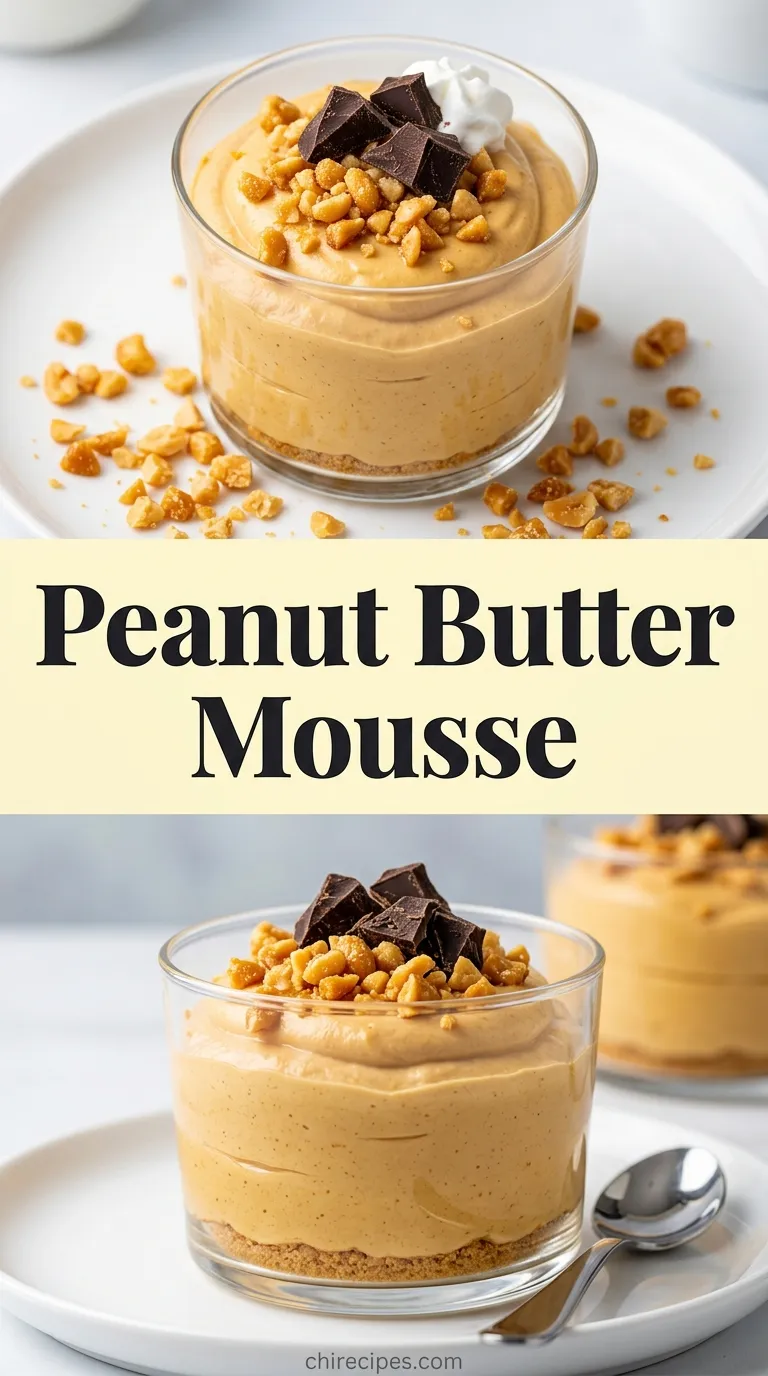
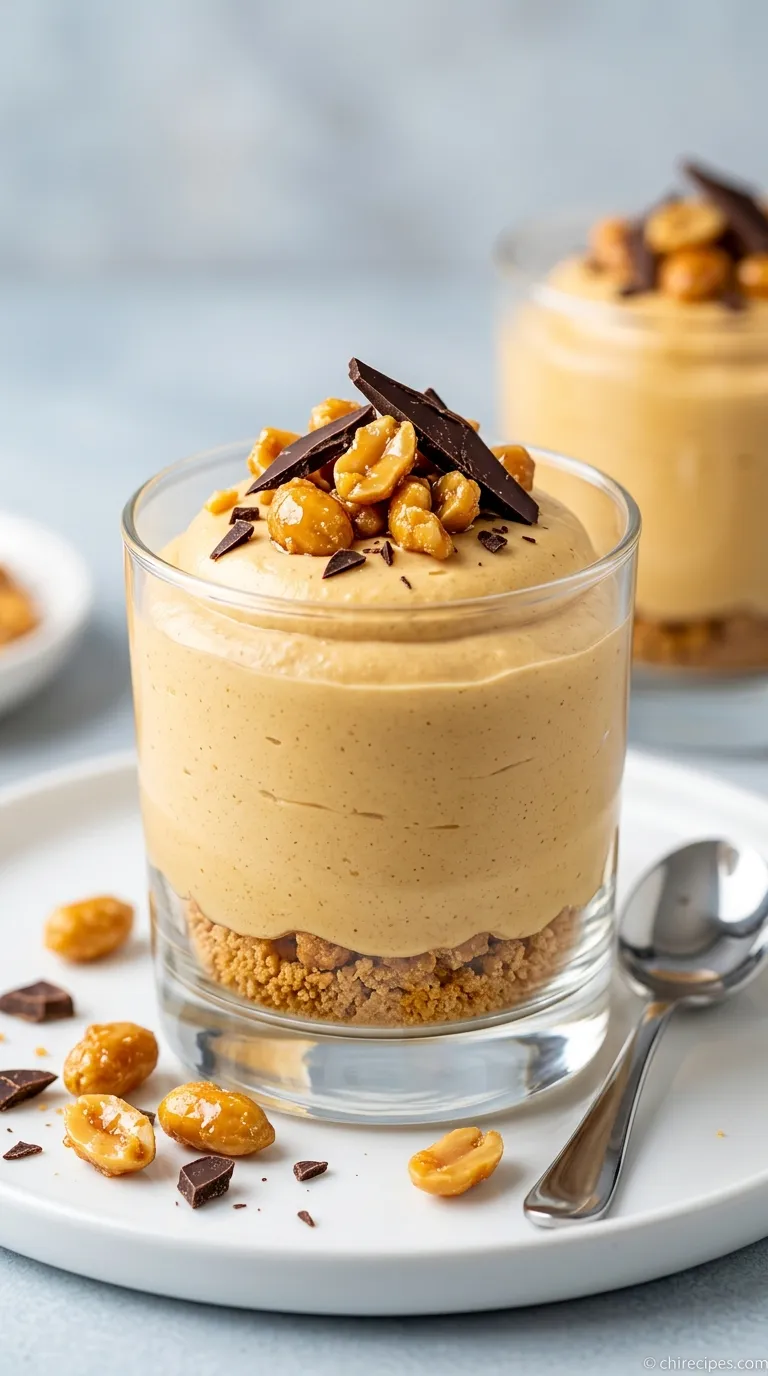
A dollop of fresh, unsweetened whipped cream on top provides a lovely visual and textural contrast. From there, the possibilities are endless. A sprinkle of flaky sea salt, a dusting of cocoa powder, or finely chopped peanuts all add a touch of elegance.
For a bit of crunch, consider topping with chocolate shavings, crushed toffee bits, or mini chocolate chips. A drizzle of melted chocolate or warm caramel sauce just before serving is always a crowd-pleaser.
This mousse is also fantastic when paired with other elements. Serve it alongside fresh fruit like sliced bananas or raspberries. Offer crisp cookies, like chocolate wafers or shortbread, for dipping. Serving your mousse in individual cups makes it a perfect dessert for parties, much like these festive Cranberry Mousse Cups or these unique Gingerbread Latte Mousse Domes.
If you tried this recipe and loved it, please leave a 5-star rating below. It helps us so much
What kind of peanut butter works best for this mousse?
For the best texture, the recipe recommends using a standard commercial creamy peanut butter, such as Jif or Skippy. You should avoid natural peanut butters that separate, as their oiliness can ruin the smooth consistency of the mousse.
Why is my peanut butter mousse lumpy, and how can I prevent it?
Lumps are most often caused by using cream cheese that is not fully at room temperature. To prevent this and ensure a perfectly smooth base, make sure your block of cream cheese is completely softened before you start beating it.
Can I make this recipe dairy-free?
Yes, you can make a dairy-free version. The article suggests substituting the heavy whipping cream with the solid cream skimmed from the top of a can of chilled, full-fat coconut milk.
How long does the mousse need to chill before serving?
The mousse must be chilled in the refrigerator for at least 4 hours to set properly. For the best texture and flavor, chilling it overnight is highly recommended. This step is crucial and should not be skipped.
Whipped Peanut Butter Mousse Dream
Ingredients
Equipment
Method
- Step 1: In a large bowl, use an electric mixer to beat the room temperature cream cheese until completely smooth and creamy. Add the powdered sugar, creamy peanut butter, vanilla extract, and salt. Mix on low speed to combine, then increase to medium-high and beat for 2-3 minutes until light and fluffy, scraping down the sides of the bowl as needed. Set aside.
- Step 2: In a separate, chilled bowl with clean beaters, whip the very cold heavy cream on medium-high speed. Continue whipping until stiff peaks form (the peak holds its shape when the beaters are lifted). Be careful not to over-whip.
- Step 3: Add about one-third of the whipped cream to the peanut butter base and stir gently with a spatula to lighten the mixture. Add the remaining whipped cream and use a folding motion (cutting down the center, scraping the bottom, and lifting up and over) until no white streaks remain. Do not overmix.
- Step 4: Spoon or pipe the mousse into serving dishes. Cover and refrigerate for at least 4 hours, or overnight, to allow the mousse to set firmly and the flavors to meld.


