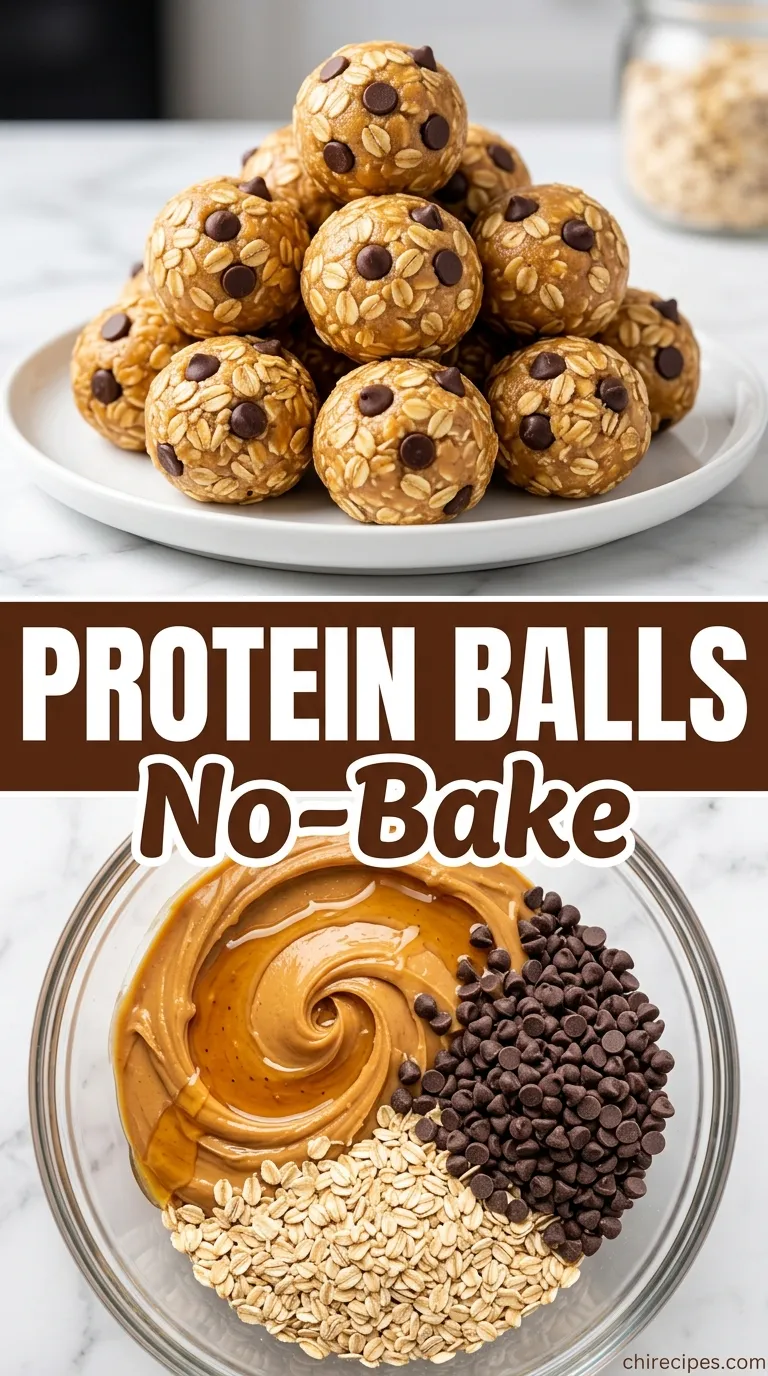
Energy that tastes like dessert is a promise I take very seriously. It’s the kind of promise whispered in the quiet of a mid-afternoon slump, when your focus wanes and the siren song of the vending machine grows louder. These little spheres of goodness are my answer to that call—a rebellion against bland, chalky protein bars and a celebration of the most iconic flavor duo known to humankind. They are born from a desire for something deeply satisfying that also happens to be incredibly good for you.
What you’re about to create is more than just a snack; it’s a moment of pure, unadulterated bliss you can feel great about. Each bite is a dense, fudgy, and chewy powerhouse, bursting with rich chocolate and creamy peanut butter. They are the perfect grab-and-go fuel, the sweet treat that crushes cravings, and the easiest, most delicious secret weapon you’ll ever have stashed in your fridge.
Recipe Highlights
- No-Bake & Incredibly Fast: Forget preheating the oven. This entire recipe comes together in one bowl in less than 15 minutes, making it perfect for busy days.
- Perfectly Balanced Fuel: With a satisfying blend of protein, healthy fats, and complex carbs, these balls keep you full and energized for hours, preventing blood sugar spikes.
- A Meal-Prep Dream: Make a big batch on Sunday and you’ll have effortless, healthy snacks ready to grab all week long. They are the ultimate solution for healthy eating on the go.
What You’ll Need
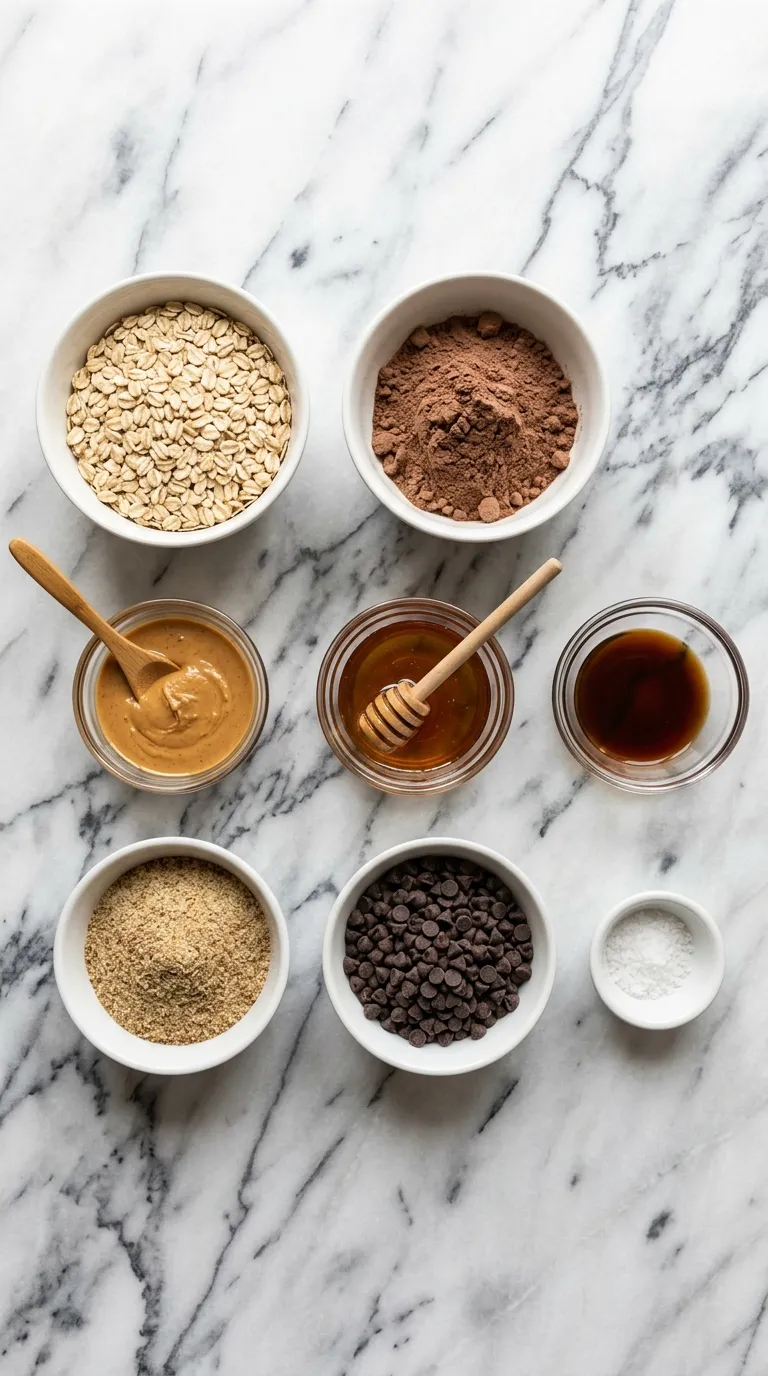
Here is what you’ll want to gather from your kitchen:
- Old-Fashioned Rolled Oats: (This is the backbone of our protein balls, providing a wonderful chewy texture and slow-releasing energy from complex carbs.)
- Chocolate Protein Powder: (The star of the show for that protein punch! Use a brand and flavor you genuinely love, as it will significantly impact the final taste.)
- Natural Peanut Butter: (Acts as the delicious glue that holds everything together while providing healthy fats. A creamy, drippy variety with only peanuts and salt works best.)
- Honey or Pure Maple Syrup: (For a touch of natural sweetness and to help bind the mixture. You can adjust the amount based on your preference.)
- Ground Flaxseed: (A fantastic source of omega-3 fatty acids and fiber, it also helps absorb moisture and create the perfect texture.)
- Chia Seeds: (These tiny seeds add a subtle crunch and are packed with fiber, protein, and antioxidants.)
- Mini Chocolate Chips: (Because a little extra chocolate is always a good idea for pockets of melty goodness.)
- Vanilla Extract: (A non-negotiable for rounding out the flavors and making everything taste richer and more dessert-like.)
- Pinch of Sea Salt: (This small addition makes the peanut butter taste nuttier and the chocolate taste chocolatier. It balances everything perfectly.)
- Milk of Choice (if needed): (A splash of almond, oat, or dairy milk can help if your mixture is a bit too dry or crumbly.)
If you find yourself with leftover peanut butter after making these, you absolutely have to try these simple Peanut Butter Bites or even this unbelievably decadent 3-ingredient Peanut Butter Fudge.
Pantry Alternatives
Don’t have everything on the list? No problem at all! This recipe is incredibly forgiving and easy to adapt.- Nut Butter Swap: Feel free to use almond butter, cashew butter, or even sunflower seed butter for a nut-free version. The key is to use a natural, creamy variety.
- Sweetener Options: Agave nectar works as a 1:1 substitute for honey or maple syrup. For a lower-sugar option, you could experiment with a sugar-free syrup, though you may need less.
- Protein Powder Flavors: While chocolate is classic, vanilla or even an unflavored protein powder would also be delicious here. If using unflavored, consider adding a tablespoon of unsweetened cocoa powder.
- Seed Variations: If you don’t have flax or chia seeds, you can substitute them with hemp hearts or simply use more rolled oats.
Fun Variations to Try
Once you’ve mastered the basic recipe, it’s so much fun to get creative and customize your protein balls. Think of this as your delicious blank canvas.Mocha Energy Boost
For the coffee lovers out there, this one is for you. Add one to two teaspoons of instant espresso powder to your dry ingredients. It dissolves beautifully and adds a deep, rich coffee flavor that complements the chocolate perfectly.Coconut Cream Dream
Give your protein balls a tropical twist. Mix in two tablespoons of unsweetened shredded coconut with the dry ingredients. After rolling the balls, press them gently into a shallow dish of more shredded coconut to coat the outside.Extra Crunchy Nut
If you love texture, this is a must-try. Use a crunchy peanut butter instead of creamy, and add 1/4 cup of finely chopped roasted peanuts, almonds, or walnuts to the mixture. The extra crunch in every bite is so satisfying. This classic chocolate and nut combination is a fan favorite, much like in these gorgeous Chocolate Peanut Butter Valentine Hearts.How to Make Chocolate Peanut Butter Protein Balls
Step 1: Combine the Dry Ingredients
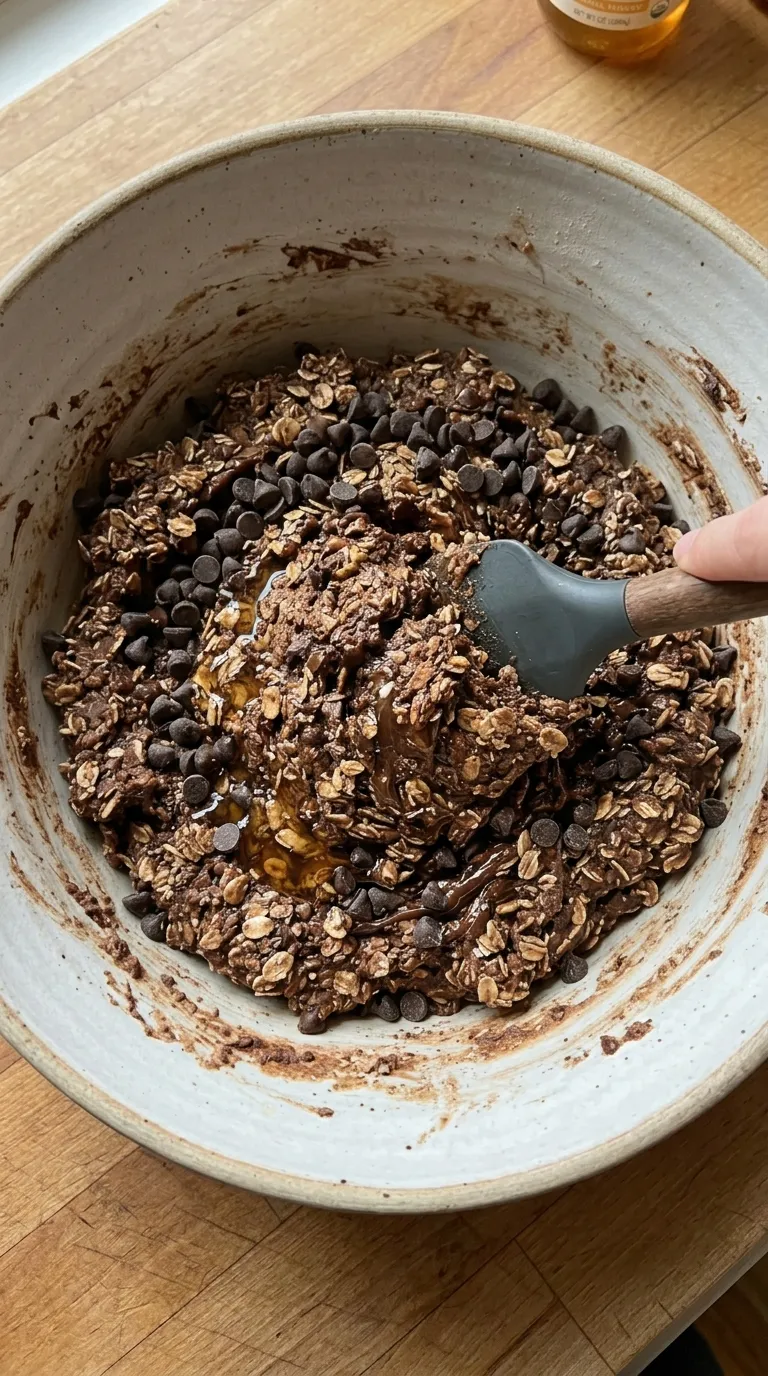
In a large mixing bowl, add your old-fashioned rolled oats, chocolate protein powder, ground flaxseed, chia seeds, and the pinch of sea salt. Use a whisk or a fork to stir everything together until it’s evenly combined. This step ensures that every single protein ball has a balanced mix of all the good stuff.Step 2: Add the Wet Ingredients
Now, add the natural peanut butter, honey or maple syrup, and vanilla extract directly into the bowl with the dry ingredients. Don’t worry about mixing just yet; just get them all in there.Step 3: Mix, Mix, Mix!
Using a sturdy spatula or a wooden spoon, begin to mix everything together. It will seem a bit crumbly at first, but keep going! The heat from your effort will warm the peanut butter and honey, helping it all come together into a thick, sticky dough. Once it’s mostly combined, fold in your mini chocolate chips.Step 4: Assess and Adjust
Check the consistency of your dough. It should be sticky enough to hold together when pressed, but not overly wet. If it seems too dry and crumbly, add a splash of milk (about a teaspoon at a time) until it reaches the right texture. If it’s too sticky, add a tablespoon more of oats.Step 5: Chill the Dough
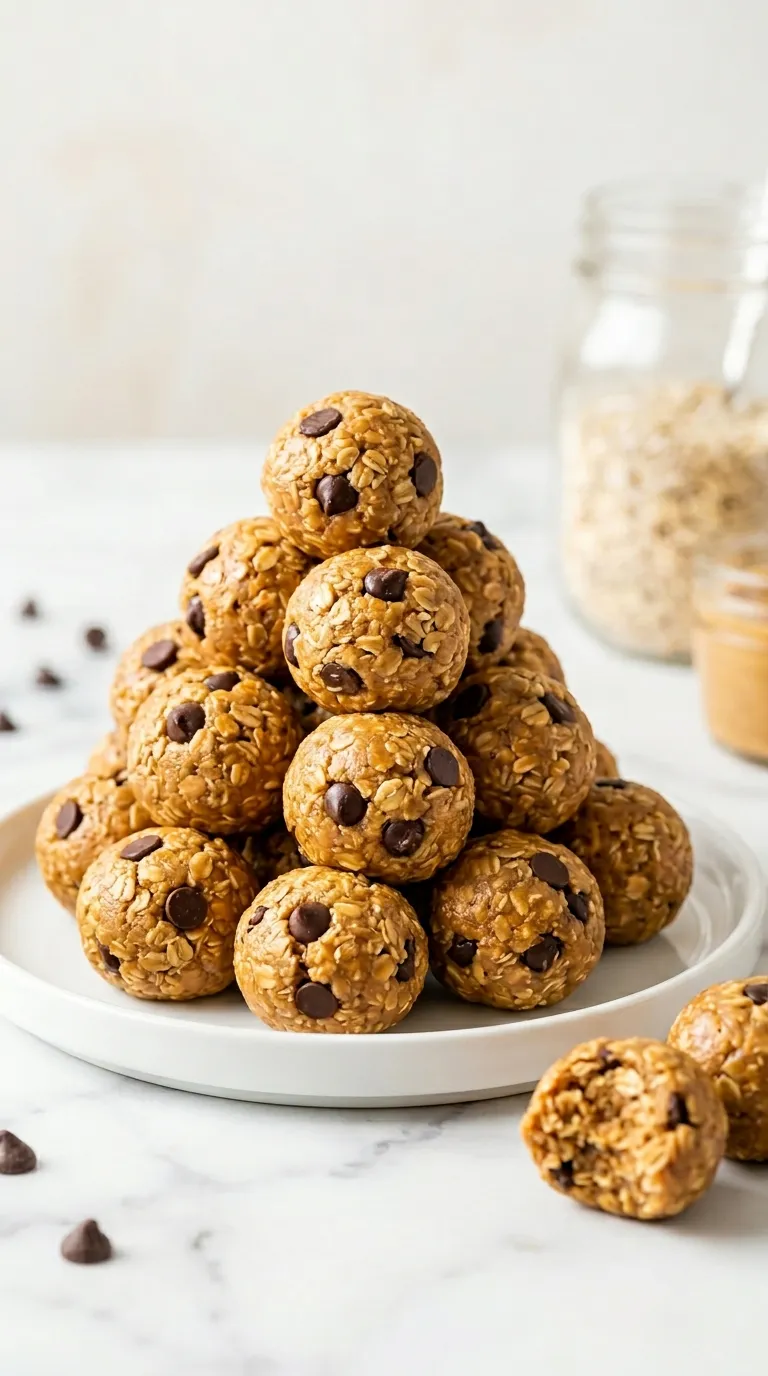
This is a game-changing step! Cover the bowl and place it in the refrigerator for about 15 to 30 minutes. Chilling the dough makes it much less sticky and significantly easier to roll into neat, perfect balls.Step 6: Roll and Store
Once chilled, use a small cookie scoop or a tablespoon to portion out the dough. Roll each portion firmly between the palms of your hands to form a smooth, round ball about one inch in diameter. Place the finished balls in an airtight container and store them in the refrigerator.Expert Tips for Success
- Choose a Protein Powder You Love: The flavor of your protein powder is front and center in this recipe. If you don’t enjoy it in a shake, you won’t enjoy it in these balls. A high-quality, good-tasting powder is key.
- Don’t Skip the Chill Time: I know it’s tempting to roll them right away, but chilling the dough for at least 15 minutes makes it firmer and so much less sticky. This little bit of patience pays off big time.
- Use a Cookie Scoop: For perfectly uniform, bite-sized protein balls every single time, use a small cookie scoop (about 1 tablespoon size). It makes the process faster, cleaner, and ensures consistent portioning.
Serving Suggestions
These chocolate peanut butter protein balls are incredibly versatile. They are a snack, a dessert, and a lifesaver all rolled into one delicious bite.They are the ultimate pre-workout fuel or post-workout recovery snack, providing a quick hit of carbs and protein. They’re also my go-to for crushing that 3 PM sweet craving with a cup of tea or coffee.
For a more substantial breakfast or snack, try crumbling one or two balls over a bowl of Greek yogurt with some fresh berries. The combination of textures and temperatures is fantastic. They are a much quicker option than something like Homemade High Protein Pizza Hot Pockets when you’re in a rush.
They also pair beautifully with other make-ahead breakfast staples. Imagine starting your day with a jar of Overnight Oats High Protein and having one of these protein balls on the side for an extra boost. It’s a powerhouse combination that will keep you going all morning. For a different flavor profile, they also go well with these Healthy Overnight Oats.
Did you change any ingredients? Let me know in the comments how you made this recipe your own
What should I do if my protein ball mixture is too dry and crumbly?
If the dough seems too dry to hold together, the article recommends adding a splash of milk (about a teaspoon at a time) and mixing until it reaches a consistency that is sticky enough to be pressed together.
Can I make this recipe nut-free?
Yes, you can create a nut-free version by swapping the peanut butter for sunflower seed butter. The article suggests using a natural, creamy variety for the best texture.
Is it necessary to chill the dough before rolling the balls?
Yes, chilling the dough for 15 to 30 minutes is a crucial step. According to the expert tips, this makes the dough much less sticky and significantly easier to roll into neat, uniform balls.
What if I don’t have chocolate protein powder?
The recipe is very adaptable. You can use vanilla or unflavored protein powder instead. If you opt for an unflavored powder, it’s recommended to add a tablespoon of unsweetened cocoa powder to achieve a similar chocolate taste.
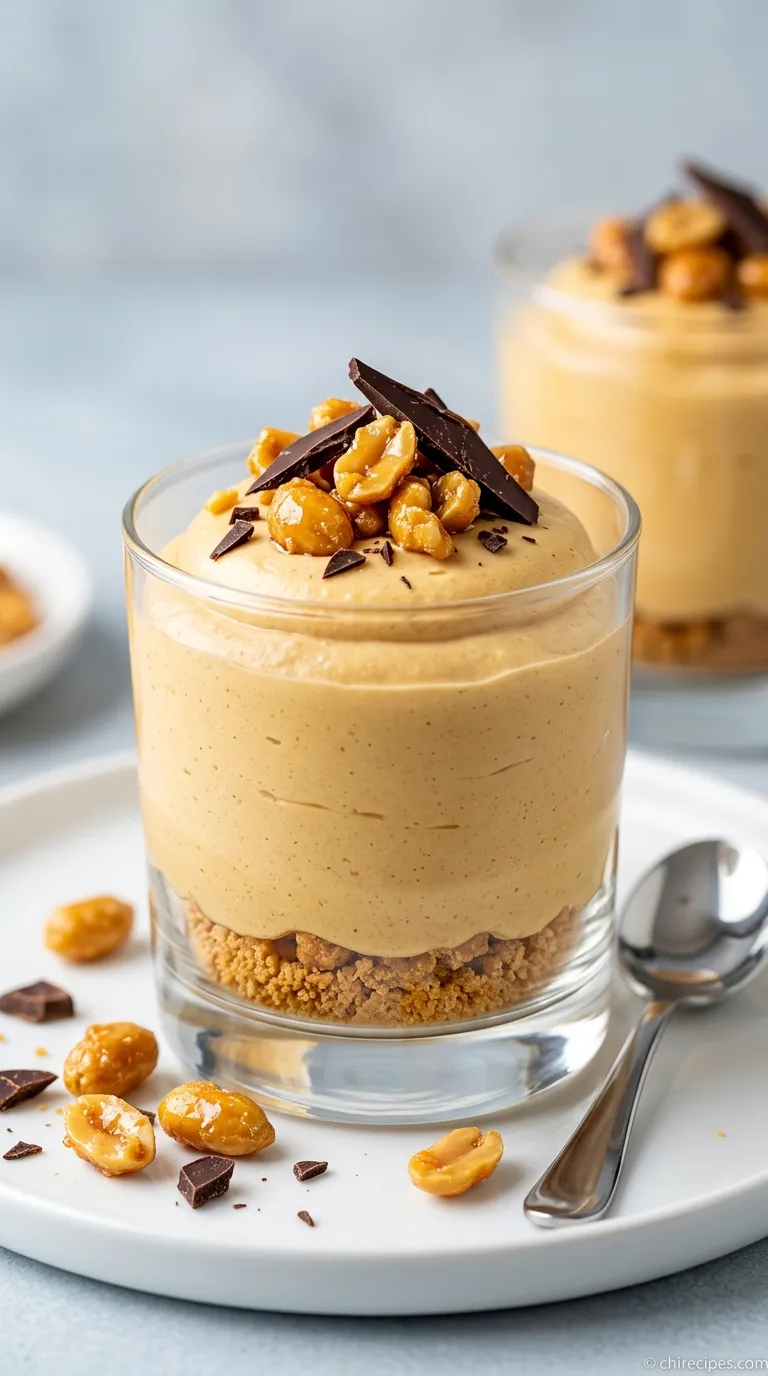
Chocolate Peanut Butter Protein Balls
Ingredients
Equipment
Method
- In a large mixing bowl, add the old-fashioned rolled oats, chocolate protein powder, ground flaxseed, chia seeds, and sea salt. Whisk or stir with a fork until evenly combined.
- Add the natural peanut butter, honey (or maple syrup), and vanilla extract to the bowl with the dry ingredients.
- Using a sturdy spatula, mix all ingredients together until a thick, sticky dough forms. It may seem crumbly at first, but it will come together. Once combined, fold in the mini chocolate chips.
- Check the dough’s consistency. If it’s too dry to hold together, add milk one teaspoon at a time. If it’s too sticky, add an extra tablespoon of oats.
- Cover the bowl and place it in the refrigerator to chill for 15 to 30 minutes. This step is crucial as it makes the dough less sticky and easier to roll.
- Use a small cookie scoop or a tablespoon to portion the chilled dough. Roll each portion between your palms to form a smooth, 1-inch ball.
- Place the finished protein balls in an airtight container and store in the refrigerator.