Licking the beaters clean was the ultimate kitchen rebellion, a sweet, forbidden ritual that tasted like pure celebration. That raw, sugary, vanilla-laced cake batter held a magic no baked cake could ever replicate; it was the taste of anticipation, of a party just about to happen. We’ve all been there, sneaking a fingerful from the bowl when no one was looking, savoring that creamy, gritty, uncooked perfection. This recipe is a love letter to that exact memory, bottled into a snack you can feel amazing about eating any day of the week.
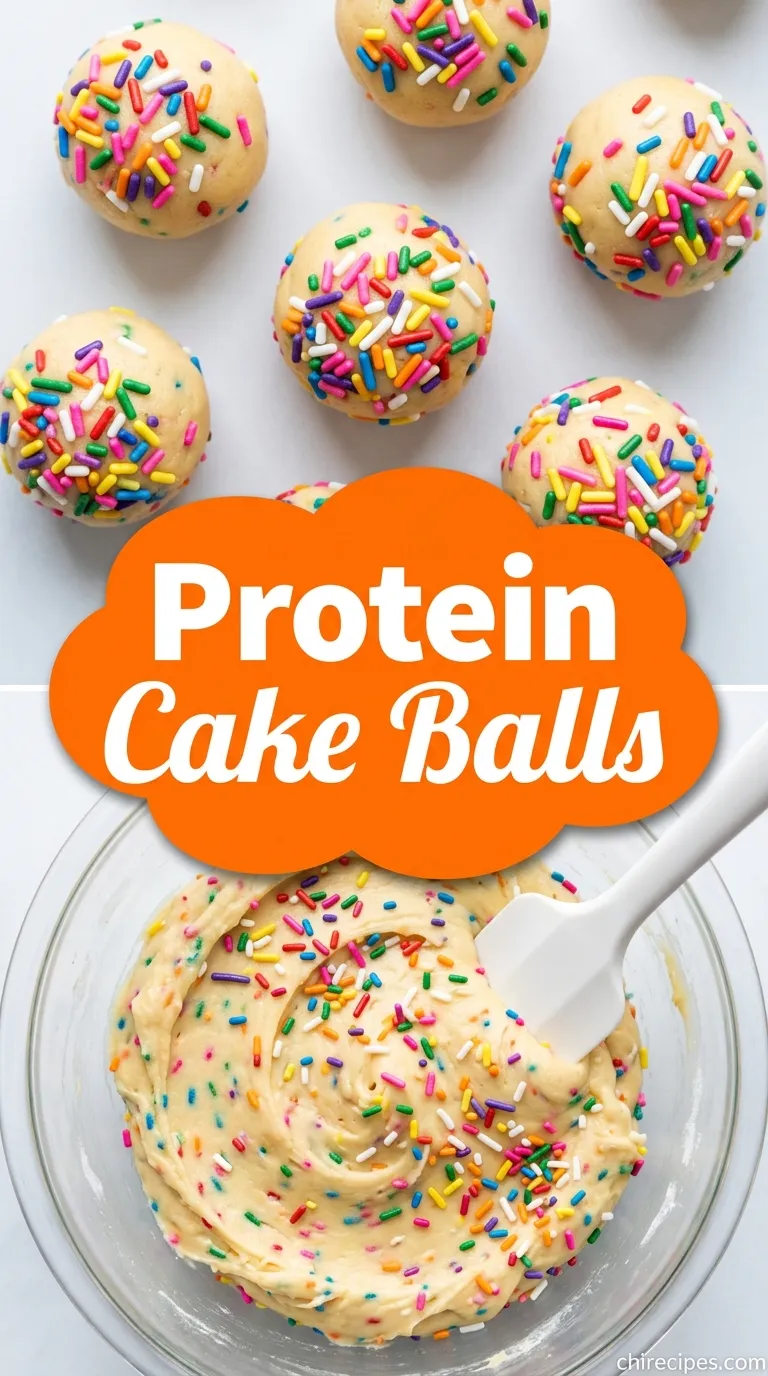
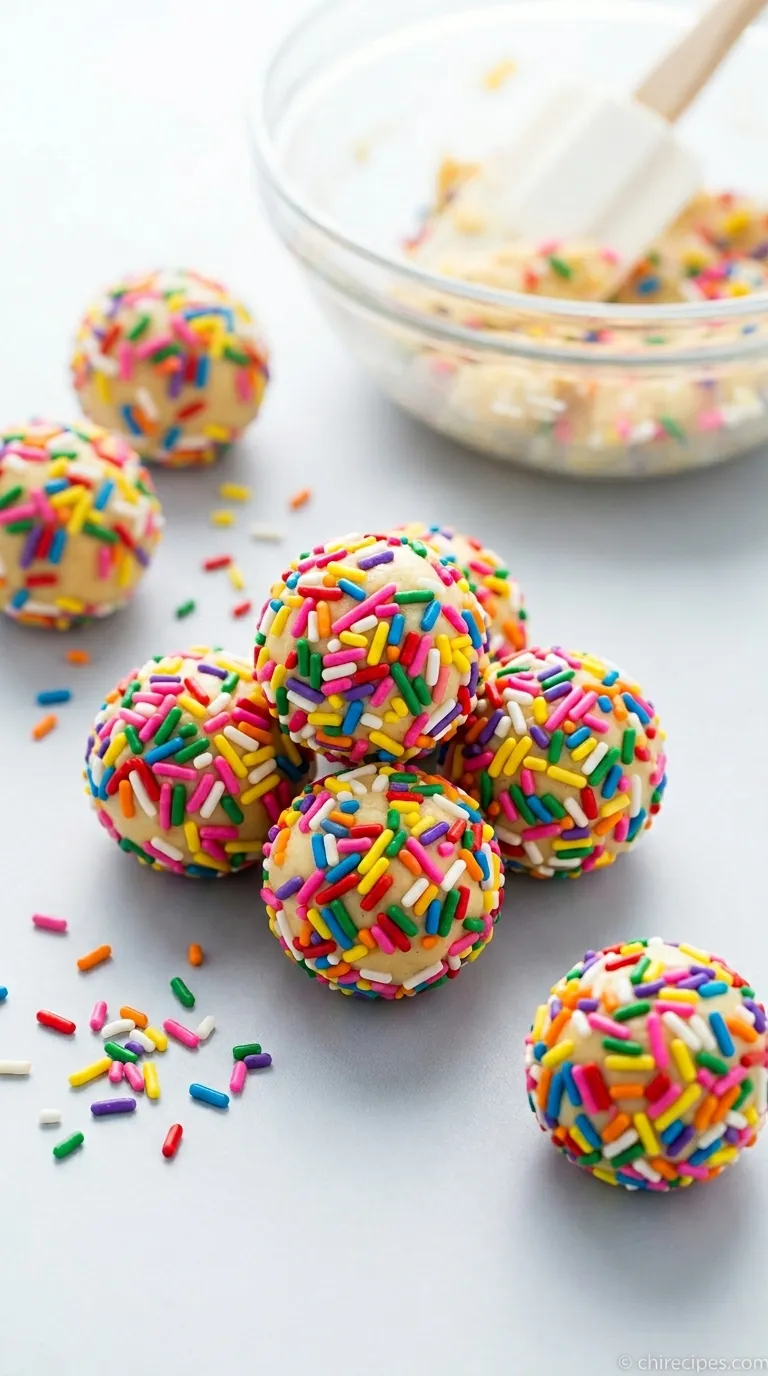
We’re capturing that nostalgic, straight-from-the-bowl flavor and transforming it into a powerhouse protein snack that will fuel your body and delight your inner child. Imagine a soft, chewy, dough-like ball, bursting with the sweet, buttery notes of vanilla cake and studded with a kaleidoscope of rainbow sprinkles. Each bite is a perfect balance of wholesome satisfaction and festive fun, a guilt-free way to have your cake and eat it too, no oven required.
The Birthday Cake Batter Protein Balls Difference
- Authentic Batter Texture: The combination of creamy cashew butter and fine oat flour perfectly mimics the dense, doughy consistency of real cake batter, a texture that many protein ball recipes miss.
- No-Bake Simplicity: This entire recipe comes together in one bowl in under 15 minutes. There’s no baking, no complicated steps—just mix, chill, and roll for instant gratification.
- Macro-Friendly Indulgence: It delivers on that decadent dessert flavor while being packed with protein and healthy fats, making it a truly satisfying snack that supports your fitness goals instead of derailing them.
The Building Blocks

Here’s what you’ll need to get started:
- Vanilla Whey Protein Powder: (This is the backbone of the “cake” flavor and provides the powerful protein punch. A good quality whey isolate or concentrate will yield the smoothest, least “chalky” result.)
- Oat Flour: (The secret to that soft, cookie-dough-like texture. It provides a wonderful chew and is a fantastic source of complex carbs. You can easily make your own by blending rolled oats in a high-speed blender until fine.)
- Creamy Cashew Butter: (The key to a rich, buttery flavor without actual butter. Its neutral taste lets the vanilla and “cake” notes shine through, unlike more assertive nut butters.)
- Pure Maple Syrup: (For a touch of natural, unrefined sweetness that binds everything together. It complements the vanilla beautifully.)
- Unsweetened Almond Milk: (Or any milk of your choice, used to achieve the perfect batter consistency. You may need a little more or less depending on your protein powder.)
- Pure Vanilla Extract: (Don’t skimp here! A high-quality vanilla is non-negotiable for authentic cake batter flavor.)
- A Pinch of Salt: (This small addition makes all the other flavors pop, balancing the sweetness and enhancing the buttery notes.)
- Rainbow Sprinkles (Jimmies): (It’s not birthday cake without them! These add the essential funfetti look, a slight crunch, and a wave of pure joy.)
Swaps & Alternatives
Don’t have everything on hand? No problem. This recipe is wonderfully flexible. Here are a few simple swaps you can make.- For the Protein Powder: A vanilla casein or a plant-based vanilla protein blend can work. Be aware that plant-based powders are often more absorbent, so you may need to add an extra tablespoon or two of almond milk to get the right consistency.
- For the Cashew Butter: Creamy almond butter is the next best choice, though it will lend a slightly more noticeable nutty flavor. For a nut-free version, sunflower seed butter is a fantastic alternative. If you are a die-hard peanut butter fan, you can use that, but it will taste more like a peanut butter treat; for that, you might just prefer my classic Peanut Butter Bites.
- For the Oat Flour: Almond flour can be used for a lower-carb, grain-free option. The texture will be a bit softer and less doughy, but still delicious.
- For the Maple Syrup: Honey or agave nectar can be substituted in equal amounts. For a sugar-free version, a liquid monk fruit or stevia-based sweetener will work, but you may need to add a bit more milk to help with binding.
Flavor Boosts
Ready to take these celebratory snacks to the next level? These simple additions can add an extra layer of texture and decadence, making them feel even more special.A drizzle of melted white chocolate over the finished balls not only looks beautiful but adds a creamy sweetness that perfectly mimics frosting. Simply melt some sugar-free or regular white chocolate chips and use a fork to create a delicate pattern on top.
For an extra “cakey” crunch, try crushing a few Golden Oreos or other vanilla sandwich cookies and mixing the crumbs directly into the dough. This adds a fantastic texture and amplifies the vanilla flavor, pushing them into cake pop territory.
A tiny drop—and I mean just a drop—of almond extract along with the vanilla extract can create a more complex, bakery-style “birthday cake” flavor profile. It’s that secret ingredient that makes people ask, “What is in this?” For a cozy, seasonal twist, you could even add a pinch of warming spices, taking a cue from my Pumpkin Cheesecake Balls.
How to Make Birthday Cake Batter Protein Balls
1. Combine the Wet Ingredients
In a medium-sized mixing bowl, add your creamy cashew butter, pure maple syrup, and vanilla extract. Use a spatula or a wooden spoon to stir everything together until it’s completely smooth and well-combined. This step creates the flavorful, sweet base for our protein balls.2. Add the Dry Ingredients
Next, add the vanilla protein powder, oat flour, and the pinch of salt directly into the bowl with the wet ingredients. Begin to mix everything together. The dough will start to get quite thick and stiff, which is exactly what you want.If the mixture seems too dry or crumbly, add the almond milk one tablespoon at a time, mixing well after each addition, until a thick, scoopable dough forms. The final consistency should be similar to cookie dough.
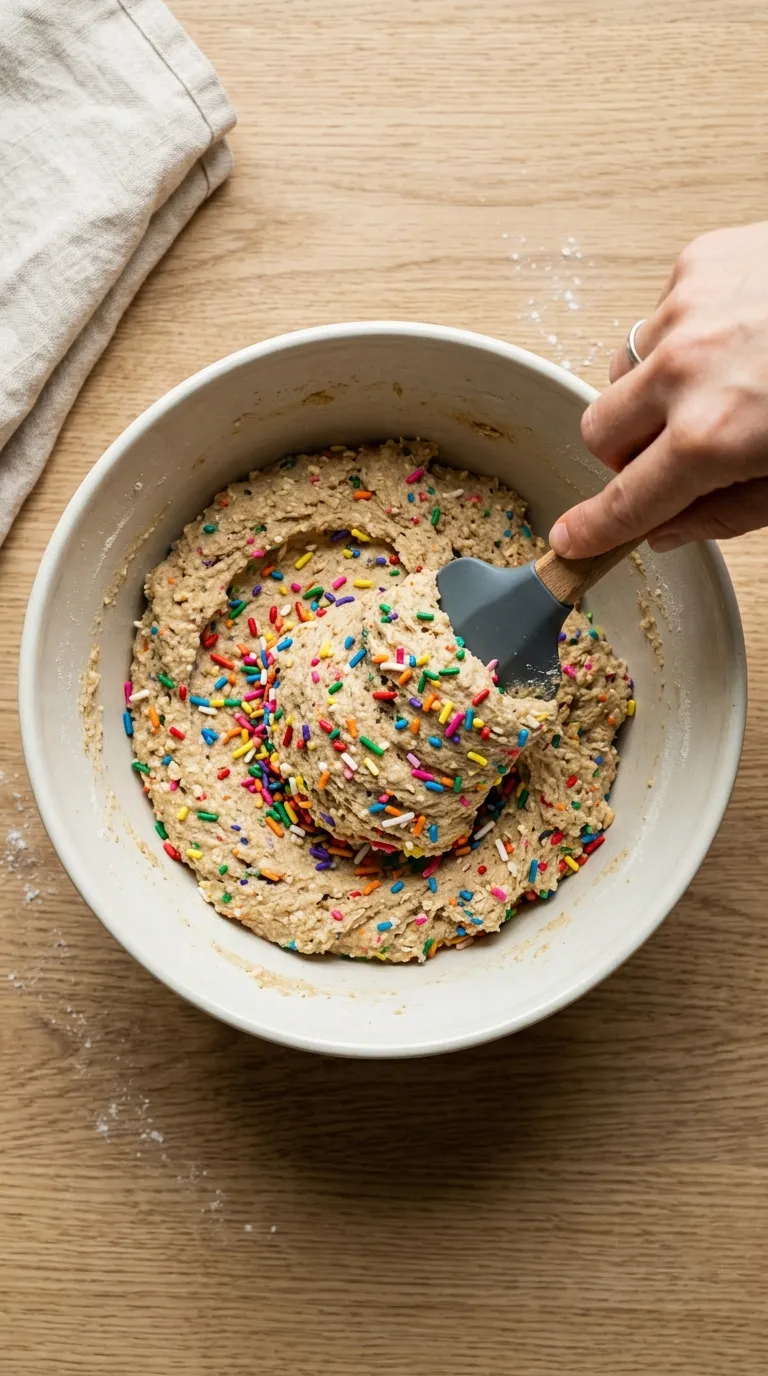
3. Fold in the Fun
Now for the best part! Pour the rainbow sprinkles into the bowl. Use your spatula to gently fold them into the dough until they are just evenly distributed. Be careful not to overmix here, as that can cause the colors to bleed and get muddy. We want those vibrant specks of color to shine.4. Chill the Dough
Cover the bowl with plastic wrap or a lid and place it in the refrigerator for at least 15-20 minutes. This step is crucial! Chilling the dough allows the oat flour and protein powder to fully hydrate, making the mixture less sticky and much easier to roll into perfect little balls.5. Roll and Store
Once chilled, use a small cookie scoop or a tablespoon to portion out the dough. Roll each portion firmly between the palms of your hands to form a smooth, round ball. You should get about 12-15 balls from this recipe.Place the finished protein balls in an airtight container and store them in the refrigerator. They will stay fresh and delicious for up to a week.
Avoid These Pitfalls
- Over-mixing the Sprinkles: Vigorously stirring after adding the sprinkles will cause their colorful coatings to break down and streak through the dough, turning your beautiful funfetti into a murky brown. Fold them in gently and briefly.
- Skipping the Chill Time: If you try to roll the dough immediately after mixing, you’ll be met with a sticky, frustrating mess. Chilling solidifies the cashew butter and allows the flour to absorb moisture, resulting in a firm, easy-to-handle dough.
- Using the Wrong Protein Powder: Not all protein powders are created equal. Some absorb more liquid than others. If you use a plant-based protein, it will likely require more milk to avoid a dry, crumbly texture. Start with the recipe as written and adjust liquid as needed.
Serving Ideas
These little bites of joy are incredibly versatile. They are the perfect post-workout snack to replenish your energy, or a fantastic mid-afternoon pick-me-up to beat the 3 PM slump. They provide a satisfying dose of protein and sweetness that will keep you going for hours.For a truly decadent and protein-packed breakfast, try crumbling one or two balls over a bowl of Greek yogurt or your morning oatmeal. It adds a delightful cake batter flavor and a fun, crunchy texture. This is one of my favorite ways to enjoy them, especially with a batch of my High Protein Overnight Oats.
They also make for a wonderful healthy dessert. When you’re craving something sweet after dinner but don’t want a heavy, sugary treat, one or two of these is the perfect solution. They offer all the satisfaction of dessert without the guilt, and they’re a much healthier option than other sweet bites like my Christmas Tree Cake Truffles or Funnel Cake Bites, making them ideal for everyday enjoyment.
Did you change any ingredients? Let me know in the comments how you made this recipe your own
Can I make these birthday cake protein balls nut-free or grain-free?
Yes, the recipe is flexible. For a nut-free version, substitute the cashew butter with sunflower seed butter. For a grain-free option, you can use almond flour instead of oat flour, which will result in a slightly softer, less doughy texture.
Why is my protein ball dough too sticky to roll, and how can I fix it?
If your dough is too sticky, it’s likely because you skipped the chilling step. It is crucial to chill the dough in the refrigerator for at least 15-20 minutes. This solidifies the cashew butter and allows the oat flour to absorb moisture, making the dough firm and easy to roll.
What kind of protein powder works best, and can I use a plant-based version?
A good quality vanilla whey protein is recommended for the smoothest, most authentic cake flavor. However, you can use a vanilla casein or a plant-based vanilla protein blend. Be aware that plant-based powders are more absorbent, so you may need to add an extra tablespoon or two of milk to achieve the right consistency.
How should I store these protein balls and how long do they last?
Place the finished protein balls in an airtight container and store them in the refrigerator. They will stay fresh and delicious for up to one week.
Funfetti Birthday Cake Batter Protein Balls
Ingredients
Equipment
Method
- In a medium mixing bowl, combine the creamy cashew butter, pure maple syrup, and vanilla extract. Stir with a spatula until completely smooth.
- Add the oat flour, vanilla protein powder, and salt to the bowl. Mix until a thick, stiff dough begins to form.
- If the mixture is too dry or crumbly, add the almond milk one tablespoon at a time, mixing well after each addition, until a thick, scoopable dough forms.
- Gently fold in the rainbow sprinkles until they are just evenly distributed. Do not overmix, as the colors can bleed.
- Cover the bowl and refrigerate the dough for at least 15-20 minutes. This step is crucial to make the dough less sticky and easier to roll.
- Once chilled, use a small cookie scoop or a tablespoon to portion the dough. Roll each portion firmly between your palms to form a smooth, round ball.
- Place the finished protein balls in an airtight container and store in the refrigerator.