
I’ll never forget the church bake sale where my grandma unveiled her cherry pie. It was a showstopper, but slicing and serving it was always a bit messy. That’s where the idea for these Irresistible Quick Cherry Pie Bites | Bite-Sized Bliss came from – all the flavor, none of the fuss! Today, I’m sharing my foolproof method for the most amazing cherry pie bites you’ll ever make, guaranteed to be a hit at any gathering!
Irresistible Quick Cherry Pie Bites: Bite-Sized Bliss

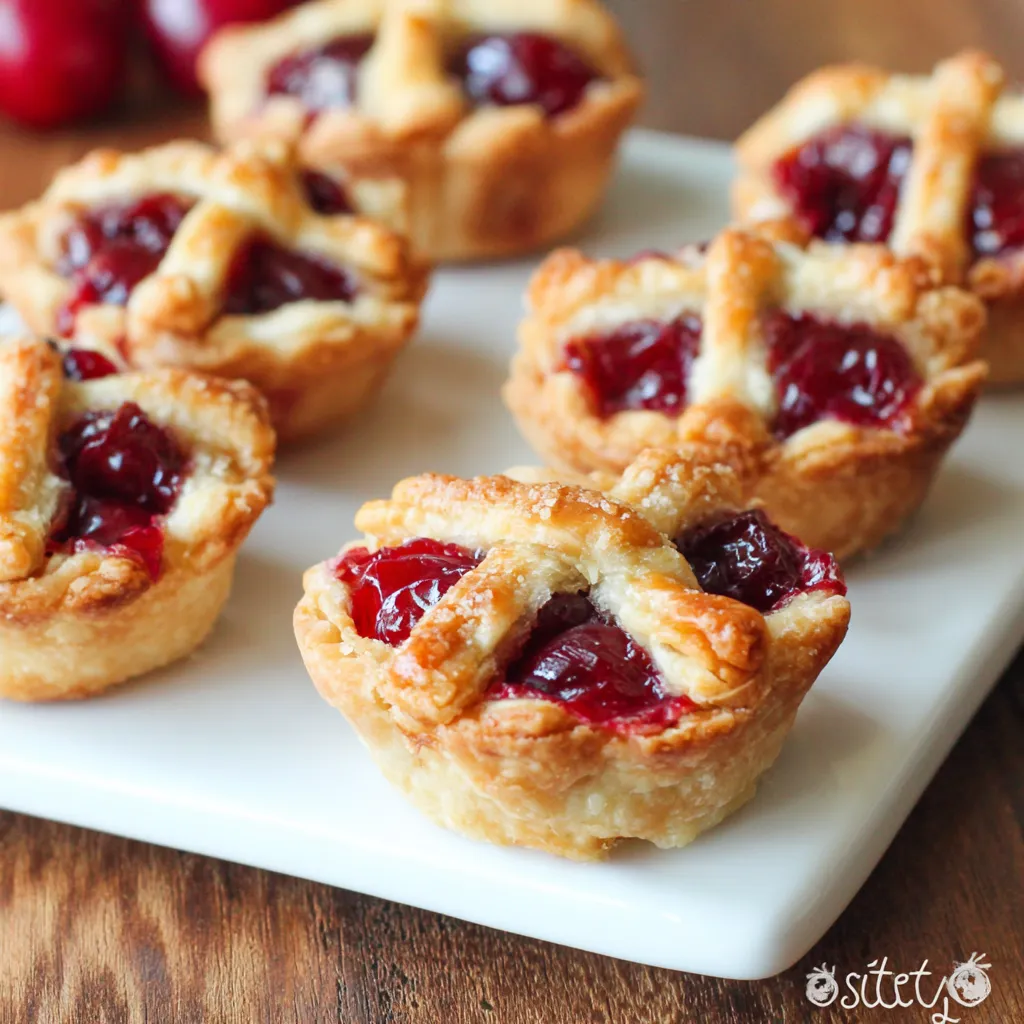
Who doesn’t love cherry pie? The sweet, tart filling encased in a flaky, buttery crust is a classic for a reason. But sometimes, you don’t want the hassle of making a full pie. That’s where these quick cherry pie bites come in! They’re perfect for parties, potlucks, or just a delightful afternoon treat. These are so easy to make, and I promise they’ll disappear faster than you can say “cherry pie!”
Why You’ll Love These Cherry Pie Bites
- Quick and Easy: Seriously, these come together in a snap. Perfect for busy weeknights or last-minute guests.
- Perfectly Portioned: No more struggling to cut even slices. Each bite is a burst of cherry goodness.
- Portable and Shareable: Ideal for picnics, bake sales, or bringing to a friend’s house.
- Customizable: Get creative with your fillings and toppings!
- Seriously Irresistible: The combination of flaky crust and sweet cherry filling is simply divine.
Ingredients You’ll Need
Here’s what you’ll need to create these little bites of heaven. Don’t worry, it’s a pretty short and sweet list!
- Refrigerated Pie Crust: 2 (14.1 ounce) packages. This is our shortcut to amazingness!
- Cherry Pie Filling: 1 (21 ounce) can. Use your favorite brand or even homemade if you’re feeling ambitious.
- All-Purpose Flour: For dusting your work surface.
- Egg: 1 large, beaten. For that golden-brown, beautiful crust.
- Granulated Sugar: For sprinkling on top (optional, but highly recommended!).
Equipment You’ll Need
- Baking Sheet: Or two, depending on the size.
- Parchment Paper or Silicone Baking Mat: To prevent sticking.
- Rolling Pin: For gently rolling out the pie crust.
- Round Cookie Cutter: About 2-3 inches in diameter. You can also use a knife or pizza cutter.
- Fork: For crimping the edges.
- Small Bowl: For the egg wash.
- Pastry Brush: For applying the egg wash.
Step-by-Step Instructions
Now for the fun part! Let’s get baking. Follow these easy steps, and you’ll be enjoying warm cherry pie bites in no time.
- Preheat your oven to 375°F (190°C). Line your baking sheet with parchment paper or a silicone baking mat. This is a MUST to prevent sticking!
- Lightly flour your work surface. This will prevent the pie crust from sticking as you roll it out.
- Unroll one package of pie crust. Gently roll it out to slightly thin it, maintaining a circular shape.
- Cut out circles using your cookie cutter. Re-roll the scraps and cut out more circles until you’ve used as much of the dough as possible.
- Place half of the circles onto the prepared baking sheet. These will be the bottoms of your pie bites.
- Spoon about 1-2 teaspoons of cherry pie filling onto each circle. Don’t overfill them, or the filling will spill out during baking.
- Beat the egg in a small bowl to make an egg wash. This will give your pie bites a beautiful golden color.
- Brush the edges of the filled circles with the egg wash. This will help the top crust stick to the bottom crust.
- Unroll the second package of pie crust and repeat steps 3 and 4. These will be the tops of your pie bites.
- Place the top circles over the cherry filling. Gently press the edges together to seal.
- Crimp the edges with a fork to seal completely. This also adds a decorative touch.
- Brush the tops of the pie bites with the remaining egg wash.
- Sprinkle with granulated sugar (optional). This adds a touch of sweetness and sparkle.
- Cut a small slit in the top of each pie bite. This allows steam to escape during baking and prevents the crust from puffing up too much.
- Bake for 15-20 minutes, or until golden brown. Keep a close eye on them – ovens can vary!
- Let cool slightly on the baking sheet before transferring to a wire rack to cool completely. This prevents them from getting soggy.
- Enjoy! These are best served warm or at room temperature.
Success Tips for Perfect Cherry Pie Bites
- Don’t Overwork the Dough: Overworking the pie crust will result in a tough, not flaky, crust. Handle it gently!
- Keep Everything Cold: Cold butter and cold ingredients are key to a flaky pie crust. If your kitchen is warm, consider chilling the dough in the refrigerator for a few minutes before rolling it out.
- Seal the Edges Well: Make sure to crimp the edges firmly to prevent the filling from leaking out during baking.
- Don’t Overfill: Resist the urge to pile on the cherry filling. Too much filling will make the pie bites soggy and difficult to handle.
- Watch the Baking Time: Ovens vary, so keep a close eye on the pie bites as they bake. They’re done when the crust is golden brown and the filling is bubbly.
Variations and Additions
Want to put your own spin on these cherry pie bites? Here are a few ideas to get you started:
- Different Fillings: Try apple, blueberry, or peach pie filling. You can even make your own homemade filling!
- Add Spices: A pinch of cinnamon, nutmeg, or allspice to the cherry filling can add a warm, comforting flavor.
- Chocolate Chips: Mix mini chocolate chips into the cherry filling for a chocolate cherry delight.
- Nuts: Sprinkle chopped pecans or walnuts on top of the pie bites before baking for a crunchy texture.
- Glaze: Drizzle a simple powdered sugar glaze over the cooled pie bites for extra sweetness.
Serving Suggestions
These cherry pie bites are delicious on their own, but here are a few ideas for serving them:
- With a scoop of vanilla ice cream. The warm pie bites and cold ice cream are a match made in heaven.
- With a dollop of whipped cream. Light and fluffy, whipped cream is the perfect complement to the sweet cherry filling.
- With a sprinkle of powdered sugar. A simple and elegant way to dress up the pie bites.
- As part of a dessert platter. Include other bite-sized treats like brownies, cookies, and fruit for a crowd-pleasing spread.
- Pack them in a lunchbox. These are a fun and easy treat for kids and adults alike.
Make-Ahead and Storage Instructions
These cherry pie bites are great for making ahead of time. Here’s how to store them:
- Store baked pie bites in an airtight container at room temperature for up to 2 days.
- For longer storage, store baked pie bites in the refrigerator for up to 5 days. Reheat in the oven or microwave before serving.
- You can also freeze unbaked pie bites. Arrange them on a baking sheet and freeze until solid. Then, transfer them to a freezer-safe bag or container. Bake from frozen, adding a few extra minutes to the baking time.
More Bite-Sized Dessert Inspiration
If you love these cherry pie bites, you might also enjoy these other delicious bite-sized desserts:
Imagine serving these cherry pie bites alongside some delightful Apple Pie Cookies. The combination of cherry and apple flavors would be a total crowd-pleaser!
For a truly decadent treat, consider making a ROASTED CHERRY BROWNIE. The roasted cherries add a depth of flavor that is simply irresistible.
And if you’re looking for something a little different, try making Strawberry Shortcake Cheesecake. It’s a delicious twist on a classic dessert.
If you are a fan of berries, then the BLACKBERRY CLAFOUTIS, is a must try!
Consider the Strawberry Shortcake Cheesecake Rolls for a quick and delicious treat!
Recipe
Here’s the full recipe for these irresistible quick cherry pie bites. Print it out, save it to your phone, and get ready to bake!
Yields: About 24 pie bites
Prep time: 20 minutes
Cook time: 15-20 minutes
Ingredients:
- 2 (14.1 ounce) packages refrigerated pie crust
- 1 (21 ounce) can cherry pie filling
- All-purpose flour, for dusting
- 1 large egg, beaten
- Granulated sugar, for sprinkling (optional)
Instructions:
- Preheat oven to 375°F (190°C). Line a baking sheet with parchment paper.
- Lightly flour your work surface. Unroll one package of pie crust and gently roll it out to slightly thin it.
- Cut out circles using a 2-3 inch round cookie cutter. Re-roll scraps and cut out more circles.
- Place half of the circles onto the prepared baking sheet.
- Spoon 1-2 teaspoons of cherry pie filling onto each circle.
- Brush the edges of the filled circles with beaten egg.
- Unroll the second package of pie crust and repeat steps 2 and 3.
- Place the top circles over the cherry filling. Gently press the edges together to seal.
- Crimp the edges with a fork to seal completely.
- Brush the tops of the pie bites with the remaining egg wash.
- Sprinkle with granulated sugar (optional).
- Cut a small slit in the top of each pie bite.
- Bake for 15-20 minutes, or until golden brown.
- Let cool slightly on the baking sheet before transferring to a wire rack to cool completely.
- Enjoy!
Final Thoughts
These Irresistible Quick Cherry Pie Bites | Bite-Sized Bliss are a guaranteed crowd-pleaser. They’re easy to make, perfectly portioned, and bursting with flavor. Whether you’re baking for a special occasion or just craving a sweet treat, these little bites of happiness are sure to satisfy. So go ahead, give them a try – I promise you won’t be disappointed!
How do I store cherry pie bites to keep them fresh?
You can store baked cherry pie bites in an airtight container at room temperature for up to 2 days or in the refrigerator for up to 5 days. For longer storage, freeze unbaked pie bites on a baking sheet until solid, then transfer them to a freezer-safe bag. Bake from frozen, adding a few extra minutes to the baking time.
What are some variations I can try with these cherry pie bites?
You can experiment with different fillings like apple, blueberry, or peach. Adding spices like cinnamon or nutmeg to the cherry filling can also enhance the flavor. For a chocolatey twist, mix mini chocolate chips into the filling, or sprinkle chopped nuts on top for added texture.
What is the key to getting a flaky crust for these cherry pie bites?
The key to a flaky crust is to not overwork the dough and to keep everything cold. Handle the pie crust gently and consider chilling it in the refrigerator for a few minutes before rolling it out, especially if your kitchen is warm.
Can I use homemade cherry pie filling for this recipe?
Yes, you can definitely use homemade cherry pie filling if you’re feeling ambitious. The recipe calls for a 21-ounce can of cherry pie filling, so adjust your homemade recipe accordingly.
Cherry Pie Bites Bliss
Ingredients
Equipment
Method
- Preheat oven to 375°F (190°C). Line a baking sheet with parchment paper or a silicone baking mat.
- Lightly flour your work surface.
- Unroll one package of pie crust and gently roll it out to slightly thin it, maintaining a circular shape.
- Cut out circles using a 2-3 inch round cookie cutter. Re-roll scraps and cut out more circles.
- Place half of the circles onto the prepared baking sheet.
- Spoon 1-2 teaspoons of cherry pie filling onto each circle.
- Brush the edges of the filled circles with beaten egg.
- Unroll the second package of pie crust and repeat steps 3 and 4.
- Place the top circles over the cherry filling. Gently press the edges together to seal.
- Crimp the edges with a fork to seal completely.
- Brush the tops of the pie bites with the remaining egg wash.
- Sprinkle with granulated sugar (optional).
- Cut a small slit in the top of each pie bite.
- Bake for 15-20 minutes, or until golden brown.
- Let cool slightly on the baking sheet before transferring to a wire rack to cool completely.
- Enjoy!


