
I can still remember the scent of my grandmother’s kitchen when she was baking a cherry cobbler. The sweet, slightly tart aroma would fill the entire house, a promise of warm, comforting goodness to come. It felt like pure love baked into a dish. Today, I’m sharing all my secrets for the most amazing Fresh Cherry Cobbler Recipe-Easy Homemade Dessert you’ll ever make! It’s simpler than you think, and I guarantee it will bring back those same comforting memories for you and your loved ones.
The Ultimate Fresh Cherry Cobbler Recipe: An Easy Homemade Dessert

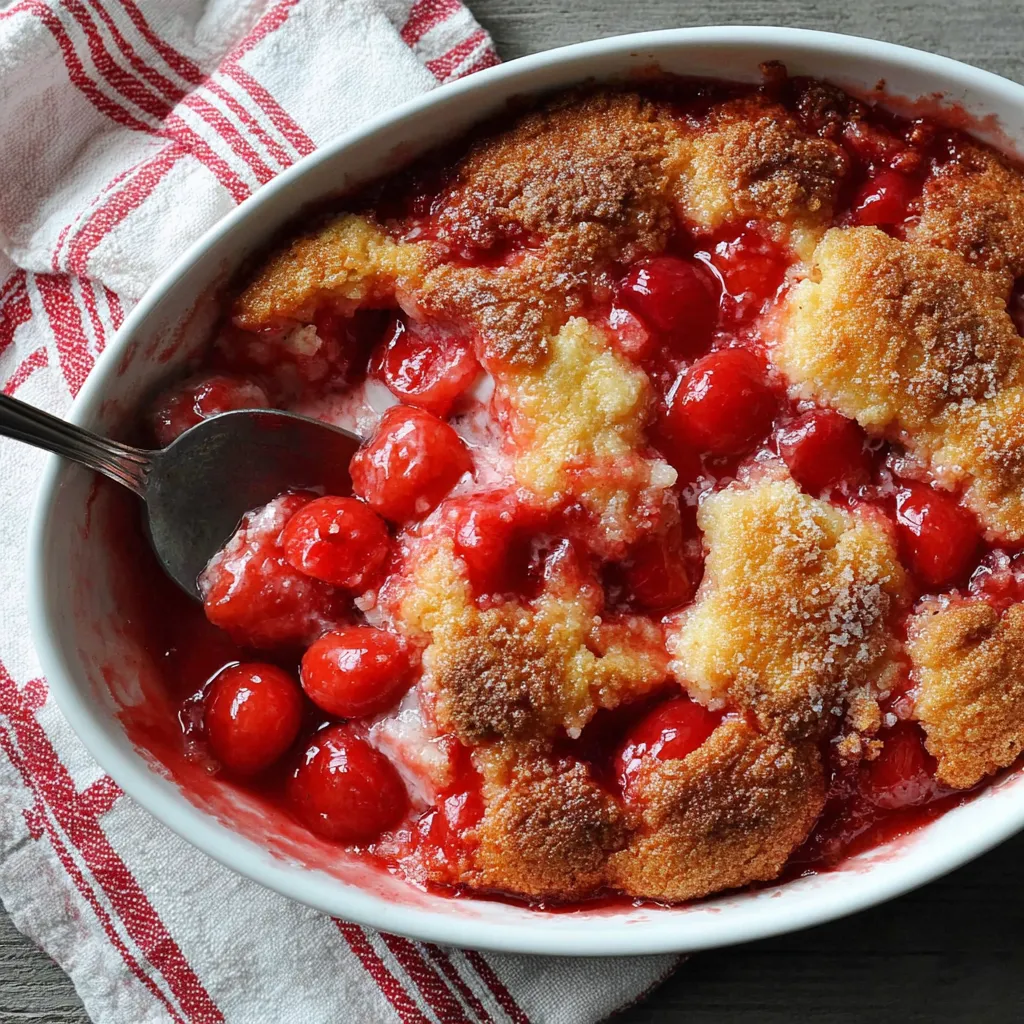
Okay, friends, let’s talk about cobbler. And not just any cobbler, but a fresh cherry cobbler. This isn’t your run-of-the-mill, canned-filling dessert. We’re talking about juicy, ripe cherries bursting with flavor, baked under a golden, buttery biscuit topping. Are you ready to dive in? I know I am! This Fresh Cherry Cobbler Recipe-Easy Homemade Dessert is unbelievably simple to make, and the results are absolutely divine. It’s perfect for a summer barbecue, a cozy weeknight dessert, or anytime you’re craving a little taste of heaven.
Why This Cherry Cobbler Recipe is a Winner
So, what makes this particular fresh cherry cobbler recipe so special? Well, for starters, it’s truly easy. I’ve streamlined the process so you can have a delicious, homemade dessert on the table in under an hour. No fussy techniques, no complicated ingredients. Just simple, honest-to-goodness flavor. It’s even easier than whipping up a batch of PEACH COBBLER! Plus, using fresh cherries really makes all the difference. The natural sweetness and tartness of the cherries create a flavor explosion that canned cherries just can’t match. We’re talking next-level deliciousness here!
Ingredients You’ll Need
Before we start baking, let’s gather our ingredients. Here’s what you’ll need for this amazing Fresh Cherry Cobbler Recipe-Easy Homemade Dessert:
For the Cherry Filling:
- Fresh Cherries: 6 cups, pitted (sweet or sour cherries work well – use your preference!)
- Granulated Sugar: ¾ cup (adjust to taste depending on the sweetness of your cherries)
- Cornstarch: 2 tablespoons
- Lemon Juice: 1 tablespoon (brightens the flavor!)
- Almond Extract: ½ teaspoon (optional, but adds a lovely depth of flavor)
- Pinch of Salt: Enhances the sweetness.
For the Biscuit Topping:
- All-Purpose Flour: 1 ½ cups
- Granulated Sugar: ¼ cup
- Baking Powder: 2 teaspoons
- Salt: ½ teaspoon
- Cold Unsalted Butter: ½ cup (1 stick), cut into small cubes
- Whole Milk: ½ cup (plus more for brushing)
- Turbinado Sugar (coarse sugar): For sprinkling on top (optional, but adds a nice crunch)
See? Nothing too scary. Most of these are pantry staples! Now, let’s get baking!
Step-by-Step Instructions: Making the Magic Happen
Alright, let’s get down to business! Follow these easy, step-by-step instructions, and you’ll be enjoying a warm, delicious cherry cobbler in no time. Trust me, you’ve got this!
- Preheat your oven to 375°F (190°C). This is crucial! We want a nice, even bake.
- Prepare the cherry filling: In a large bowl, combine the pitted cherries, granulated sugar, cornstarch, lemon juice, almond extract (if using), and a pinch of salt. Gently toss everything together until the cherries are evenly coated. The mixture will start to look juicy and luscious.
- Pour the cherry filling into a 9×13 inch baking dish. Make sure the cherries are spread out evenly.
- Prepare the biscuit topping: In a separate bowl, whisk together the flour, granulated sugar, baking powder, and salt.
- Cut in the cold butter: This is where the magic happens! Use a pastry blender or your fingertips to cut the cold butter into the dry ingredients. You want to create a mixture that resembles coarse crumbs. The butter should be cold and in small pieces; this will give you those beautiful, flaky biscuits.
- Add the milk: Gradually add the milk to the flour mixture, stirring until just combined. Be careful not to overmix! A few lumps are perfectly fine. Overmixing will result in tough biscuits. The dough will be slightly sticky.
- Drop spoonfuls of biscuit dough over the cherry filling. Don’t worry about making them perfect! Irregular shapes add to the rustic charm of a cobbler. You should have about 8-10 biscuits.
- Brush the biscuit topping with milk. This will help them brown beautifully.
- Sprinkle with turbinado sugar (optional). This adds a delightful crunch and sparkle.
- Bake for 35-40 minutes, or until the biscuit topping is golden brown and the cherry filling is bubbly. Keep an eye on it! Ovens can vary, so start checking for doneness around 30 minutes. The filling should be visibly bubbling around the edges of the biscuits.
- Let the cobbler cool slightly before serving. This will allow the filling to thicken up a bit. Serve warm with a scoop of vanilla ice cream or a dollop of whipped cream. Pure bliss! You might even enjoy it with a scoop of CHERRY SORBET DELIGHT for an extra cherry kick!
Success Tips for a Perfect Cherry Cobbler
Want to guarantee your Fresh Cherry Cobbler Recipe-Easy Homemade Dessert is a resounding success? Here are my top tips and tricks:
- Use cold butter! I can’t stress this enough. Cold butter is essential for creating flaky biscuits. Make sure your butter is well chilled before you start. You can even pop it in the freezer for 10-15 minutes before cutting it into the flour.
- Don’t overmix the biscuit dough! Overmixing develops the gluten in the flour, which will result in tough, chewy biscuits. Stir the milk into the dry ingredients until just combined. A few lumps are perfectly fine.
- Adjust the sugar to your taste. The amount of sugar you need will depend on the sweetness of your cherries. If you’re using sweet cherries, you might want to reduce the amount of sugar in the filling. If you’re using sour cherries, you might want to add a little more.
- Use fresh, ripe cherries. The quality of your cherries will directly impact the flavor of your cobbler. Choose cherries that are firm, plump, and deeply colored.
- Let it cool slightly before serving. This allows the filling to thicken up and prevents you from burning your mouth!
Variations and Adaptations
One of the best things about this Fresh Cherry Cobbler Recipe-Easy Homemade Dessert is that it’s so versatile! Feel free to experiment with different variations and adaptations to suit your taste.
Add Spices
A pinch of cinnamon or nutmeg can add a warm, cozy flavor to the cherry filling. You could even try adding a little bit of ground ginger for a spicy kick.
Use Different Fruits
While this recipe is specifically for cherry cobbler, you can easily adapt it to use other fruits. Try using peaches, blueberries, blackberries, or a combination of your favorite fruits. Just be sure to adjust the sugar accordingly, depending on the sweetness of the fruit. This recipe is almost as easy as making PEACH COBBLER!
Add Nuts
Chopped pecans or walnuts can add a nice crunch and nutty flavor to the biscuit topping. Simply sprinkle them on top of the biscuits before baking.
Make it Gluten-Free
If you’re gluten-free, you can easily adapt this recipe by using a gluten-free all-purpose flour blend. Just be sure to choose a blend that contains xanthan gum, which will help to bind the ingredients together. You might also want to add a little extra milk to the dough, as gluten-free flour tends to be drier than regular flour.
Make Mini Cobblers
For individual servings, you can bake the cobbler in ramekins or small oven-safe dishes. This is a great way to control portion sizes and make the dessert extra special. Remember to adjust the baking time accordingly – mini cobblers will bake faster than a large cobbler.
Serving Suggestions
Okay, so you’ve baked your amazing Fresh Cherry Cobbler Recipe-Easy Homemade Dessert. Now what? Here are some of my favorite ways to serve it:
- Warm with a scoop of vanilla ice cream: This is a classic combination that’s hard to beat. The cold, creamy ice cream perfectly complements the warm, juicy cobbler.
- With a dollop of whipped cream: Light and fluffy whipped cream adds a touch of elegance to the dessert. You can even use a flavored whipped cream, such as almond or vanilla.
- With a sprinkle of powdered sugar: A dusting of powdered sugar adds a touch of sweetness and visual appeal.
- As part of a summer barbecue: Cherry cobbler is the perfect dessert to bring to a summer barbecue. It’s easy to transport and always a crowd-pleaser.
- For a cozy weeknight dessert: There’s nothing quite like a warm bowl of cherry cobbler on a chilly evening. It’s the ultimate comfort food.
Make-Ahead and Storage Instructions
Want to get ahead of the game? Here’s how to make this Fresh Cherry Cobbler Recipe-Easy Homemade Dessert in advance:
Make-Ahead
You can prepare the cherry filling up to 24 hours in advance. Simply combine the cherries, sugar, cornstarch, lemon juice, almond extract (if using), and salt in a bowl, cover, and refrigerate. When you’re ready to bake, pour the filling into the baking dish and proceed with the recipe.
The biscuit dough can also be made ahead of time, although it’s best to make it as close to baking time as possible. If you do make it ahead, wrap it tightly in plastic wrap and refrigerate for up to 2 hours. The longer it sits, the more the baking powder will lose its effectiveness.
Storage
Leftover cherry cobbler can be stored in the refrigerator for up to 3 days. To reheat, simply microwave it for a few seconds or bake it in a preheated oven at 350°F (175°C) until warmed through. You can also freeze it! For best results, freeze individual portions wrapped tightly in plastic wrap and then placed in a freezer-safe bag or container. Thaw overnight in the refrigerator before reheating. It’s almost as delightful as enjoying CHERRY PIE BITES BLISS!
Recipe Summary
Here is a quick overview of the recipe:
Ingredients:
- Cherry Filling: 6 cups pitted fresh cherries, ¾ cup granulated sugar, 2 tbsp cornstarch, 1 tbsp lemon juice, ½ tsp almond extract (optional), pinch of salt
- Biscuit Topping: 1 ½ cups all-purpose flour, ¼ cup granulated sugar, 2 tsp baking powder, ½ tsp salt, ½ cup (1 stick) cold unsalted butter, ½ cup whole milk, turbinado sugar (optional)
Instructions:
- Preheat oven to 375°F (190°C).
- Combine cherry filling ingredients and pour into a 9×13 inch baking dish.
- Whisk together biscuit topping dry ingredients.
- Cut in cold butter until mixture resembles coarse crumbs.
- Add milk until just combined.
- Drop spoonfuls of biscuit dough over cherry filling.
- Brush with milk and sprinkle with turbinado sugar (optional).
- Bake for 35-40 minutes, or until golden brown and bubbly.
- Let cool slightly before serving.
Enjoy!
Final Thoughts: A Taste of Home
And there you have it! My easy, foolproof Fresh Cherry Cobbler Recipe-Easy Homemade Dessert. I hope you’ll give it a try and experience the joy of baking a truly delicious, homemade dessert. It’s a simple recipe, but the flavors are complex and comforting, reminiscent of those warm summer days and the aroma of Grandma’s kitchen. Whether you’re a seasoned baker or a complete beginner, I’m confident that you can make this recipe with success. So, gather your ingredients, preheat your oven, and let’s get baking! I promise you won’t be disappointed. Happy baking, my friends!
Can I use frozen cherries instead of fresh cherries for this cobbler recipe?
The recipe recommends using fresh, ripe cherries for the best flavor. The natural sweetness and tartness of fresh cherries create a flavor explosion that canned cherries just can’t match. While frozen cherries *might* work, the texture could be different, and you may need to adjust the liquid content and baking time.
What kind of cherries are best for this cobbler – sweet or sour?
The recipe indicates that either sweet or sour cherries can be used, depending on your preference. Adjust the amount of sugar in the filling based on the sweetness of the cherries you choose.
How do I store leftover cherry cobbler?
Leftover cherry cobbler can be stored in the refrigerator for up to 3 days. To reheat, simply microwave it for a few seconds or bake it in a preheated oven at 350°F (175°C) until warmed through. You can also freeze it for longer storage.
Can I make the cherry cobbler ahead of time?
Yes, you can prepare the cherry filling up to 24 hours in advance. The biscuit dough can also be made ahead of time, although it’s best to make it as close to baking time as possible. If you do make it ahead, wrap it tightly in plastic wrap and refrigerate for up to 2 hours.
EASIEST CHERRY COBBLER EVER
Ingredients
Equipment
Method
- Preheat your oven to 375°F (190°C).
- In a large bowl, combine the pitted cherries, granulated sugar, cornstarch, lemon juice, almond extract (if using), and a pinch of salt.
- Gently toss everything together until the cherries are evenly coated.
- Pour the cherry filling into a 9×13 inch baking dish, spreading the cherries out evenly.
- In a separate bowl, whisk together the flour, granulated sugar, baking powder, and salt.
- Cut in the cold butter using a pastry blender or your fingertips until the mixture resembles coarse crumbs.
- Gradually add the milk to the flour mixture, stirring until just combined. Be careful not to overmix; a few lumps are fine.
- Drop spoonfuls of biscuit dough over the cherry filling, creating about 8-10 biscuits.
- Brush the biscuit topping with milk.
- Sprinkle with turbinado sugar (optional).
- Bake for 35-40 minutes, or until the biscuit topping is golden brown and the cherry filling is bubbly.
- Let the cobbler cool slightly before serving.


