
I can almost smell the buttery, caramelized pineapple now! My grandma used to bake an Easy Pineapple Upside Down Cake every summer, and the sweet, tangy aroma would fill the whole house. It was the kind of cake that just made you smile. Today, I’m sharing all my secrets for the most delightful Easy Pineapple Upside Down Cake you’ll ever make! Prepare to be amazed!
The Magic of Pineapple Upside Down Cake

Pineapple Upside Down Cake. Just the name conjures up images of sunny days, retro kitchens, and a slice of pure comfort. This isn’t just a cake; it’s a statement. A declaration that you know how to bake something utterly delicious and undeniably impressive. And the best part? It’s incredibly easy to make, especially if you follow my foolproof recipe. We are going to take all the guesswork out of it, so you can focus on enjoying the sweet reward.
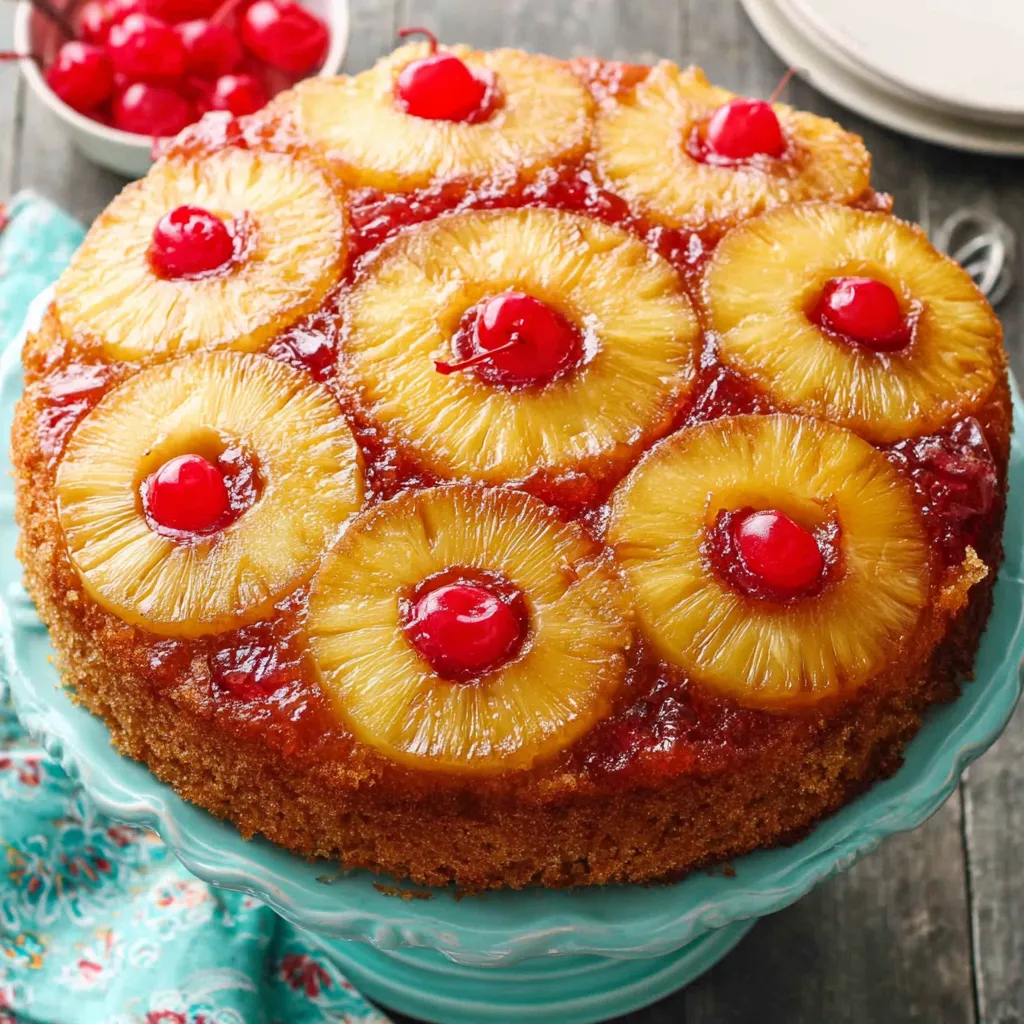
What sets this cake apart is the beautiful contrast of textures and flavors. The moist, tender cake base perfectly complements the caramelized pineapple and cherries, creating a symphony of sweetness and tanginess in every bite. It’s a visual masterpiece too, with its golden-brown top and vibrant fruit arrangement. Trust me, this cake will be the star of any dessert table.
Let’s Get Baking: Your Step-by-Step Guide
Ready to create some kitchen magic? Here’s a detailed, step-by-step guide to making the most amazing Pineapple Upside Down Cake. I’ll walk you through each step, ensuring success every time!
Ingredients You’ll Need:
- For the Topping:
- 1/2 cup (1 stick) unsalted butter
- 1 cup packed brown sugar
- 1 (20 ounce) can pineapple slices, drained (reserve the juice!)
- Maraschino cherries, halved
- For the Cake:
- 1 1/2 cups all-purpose flour
- 1 1/2 teaspoons baking powder
- 1/4 teaspoon salt
- 1/2 cup (1 stick) unsalted butter, softened
- 3/4 cup granulated sugar
- 2 large eggs
- 1/2 cup pineapple juice (from the can)
- 1 teaspoon vanilla extract
Equipment:
- 9-inch round cake pan
- Mixer (handheld or stand mixer)
- Mixing bowls
- Measuring cups and spoons
- Rubber spatula
Step-by-Step Instructions:
- Prepare the Pan: Melt the butter for the topping in your 9-inch cake pan in the oven as it preheats to 350°F (175°C), or in a microwave-safe bowl. Make sure the butter coats the entire bottom of the pan evenly.
- Add the Brown Sugar: Sprinkle the brown sugar evenly over the melted butter. This creates the gorgeous caramel layer.
- Arrange the Pineapple: Place the pineapple slices in a single layer over the brown sugar. You can overlap them slightly.
- Add the Cherries: Place a halved maraschino cherry in the center of each pineapple ring and scatter the rest around to fill in the gaps. This gives the cake its signature look.
- Whisk Dry Ingredients: In a medium bowl, whisk together the flour, baking powder, and salt. This ensures even distribution of the leavening agent.
- Cream Butter and Sugar: In a separate large bowl, cream together the softened butter and granulated sugar until light and fluffy. Beat the butter and sugars together on medium speed until pale and creamy, about 2 full minutes. This is the foundation for a tender cake.
- Add Eggs: Beat in the eggs one at a time, mixing well after each addition. This emulsifies the mixture and adds richness.
- Combine Wet and Dry Ingredients: Gradually add the dry ingredients to the wet ingredients, alternating with the pineapple juice, beginning and ending with the dry ingredients. Mix until just combined. Don’t overmix! Overmixing develops the gluten in the flour, resulting in a tough cake.
- Add Vanilla: Stir in the vanilla extract.
- Pour Batter: Carefully pour the cake batter over the pineapple and cherry arrangement in the cake pan. Spread the batter evenly.
- Bake: Bake in the preheated oven for 35-40 minutes, or until a wooden skewer inserted into the center comes out clean. Keep an eye on it. Ovens vary, and you want the cake to be perfectly golden brown, not burnt.
- Cool and Invert: Let the cake cool in the pan for 10 minutes. This allows the caramel to set slightly, making it easier to invert.
- Invert the Cake: Place a serving plate over the cake pan and carefully invert the cake onto the plate. The warm caramel will drizzle down the sides, creating a beautiful presentation.
- Serve and Enjoy: Serve warm, and prepare for rave reviews! This cake is delicious on its own, but you can also serve it with a scoop of vanilla ice cream or a dollop of whipped cream.
Success Tips for the Perfect Pineapple Upside Down Cake
Want to guarantee a flawless Pineapple Upside Down Cake every single time? Here are a few of my most treasured secrets:
- Don’t Skip the Brown Sugar: The brown sugar is crucial for that rich, caramel flavor. Don’t substitute it with granulated sugar.
- Drain the Pineapple Well: Excess moisture will make your cake soggy. Be sure to drain the pineapple slices thoroughly and pat them dry with a paper towel.
- Use Softened Butter: Softened butter creams much better with the sugar, creating a light and airy cake batter. If you forget to take the butter out ahead of time, you can soften it quickly in the microwave, but be careful not to melt it.
- Don’t Overbake: Overbaking will result in a dry cake. Start checking for doneness at 35 minutes and use a wooden skewer to test.
- Cool Properly Before Inverting: Cooling the cake for 10 minutes allows the caramel to set slightly, preventing the topping from sticking to the pan. If you invert it too soon, the pineapple and cherries might not release properly.
Variations to Spice Things Up
While the classic Pineapple Upside Down Cake is perfect as it is, don’t be afraid to experiment! Here are a few fun variations to try:
Spice it with Cinnamon
Add a teaspoon of ground cinnamon to the cake batter for a warm, comforting flavor.
Coconut Flakes
Sprinkle shredded coconut over the pineapple slices before pouring in the cake batter for a tropical twist.
Nuts About It
Add chopped pecans or walnuts to the brown sugar mixture for extra crunch and flavor.
Spice it up
A pinch of ground ginger or nutmeg to the batter can add a layer of warmth and complexity.
Serving Suggestions and Pairings
Pineapple Upside Down Cake is a versatile dessert that can be enjoyed in many ways. Here are some of my favorite serving suggestions and pairings:
- Warm with Ice Cream: Serve a warm slice of cake with a scoop of vanilla ice cream or coconut ice cream for a decadent treat. The contrast of warm and cold is simply divine.
- Whipped Cream: A dollop of freshly whipped cream adds a light and airy touch.
- Caramel Sauce: Drizzle with extra caramel sauce for an extra layer of sweetness.
- Coffee or Tea: Pair with a cup of freshly brewed coffee or tea for a perfect afternoon treat.
- Dessert Wine: For a sophisticated pairing, try a dessert wine like Moscato or Sauternes.
Make-Ahead and Storage Instructions
Planning ahead? No problem! Here’s how to make Pineapple Upside Down Cake in advance and store it properly:
- Make-Ahead: You can prepare the topping (butter, brown sugar, pineapple, and cherries) up to a day in advance. Simply assemble it in the cake pan and cover it tightly with plastic wrap. Store it at room temperature. When you’re ready to bake, prepare the cake batter and pour it over the topping.
- Storage: Store leftover cake in an airtight container at room temperature for up to 3 days or in the refrigerator for up to 5 days. The cake may become slightly moister in the refrigerator.
- Freezing: While Pineapple Upside Down Cake is best enjoyed fresh, you can freeze it for longer storage. Wrap individual slices tightly in plastic wrap and then place them in a freezer bag or container. Freeze for up to 2 months. Thaw overnight in the refrigerator before serving.
From My Kitchen to Yours: A Few More Tips!
This recipe is near and dear to my heart, passed down through generations, and perfected with a few of my own special touches. To make sure yours comes out as beautifully as possible, here are some extra tips I’ve learned over the years:
Why Pineapple Juice?
Adding the pineapple juice back into the cake batter amplifies the pineapple flavor throughout the entire cake! Don’t throw it away!
Cherry Placement
Have fun with the cherry placement! Get creative and make a beautiful design with the cherries! You can even use other candied fruits if you like!
The Right Pan
While I suggest a 9-inch round cake pan, you could also use a cast iron skillet! It gives the cake a rustic, old-fashioned look.
Pineapple Perfection Beyond Cake
While we’re celebrating pineapple, let’s not forget its versatility! You can enjoy pineapple in so many ways. For a fun and crispy treat, give Fried Pineapple Rings a try – they’re absolutely addictive! Or, for a complete meal, the Sweet Hawaiian Crockpot Chicken is always a crowd-pleaser. If you are looking for a refreshing adult beverage, try Pineapple Blueberry Margarita Bliss. It’s the perfect tropical escape in a glass. And for a quick and easy dinner, the Hawaiian Chicken Sheet Pan is a lifesaver on busy weeknights!
Final Thoughts: Enjoy the Sweet Rewards
There you have it – my foolproof recipe for Easy Pineapple Upside Down Cake. This cake is more than just a dessert; it’s a symbol of warmth, comfort, and happy memories. It’s the perfect cake to bake for a special occasion, a family gathering, or simply to brighten up a rainy day. I hope you enjoy making it as much as I do. Happy baking!
Can I use granulated sugar instead of brown sugar for the topping?
No, the brown sugar is crucial for the rich, caramel flavor of the topping. Substituting it with granulated sugar is not recommended.
How do I prevent my Pineapple Upside Down Cake from becoming soggy?
Make sure to drain the pineapple slices thoroughly and pat them dry with a paper towel to remove excess moisture. Excess moisture will make the cake soggy.
How long can I store Pineapple Upside Down Cake?
You can store leftover cake in an airtight container at room temperature for up to 3 days or in the refrigerator for up to 5 days. For longer storage, you can freeze individual slices for up to 2 months.
Why is it important to cool the cake for 10 minutes before inverting it?
Cooling the cake for 10 minutes allows the caramel to set slightly, preventing the topping from sticking to the pan. If you invert it too soon, the pineapple and cherries might not release properly.
Easy Pineapple Upside Down Cake
Ingredients
Equipment
Method
- Preheat oven to 350°F (175°C).
- Melt the butter for the topping in your 9-inch cake pan in the oven as it preheats, or in a microwave-safe bowl. Make sure the butter coats the entire bottom of the pan evenly.
- Sprinkle the brown sugar evenly over the melted butter. This creates the gorgeous caramel layer.
- Place the pineapple slices in a single layer over the brown sugar. You can overlap them slightly.
- Place a halved maraschino cherry in the center of each pineapple ring and scatter the rest around to fill in the gaps. This gives the cake its signature look.
- In a medium bowl, whisk together the flour, baking powder, and salt.
- In a separate large bowl, cream together the softened butter and granulated sugar until light and fluffy. Beat the butter and sugars together on medium speed until pale and creamy, about 2 full minutes.
- Beat in the eggs one at a time, mixing well after each addition.
- Gradually add the dry ingredients to the wet ingredients, alternating with the pineapple juice, beginning and ending with the dry ingredients. Mix until just combined. Don’t overmix!
- Stir in the vanilla extract.
- Carefully pour the cake batter over the pineapple and cherry arrangement in the cake pan. Spread the batter evenly.
- Bake in the preheated oven for 35-40 minutes, or until a wooden skewer inserted into the center comes out clean.
- Let the cake cool in the pan for 10 minutes. This allows the caramel to set slightly, making it easier to invert.
- Place a serving plate over the cake pan and carefully invert the cake onto the plate. The warm caramel will drizzle down the sides, creating a beautiful presentation.
- Serve warm, and enjoy!


