
When summertime brings an abundance of ruby-red raspberries, there’s no better way to showcase their vibrant flavor than in a homemade Raspberry Crumble. This quintessential dessert strikes the perfect balance between rustic charm and elegant indulgence, making it suitable for both casual family dinners and special occasions. Unlike fussy pastries that demand precision and experience, a Raspberry Crumble welcomes bakers of all skill levels with its forgiving nature and straightforward preparation. The contrast between the warm, jammy raspberry filling and the buttery, crunchy topping creates a texture and flavor experience that has stood the test of time as a beloved dessert classic. Whether you’re a seasoned baker or just starting your culinary journey, this Raspberry Crumble recipe will quickly become a staple in your dessert repertoire.
Why Raspberry Crumble Stands Out
While fruit desserts abound, Raspberry Crumble deserves special attention for several compelling reasons:
- Perfect sweet-tart balance: Raspberries naturally provide the ideal balance of sweetness and acidity, creating a more complex flavor profile than many other fruit desserts.
- Stunning color: The deep ruby hue of cooked raspberries creates a visually striking dessert that looks as good as it tastes.
- Year-round accessibility: While fresh raspberries create the most vibrant flavor, frozen berries work beautifully in this recipe, making it an option no matter the season.
- Quick preparation: Unlike pies with their time-consuming crusts, a crumble comes together in minutes, perfect for busy households and last-minute entertaining.
- Versatility: The basic recipe adapts easily to dietary needs and can be served in various ways—warm with ice cream, room temperature with whipped cream, or even cold for breakfast with a dollop of yogurt.
The Perfect Raspberry Crumble Recipe
This recipe strikes the ideal balance between simplicity and spectacular results. The minimal ingredient list relies on quality components, allowing the raspberry flavor to shine through.
Ingredients
For the raspberry filling:
- 4 cups fresh raspberries (about 2 pints)
- 3-4 tablespoons granulated sugar (adjust based on sweetness of berries)
- 2 tablespoons cornstarch
- 1 tablespoon fresh lemon juice
- 1 teaspoon vanilla extract
- Pinch of salt
- Optional: 1 tablespoon lemon zest for enhanced flavor
For the crumble topping:
- 1 cup all-purpose flour
- ⅔ cup old-fashioned rolled oats
- ⅔ cup packed light brown sugar
- ½ cup cold unsalted butter, cubed
- ½ teaspoon ground cinnamon
- ¼ teaspoon salt
- Optional add-ins: ¼ cup chopped nuts (almonds, pecans, or walnuts) or ¼ cup shredded coconut
For serving (optional):
- Vanilla ice cream
- Freshly whipped cream
- Greek yogurt
- Additional fresh raspberries
- Fresh mint leaves
Step-by-Step Instructions
1. Prepare Your Baking Dish and Oven
Preheat your oven to 375°F (190°C). Lightly grease a 9-inch square baking dish or a 9-inch pie plate with butter or cooking spray.
2. Make the Raspberry Filling
- In a large bowl, gently toss the raspberries with granulated sugar, cornstarch, lemon juice, vanilla extract, and salt.
- If using lemon zest, add it now and toss gently.
- Allow the mixture to sit for 10 minutes, giving the berries time to release some of their juices and the sugar to begin dissolving.
- Transfer the raspberry mixture to your prepared baking dish, spreading it into an even layer.
3. Prepare the Crumble Topping
- In a medium bowl, combine the flour, oats, brown sugar, cinnamon, and salt.
- Add the cold cubed butter to the dry ingredients.
- Using your fingertips or a pastry cutter, work the butter into the dry ingredients until the mixture resembles coarse crumbs with some pea-sized butter pieces remaining. This texture creates the perfect crumble.
- If using nuts or coconut, fold them into the crumble mixture now.
4. Assemble and Bake
- Sprinkle the crumble topping evenly over the raspberry filling, covering the fruit completely.
- Place the baking dish on a rimmed baking sheet to catch any potential overflow.
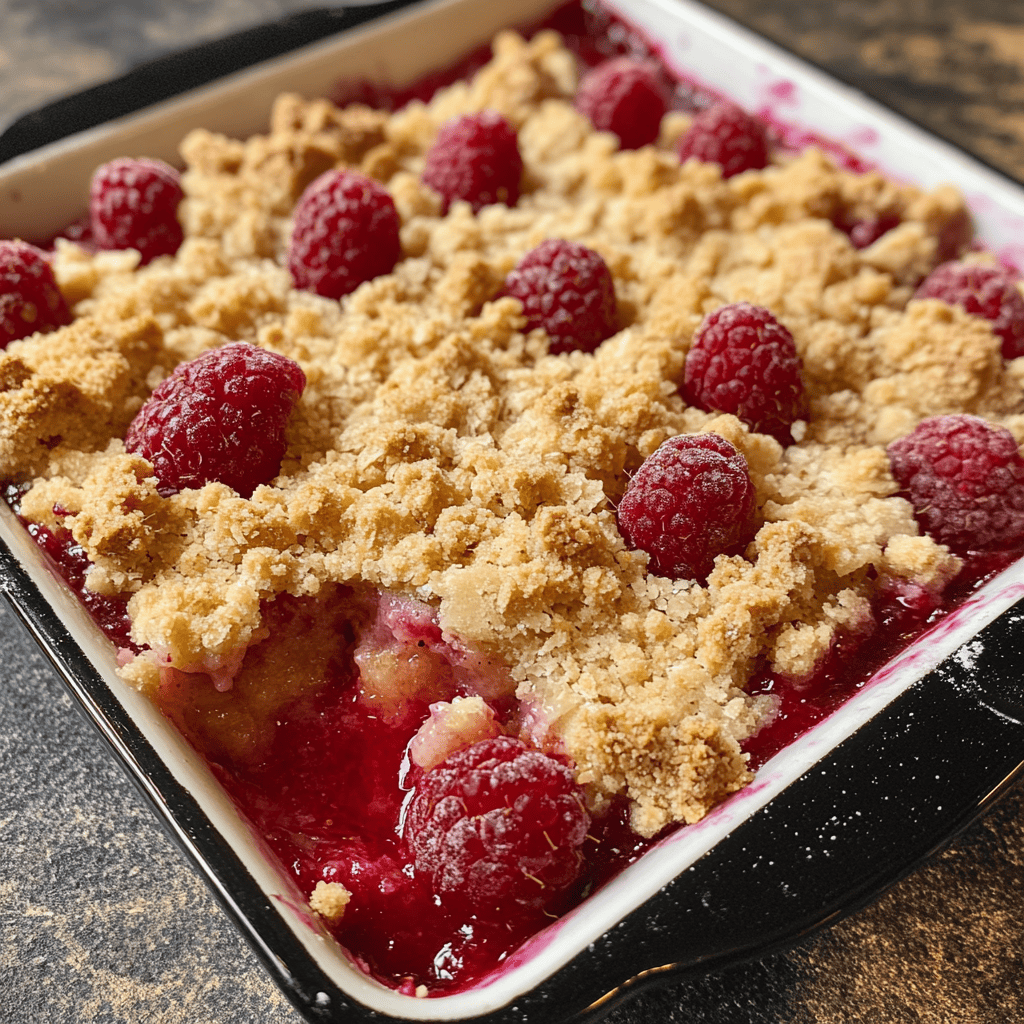
- Bake in the preheated oven for 30-35 minutes, until the filling is bubbling around the edges and the topping is golden brown.
- If the topping begins to brown too quickly, loosely cover the dish with aluminum foil.
5. Cool and Serve
- Remove the Raspberry Crumble from the oven and place it on a wire rack.
- Allow it to cool for at least 15-20 minutes before serving. This cooling period allows the filling to set slightly, making it easier to serve.
- Serve warm with vanilla ice cream, whipped cream, or a dollop of Greek yogurt.
My Raspberry Crumble Journey
The first time I made Raspberry Crumble, I was facing a mountain of raspberries from an overzealous picking session at a local farm. While my original plan had been jam, the summer heat made the prospect of standing over a boiling water canner less than appealing. This dessert became my delicious plan B.
I remember being surprised by how quickly it came together—no rolling out dough or precise measurements needed. When the bubbling, fragrant dessert emerged from the oven, my kitchen filled with an aroma so delicious that my neighbor actually texted to ask what I was baking!
What started as a simple solution to berry overabundance has become a signature dish that follows me to potlucks, holiday gatherings, and impromptu dinner invitations. The look of delight when guests take their first bite—the contrast of warm, jammy berries against cold ice cream and crunchy topping—makes this humble dessert a reliable crowd-pleaser.
Tips for Raspberry Crumble Success
Through countless batches of Raspberry Crumble, I’ve gathered these helpful tips to ensure perfect results every time:
- Don’t overmix the berries: Raspberries are delicate. Gentle folding preserves some of their structure, giving your crumble varied texture rather than a uniform puree.
- Cold butter is crucial: For the best crumble texture, your butter must be cold when incorporated into the topping mixture. If your kitchen is warm, consider chilling the prepared topping for 10 minutes before sprinkling it over the fruit.
- The right sugar balance: If your raspberries are particularly tart, add the full 4 tablespoons of sugar to the filling. For sweeter berries or if you prefer a more tart dessert, use only 3 tablespoons.
- Let it bubble: Don’t rush the baking process. A properly cooked filling should bubble around the edges, which ensures the cornstarch is fully activated and will thicken properly as it cools.
- Rest before serving: That 15-minute cooling period isn’t just to prevent burnt tongues—it allows the filling to set up properly for the perfect spoonable consistency.
Variations to Try
The beauty of Raspberry Crumble lies in its adaptability. Here are some delicious variations to explore:
Mixed Berry Crumble
Substitute half the raspberries with blackberries, blueberries, or sliced strawberries for a colorful mixed berry version.
Raspberry-Peach Crumble
Add 2 cups of sliced, peeled peaches to the raspberry mixture for a delightful summer combination.
Nutty Raspberry Crumble
Enhance the topping with ½ cup of sliced almonds or chopped pecans. The nuts add wonderful texture and a complementary flavor to the raspberries.
Coconut Raspberry Crumble
Add ⅓ cup of shredded coconut to the crumble topping for a tropical twist.
Gluten-Free Raspberry Crumble
Substitute the all-purpose flour with a gluten-free flour blend and ensure your oats are certified gluten-free.
Vegan Raspberry Crumble
Replace the butter with coconut oil or a plant-based butter alternative. The coconut oil adds a subtle complementary flavor to the raspberries.
Make Ahead and Storage Tips
Raspberry Crumble is wonderfully accommodating for busy schedules and entertaining:
Make Ahead Options:
- Prepare the components separately: The crumble topping can be made up to 3 days ahead and stored in an airtight container in the refrigerator. The raspberry filling can be assembled and refrigerated separately for up to 24 hours.
- Assemble but don’t bake: The entire dish can be assembled up to 8 hours before baking. Cover with plastic wrap and refrigerate, then bake as directed (you may need to add 5-10 minutes to the baking time).
- Freeze for future use: Assemble the unbaked crumble in a freezer-safe dish, cover tightly, and freeze for up to 3 months. Thaw overnight in the refrigerator before baking.
Storage Tips:
- Room temperature: The baked crumble can remain at room temperature, covered loosely with foil, for up to 24 hours.
- Refrigerator: Cover and refrigerate leftover crumble for up to 5 days.
- Freezer: Baked crumble can be frozen for up to 3 months. Thaw overnight in the refrigerator and reheat in a 350°F oven until warmed through.
Reheating:
- Individual portions: Microwave for 30-45 seconds until warmed through.
- Whole crumble: Cover with foil and reheat in a 350°F oven for 15-20 minutes until heated through.
Serving Suggestions
Elevate your Raspberry Crumble with these serving ideas:
- Classic à la mode: Serve warm with a scoop of vanilla ice cream for the perfect hot-cold contrast.
- Breakfast crumble: Top with Greek yogurt and a drizzle of honey for a special breakfast treat.
- Whipped cream clouds: Dollop freshly whipped cream on top, perhaps with a tiny hint of almond extract in the cream.
- Sauce enhancement: Drizzle with a simple raspberry sauce made from pureed raspberries and a touch of honey.
- Dinner party elegance: Serve individual portions in ramekins with a sprig of mint and a few fresh raspberries.
Raspberry Crumble: A Simple Yet Spectacular Summer Dessert
- Total Time: 50 minutes
- Yield: 6–8 servings 1x
Description
This Raspberry Crumble transforms fresh or frozen raspberries into a warm, jammy filling topped with a golden, buttery oat crumble. It’s an easy, crowd-pleasing dessert that highlights the sweet-tart beauty of summer berries and comes together in under an hour with minimal fuss.
Ingredients
For the raspberry filling:
-
4 cups fresh raspberries (about 2 pints)
-
3–4 tablespoons granulated sugar
-
2 tablespoons cornstarch
-
1 tablespoon fresh lemon juice
-
1 teaspoon vanilla extract
-
Pinch of salt
-
Optional: 1 tablespoon lemon zest
For the crumble topping:
-
1 cup all-purpose flour
-
⅔ cup old-fashioned rolled oats
-
⅔ cup packed light brown sugar
-
½ cup cold unsalted butter, cubed
-
½ teaspoon ground cinnamon
-
¼ teaspoon salt
-
Optional add-ins: ¼ cup chopped nuts or shredded coconut
For serving (optional):
-
Vanilla ice cream
-
Whipped cream
-
Greek yogurt
-
Fresh raspberries
-
Fresh mint leaves
Instructions
-
Preheat oven to 375°F (190°C). Grease a 9-inch square dish or pie plate.
-
Make filling: In a large bowl, gently toss raspberries with sugar, cornstarch, lemon juice, vanilla, and salt (plus zest if using). Let sit for 10 minutes. Transfer to baking dish.
-
Make topping: In a bowl, mix flour, oats, brown sugar, cinnamon, and salt. Add butter and use fingertips or a pastry cutter to blend until crumbly. Fold in nuts or coconut if using.
-
Assemble: Sprinkle topping over fruit evenly. Place baking dish on a baking sheet.
-
Bake for 30–35 minutes, until golden and bubbly. Cover loosely with foil if browning too quickly.
-
Cool for 15–20 minutes before serving with optional toppings.
Notes
-
For a gluten-free version, use GF oats and flour.
-
Frozen berries work—no need to thaw.
-
Add lemon zest or chopped nuts for extra flavor and texture.
- Prep Time: 15 minutes
- Cook Time: 35 minutes
- Category: Desserts & Sweets
- Method: Baking
- Cuisine: American
Nutrition
- Serving Size: 1 portion (1/8 of recipe)
- Calories: 295
- Sugar: 19g
- Sodium: 85mg
- Fat: 14g
- Saturated Fat: 8g
- Unsaturated Fat: 8g
- Trans Fat: 0
- Carbohydrates: 40g
- Fiber: 5g
- Protein: 3g
- Cholesterol: 30mg
Keywords: raspberry crumble, easy raspberry dessert, summer berry recipes, fruit crisp, oat crumble, raspberry crisp
Can I use frozen raspberries?
Absolutely! No need to thaw them first; simply use them straight from the freezer. You may need to add an extra tablespoon of cornstarch as frozen berries tend to release more liquid.
Why is my raspberry filling runny?
Raspberries naturally contain a lot of water. Make sure you’re using the recommended amount of cornstarch and allowing the crumble to cool adequately before serving. Remember that the filling will continue to thicken as it cools.
Can I reduce the sugar in this recipe?
Yes, the sugar in both the filling and topping can be reduced by about 25% without significantly affecting the texture. If you prefer a more tart dessert, start by reducing the sugar in the filling.
How can I make the topping extra crunchy?
For maximum crunch, add 2-3 tablespoons of turbinado sugar (Sugar in the Raw) to the topping mixture before sprinkling it over the fruit.
Can I make this with other fruits?
Absolutely! The basic formula works beautifully with many fruits. Stone fruits like peaches, plums, and cherries are excellent alternatives or additions to the raspberries. Apples and pears work well in fall and winter versions.
Conclusion
Raspberry Crumble stands as a testament to the beauty of simplicity in dessert-making. Its humble ingredients transform into something truly extraordinary when combined with care and baked until golden and bubbling. Whether you’re serving it at a casual family dinner or a special celebration, this dessert carries the perfect balance of rustic charm and elegant flavor.
Next time you find yourself with an abundance of raspberries—or simply a craving for something sweet, tart, and comforting—remember this Raspberry Crumble recipe. In less than an hour, you can create a dessert that celebrates the natural perfection of summer berries while adding your own personal touch through the variations and serving suggestions that appeal to you most. From the first scoop, with its contrast of warm, jammy berries and crunchy topping, to the last crumb scraped from the dish, this dessert proves that the most memorable culinary experiences often come from the simplest recipes.


