
I can still remember my grandmother’s banana pudding, a dish so comforting it felt like a warm hug. It was always the star of every family gathering. Now, imagine taking that classic, beloved flavor and transforming it into something even more decadent and irresistible. Today, I’m sharing all my secrets for the most amazing Banana Pudding Cheesecake – Creamy & Indulgent you’ll ever make!
The Ultimate Banana Pudding Cheesecake Experience

Get ready, friends, because we’re about to embark on a culinary adventure that will tantalize your taste buds and impress everyone you share it with. This Banana Pudding Cheesecake is not just a dessert; it’s an experience. It combines the creamy richness of cheesecake with the comforting, nostalgic flavors of banana pudding, creating a symphony of textures and tastes that will leave you craving more. It’s truly a showstopper!
This recipe is more than just a list of ingredients and instructions. I’m going to guide you through each step, sharing tips and tricks I’ve learned over the years to ensure your cheesecake is a resounding success. I promise, even if you’re a beginner baker, you can absolutely nail this!
What Makes This Cheesecake So Special?
Several things set this Banana Pudding Cheesecake apart. First, it’s the perfect balance of flavors. The creamy, tangy cheesecake filling is perfectly complemented by the sweet, ripe bananas and the subtle hint of vanilla in the pudding layer. Second, it’s the texture. We’re talking about a smooth, velvety cheesecake filling, a soft, moist vanilla wafer crust, and slices of fresh banana, all working together in perfect harmony.
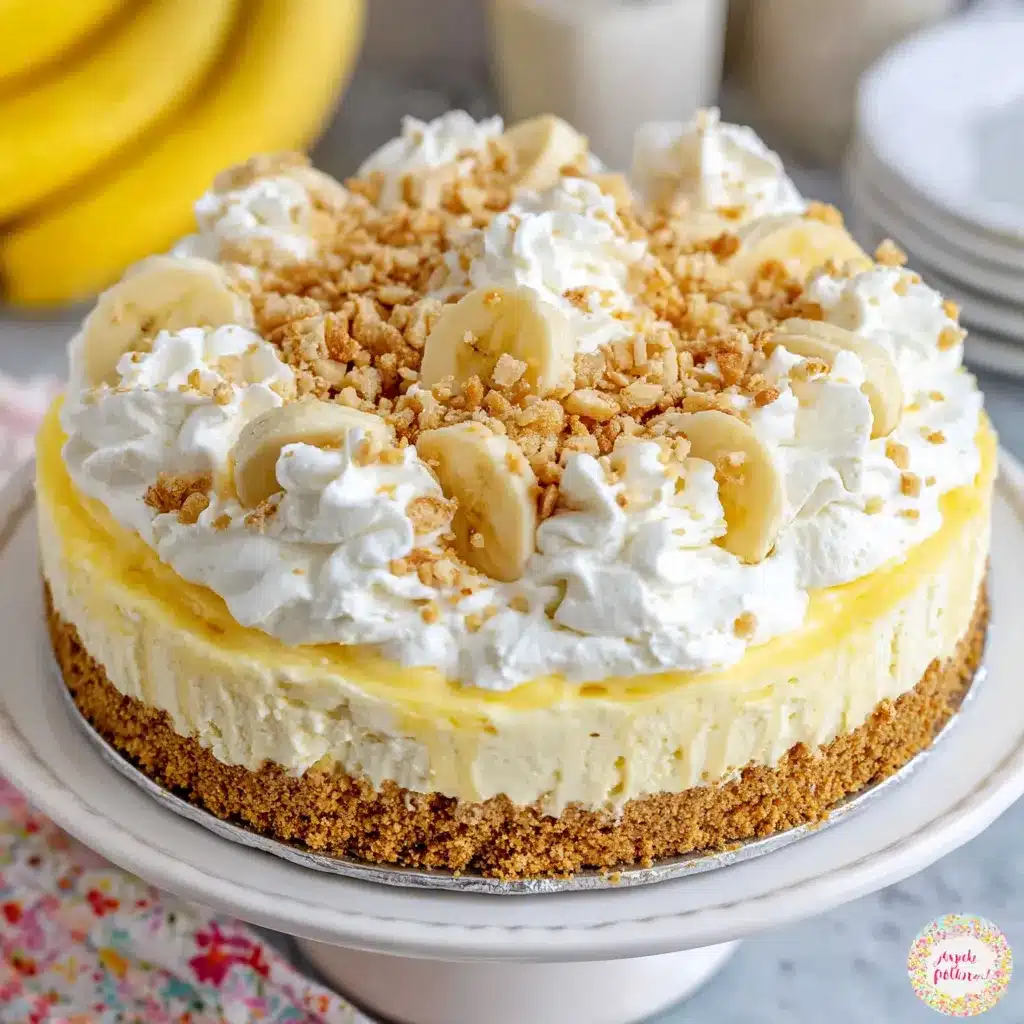
And finally, it’s the presentation. This cheesecake is beautiful! The layers of creamy filling, golden bananas, and crunchy wafers create a visually stunning dessert that’s sure to impress. It’s perfect for birthdays, holidays, or any special occasion where you want to wow your guests. If you love this, be sure to check out Mini Banana Pudding Cheesecakes for individual servings!
Ingredients You’ll Need
Let’s gather our ingredients. Don’t be intimidated by the list; most of these are pantry staples!
For the Vanilla Wafer Crust:
- 1 1/2 cups vanilla wafer crumbs (about 45 wafers)
- 5 tablespoons unsalted butter, melted
- 2 tablespoons granulated sugar
For the Cheesecake Filling:
- 32 ounces cream cheese, softened to room temperature
- 1 1/2 cups granulated sugar
- 1/4 cup sour cream
- 2 large eggs
- 1 teaspoon vanilla extract
- 1/4 teaspoon salt
For the Banana Pudding Layer:
- 1 (3.4 ounce) package instant vanilla pudding mix
- 1 1/2 cups milk
- 2 ripe bananas, sliced
For the Topping:
- Whipped cream (homemade or store-bought)
- Vanilla wafers, for garnish
- Banana slices, for garnish
Step-by-Step Instructions
Now for the fun part! Let’s get baking. I’ll walk you through each step to ensure your Banana Pudding Cheesecake is a masterpiece.
Step 1: Prepare the Vanilla Wafer Crust
- Preheat your oven to 350°F (175°C).
- In a food processor, pulse the vanilla wafers until they are finely crushed. You should have about 1 1/2 cups of crumbs.
- In a medium bowl, combine the vanilla wafer crumbs, melted butter, and granulated sugar. Mix well until the crumbs are evenly moistened.
- Press the crumb mixture firmly into the bottom of a 9-inch springform pan. Use the bottom of a measuring cup to create a smooth, even crust.
- Bake the crust for 8-10 minutes, or until lightly golden brown. This helps to set the crust and prevent it from becoming soggy.
- Remove the crust from the oven and let it cool completely while you prepare the cheesecake filling.
Step 2: Make the Cheesecake Filling
- In a large bowl, beat the softened cream cheese and granulated sugar together with an electric mixer on medium speed until smooth and creamy. This usually takes about 2-3 minutes. It’s crucial that your cream cheese is at room temperature to avoid lumps!
- Add the sour cream, eggs, vanilla extract, and salt to the cream cheese mixture. Beat on low speed until just combined. Be careful not to overmix, as this can cause the cheesecake to crack.
- Pour the cheesecake filling over the cooled vanilla wafer crust in the springform pan.
Step 3: Bake the Cheesecake
- Wrap the bottom of the springform pan tightly with aluminum foil. This will prevent water from seeping into the cheesecake during the water bath.
- Place the wrapped springform pan in a larger roasting pan. Pour hot water into the roasting pan until it reaches about halfway up the sides of the springform pan. This creates a water bath, which helps to bake the cheesecake evenly and prevent it from cracking.
- Bake in the preheated oven for 55-65 minutes, or until the edges of the cheesecake are set but the center still has a slight wobble.
- Turn off the oven and crack the oven door slightly. Let the cheesecake cool in the oven for 1 hour. This gradual cooling process helps to prevent cracking.
- Remove the cheesecake from the oven and the water bath. Let it cool completely at room temperature.
- Cover the cheesecake with plastic wrap and refrigerate for at least 6 hours, or preferably overnight. This allows the cheesecake to set completely and develop its flavor.
Step 4: Prepare the Banana Pudding Layer
- In a medium bowl, whisk together the instant vanilla pudding mix and milk until smooth.
- Let the pudding mixture stand for 5 minutes to thicken.
- Gently fold in the sliced bananas.
Step 5: Assemble the Banana Pudding Cheesecake
- Remove the cheesecake from the refrigerator and carefully remove it from the springform pan.
- Spread the banana pudding layer evenly over the top of the cheesecake.
Step 6: Decorate and Serve
- Decorate the cheesecake with whipped cream, vanilla wafers, and banana slices. Get creative and make it look beautiful!
- Slice and serve. Enjoy!
Success Tips for the Perfect Banana Pudding Cheesecake
Here are a few golden tips to ensure your Banana Pudding Cheesecake is a complete success:
- Use Room Temperature Ingredients: This is crucial for a smooth and creamy cheesecake filling. Make sure your cream cheese, eggs, and sour cream are all at room temperature.
- Don’t Overmix the Filling: Overmixing incorporates too much air into the batter, which can cause the cheesecake to crack during baking. Mix on low speed until just combined.
- Water Bath is Key: The water bath is essential for a moist and creamy cheesecake. Don’t skip this step!
- Cooling is Crucial: Allow the cheesecake to cool gradually in the oven and then in the refrigerator. This prevents cracking and allows the flavors to meld together.
- Banana Ripeness Matters: Use ripe but firm bananas for the banana pudding layer. Overripe bananas will become mushy and won’t hold their shape.
Variations and Adaptations
Want to put your own spin on this recipe? Here are a few ideas:
- Add a Caramel Swirl: Swirl a little caramel sauce into the cheesecake filling before baking for a touch of extra sweetness.
- Chocolate Wafer Crust: Substitute chocolate wafers for vanilla wafers in the crust for a richer flavor.
- Peanut Butter Drizzle: Drizzle peanut butter over the finished cheesecake for a delicious combination of flavors.
- Try different pudding flavors! Butterscotch or even banana cream pudding could be interesting!
- Why not add some STRAWBERRY BARS as a side, the freshness of the berries complements the banana flavor well.
Make-Ahead and Storage Instructions
This Banana Pudding Cheesecake is perfect for making ahead of time. You can bake the cheesecake up to 2 days in advance and store it in the refrigerator, tightly wrapped. The banana pudding layer is best added just before serving to prevent the bananas from browning. Leftover cheesecake can be stored in the refrigerator for up to 3 days.
While I wouldn’t recommend freezing the entire finished cheesecake (the bananas can get a bit mushy upon thawing), you can freeze the plain baked cheesecake (before adding the banana pudding layer). Wrap it tightly in plastic wrap and then in foil, and it will keep in the freezer for up to 2 months. Thaw it in the refrigerator overnight before adding the banana pudding layer and serving.
Serving Suggestions
This Banana Pudding Cheesecake is delicious on its own, but here are a few ideas to elevate your serving experience:
- Serve with a scoop of vanilla ice cream. The cold ice cream complements the creamy cheesecake perfectly.
- Drizzle with chocolate sauce or caramel sauce. This adds an extra touch of sweetness and decadence.
- Garnish with fresh berries. Strawberries or blueberries would be a beautiful and delicious addition. Similar to Strawberry Shortcake Cheesecake
- Add a bit of an element of surprise with Oreo Dirt Cake crumbles!
Final Thoughts
There you have it! My recipe for the most incredibly delicious Banana Pudding Cheesecake – Creamy & Indulgent you’ll ever make. I know it seems like a lot of steps, but trust me, it’s worth every minute. The combination of flavors and textures is simply divine, and the presentation is sure to impress. So, gather your ingredients, put on some music, and get ready to bake a cheesecake that will become a family favorite for years to come. I know you can do it, and I can’t wait to hear how it turns out!
What makes this Banana Pudding Cheesecake so special compared to other cheesecakes?
This cheesecake stands out due to its perfect balance of flavors, combining creamy cheesecake, sweet bananas, and vanilla pudding. The texture is also key, featuring a smooth filling, a moist vanilla wafer crust, and fresh banana slices. Finally, the layered presentation makes it a visually stunning dessert.
Can I make this cheesecake ahead of time?
Yes, you can bake the cheesecake up to 2 days in advance and store it in the refrigerator, tightly wrapped. However, it’s best to add the banana pudding layer just before serving to prevent the bananas from browning.
Is a water bath really necessary for baking this cheesecake?
Yes, the water bath is essential for a moist and creamy cheesecake. It helps to bake the cheesecake evenly and prevent it from cracking.
Can I freeze this Banana Pudding Cheesecake?
While freezing the entire finished cheesecake is not recommended due to the bananas, you can freeze the plain baked cheesecake (before adding the banana pudding layer). Wrap it tightly in plastic wrap and then in foil, and it will keep in the freezer for up to 2 months. Thaw it in the refrigerator overnight before adding the banana pudding layer and serving.
Banana Pudding Cheesecake Bliss
Ingredients
Equipment
Method
- Preheat your oven to 350°F (175°C).
- In a food processor, pulse the vanilla wafers until they are finely crushed. You should have about 1 1/2 cups of crumbs.
- In a medium bowl, combine the vanilla wafer crumbs, melted butter, and granulated sugar. Mix well until the crumbs are evenly moistened.
- Press the crumb mixture firmly into the bottom of a 9-inch springform pan. Use the bottom of a measuring cup to create a smooth, even crust.
- Bake the crust for 8-10 minutes, or until lightly golden brown.
- Remove the crust from the oven and let it cool completely while you prepare the cheesecake filling.
- In a large bowl, beat the softened cream cheese and granulated sugar together with an electric mixer on medium speed until smooth and creamy (2-3 minutes).
- Add the sour cream, eggs, vanilla extract, and salt to the cream cheese mixture. Beat on low speed until just combined. Be careful not to overmix.
- Pour the cheesecake filling over the cooled vanilla wafer crust in the springform pan.
- Wrap the bottom of the springform pan tightly with aluminum foil.
- Place the wrapped springform pan in a larger roasting pan. Pour hot water into the roasting pan until it reaches about halfway up the sides of the springform pan.
- Bake in the preheated oven for 55-65 minutes, or until the edges of the cheesecake are set but the center still has a slight wobble.
- Turn off the oven and crack the oven door slightly. Let the cheesecake cool in the oven for 1 hour.
- Remove the cheesecake from the oven and the water bath. Let it cool completely at room temperature.
- Cover the cheesecake with plastic wrap and refrigerate for at least 6 hours, or preferably overnight.
- In a medium bowl, whisk together the instant vanilla pudding mix and milk until smooth.
- Let the pudding mixture stand for 5 minutes to thicken.
- Gently fold in the sliced bananas.
- Remove the cheesecake from the refrigerator and carefully remove it from the springform pan.
- Spread the banana pudding layer evenly over the top of the cheesecake.
- Decorate the cheesecake with whipped cream, vanilla wafers, and banana slices.
- Slice and serve. Enjoy!


