
Ingredients: The Dream Team

For the Chicken:
- 1.5 lbs boneless, skinless chicken thighs, cut into 1-inch pieces
- 1/4 cup cornstarch
- 1/4 teaspoon salt
- 1/4 teaspoon black pepper
- 1 tablespoon vegetable oil
For the Honey Garlic Sauce:
- 1/4 cup honey
- 1/4 cup soy sauce
- 2 tablespoons rice vinegar
- 2 tablespoons ketchup
- 4 cloves garlic, minced
- 1 teaspoon ginger, grated
- 1/2 teaspoon red pepper flakes (optional, for heat)
- 1 tablespoon cornstarch
- 2 tablespoons water
For Garnish (Optional):
- Sesame seeds
- Chopped green onions
Step-by-Step Instructions: Let’s Get Cooking!
Step 1: Prep the Chicken
- In a large bowl, toss the chicken pieces with cornstarch, salt, and pepper until evenly coated. This coating is KEY to getting that crispy texture we all crave!
Step 2: Sear the Chicken
- Heat the vegetable oil in a large skillet or wok over medium-high heat.
- Add the chicken in a single layer (you may need to do this in batches to avoid overcrowding the pan). Don’t move the chicken for the first few minutes, allowing it to develop a nice golden-brown sear.
- Cook the chicken for about 5-7 minutes, flipping occasionally, until cooked through and nicely browned on all sides. The internal temperature should reach 165°F (74°C).
- Remove the chicken from the skillet and set aside.
Step 3: Make the Honey Garlic Sauce
- In a medium bowl, whisk together the honey, soy sauce, rice vinegar, ketchup, minced garlic, grated ginger, and red pepper flakes (if using).
- In a small bowl, whisk together the cornstarch and water to create a slurry. This will help thicken the sauce.
Step 4: Combine and Simmer
- Pour the honey garlic sauce into the same skillet you used to cook the chicken.
- Bring the sauce to a simmer over medium heat, stirring constantly.
- Pour in the cornstarch slurry and continue to stir until the sauce thickens, about 1-2 minutes. The sauce should be glossy and able to coat the back of a spoon.
Step 5: Coat the Chicken
- Add the cooked chicken back into the skillet with the honey garlic sauce.
- Toss the chicken to ensure it’s completely coated in the sauce.
- Cook for another 2-3 minutes, allowing the sauce to further caramelize and cling to the chicken. This is where the magic happens!
Step 6: Serve and Enjoy!
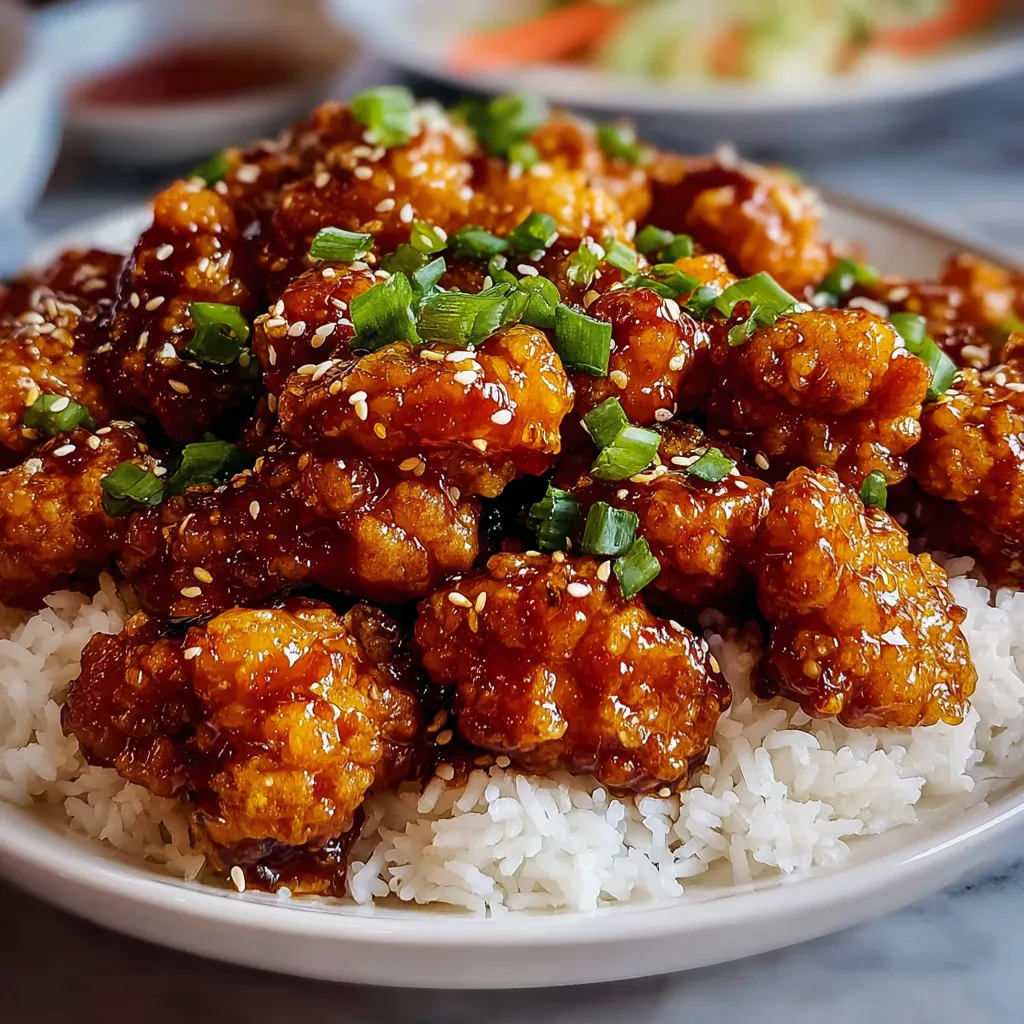
- Garnish with sesame seeds and chopped green onions, if desired.
- Serve the Chinese Honey Garlic Chicken immediately over rice, noodles, or your favorite vegetables.
Pro Tips for Honey Garlic Chicken Perfection
Don’t overcrowd the pan!
This is crucial for achieving that perfect sear on the chicken. Overcrowding lowers the pan temperature and steams the chicken instead of browning it. Work in batches if necessary.
Adjust the sweetness and spice.
Taste the sauce as it simmers and adjust the honey or red pepper flakes to your liking. Want it sweeter? Add more honey. Want a kick? Add more red pepper flakes!
Use fresh garlic and ginger.
While garlic powder and ground ginger can work in a pinch, fresh garlic and ginger will provide a much more vibrant and aromatic flavor. Trust me, it makes a difference!
Don’t overcook the chicken.
Overcooked chicken will be dry and tough. Use a meat thermometer to ensure it reaches 165°F (74°C) and remove it from the pan immediately once it’s cooked through.
Serving Suggestions: Complete the Meal
This Chinese Honey Garlic Chicken is incredibly versatile! Here are some of my favorite ways to serve it:
- Over Rice: A classic pairing! Serve it with fluffy white rice, brown rice, or even fried rice.
- With Noodles: Toss it with lo mein noodles, chow mein noodles, or even simple spaghetti.
- With Vegetables: Serve it alongside steamed broccoli, green beans, or a colorful stir-fry.
- As Lettuce Wraps: Serve the chicken in crisp lettuce cups for a lighter, healthier option.
Variations: Make It Your Own!
Feel free to experiment with different ingredients and flavors to create your own unique twist on this recipe:
- Honey Garlic Shrimp: Substitute the chicken with shrimp for a delicious seafood version. Be sure to check out my Honey Garlic Shrimp recipe too!
- Honey Garlic Sausage: You can also swap the chicken for sausages. I know you will enjoy this Honey Garlic Sausage recipe!
- Pineapple Chicken: Add chunks of pineapple to the sauce for a tropical twist.
- Orange Chicken: Replace the rice vinegar with orange juice and add a bit of orange zest for a citrusy flavor.
Why This Recipe Works: The Science of Deliciousness
This recipe isn’t just tasty; it’s designed for success! The cornstarch coating on the chicken creates a crispy exterior that perfectly complements the sticky, flavorful sauce. The combination of honey, soy sauce, rice vinegar, and garlic creates a harmonious balance of sweet, savory, and tangy flavors that will tantalize your taste buds. And the best part? It’s quick and easy to make, perfect for busy weeknights.
Other Chicken Recipes You’ll Love
If you’re a chicken lover like me, you’re always on the lookout for new and exciting recipes! Here are a few more of my favorites:
- Garlic Parmesan Potato Chicken: A creamy, cheesy delight with crispy potatoes.
- Ranch Garlic Chicken Skewers: Perfect for grilling season, these skewers are packed with flavor.
- Butter Chicken: A classic Indian dish that’s rich, creamy, and incredibly satisfying.
- Garlic Parmesan Chicken Pasta: Simple, delicious, and a crowd-pleaser.
Storage and Reheating Instructions
Leftover Chinese Honey Garlic Chicken can be stored in an airtight container in the refrigerator for up to 3-4 days. To reheat, simply microwave it for a few minutes until heated through, or reheat it in a skillet over medium heat, adding a splash of water or broth if needed to prevent it from drying out. The flavors actually meld together even more overnight, making it even better the next day!
Final Thoughts
So there you have it! A foolproof recipe for Chinese Honey Garlic Chicken that’s guaranteed to impress. I truly believe that anyone can make this dish with confidence, and I can’t wait for you to try it. Happy cooking, my friend, and enjoy!
What makes the chicken crispy in this recipe?
The cornstarch coating on the chicken is key to getting a crispy texture when searing it in the pan.
How should I adjust the sauce to suit my taste preferences?
Taste the sauce as it simmers and adjust the honey for sweetness or red pepper flakes for spice. Add more of either ingredient to reach your desired flavor profile.
What are some serving suggestions for the Honey Garlic Chicken?
This dish is versatile and can be served over rice, with noodles, alongside vegetables, or even as lettuce wraps.
How long can I store leftover Honey Garlic Chicken?
Leftovers can be stored in an airtight container in the refrigerator for up to 3-4 days.
Best Chinese Honey Garlic Chicken
Ingredients
Equipment
Method
- In a large bowl, toss the chicken pieces with cornstarch, salt, and pepper until evenly coated.
- Heat the vegetable oil in a large skillet or wok over medium-high heat.
- Add the chicken in a single layer (you may need to do this in batches). Cook for 5-7 minutes, flipping occasionally, until cooked through and browned on all sides. The internal temperature should reach 165°F (74°C). Remove the chicken from the skillet and set aside.
- In a medium bowl, whisk together the honey, soy sauce, rice vinegar, ketchup, minced garlic, grated ginger, and red pepper flakes (if using).
- In a small bowl, whisk together the cornstarch and water to create a slurry.
- Pour the honey garlic sauce into the same skillet you used to cook the chicken.
- Bring the sauce to a simmer over medium heat, stirring constantly.
- Pour in the cornstarch slurry and continue to stir until the sauce thickens, about 1-2 minutes.
- Add the cooked chicken back into the skillet with the honey garlic sauce.
- Toss the chicken to ensure it’s completely coated in the sauce.
- Cook for another 2-3 minutes, allowing the sauce to further caramelize and cling to the chicken.
- Garnish with sesame seeds and chopped green onions, if desired.
- Serve immediately over rice, noodles, or your favorite vegetables.


