
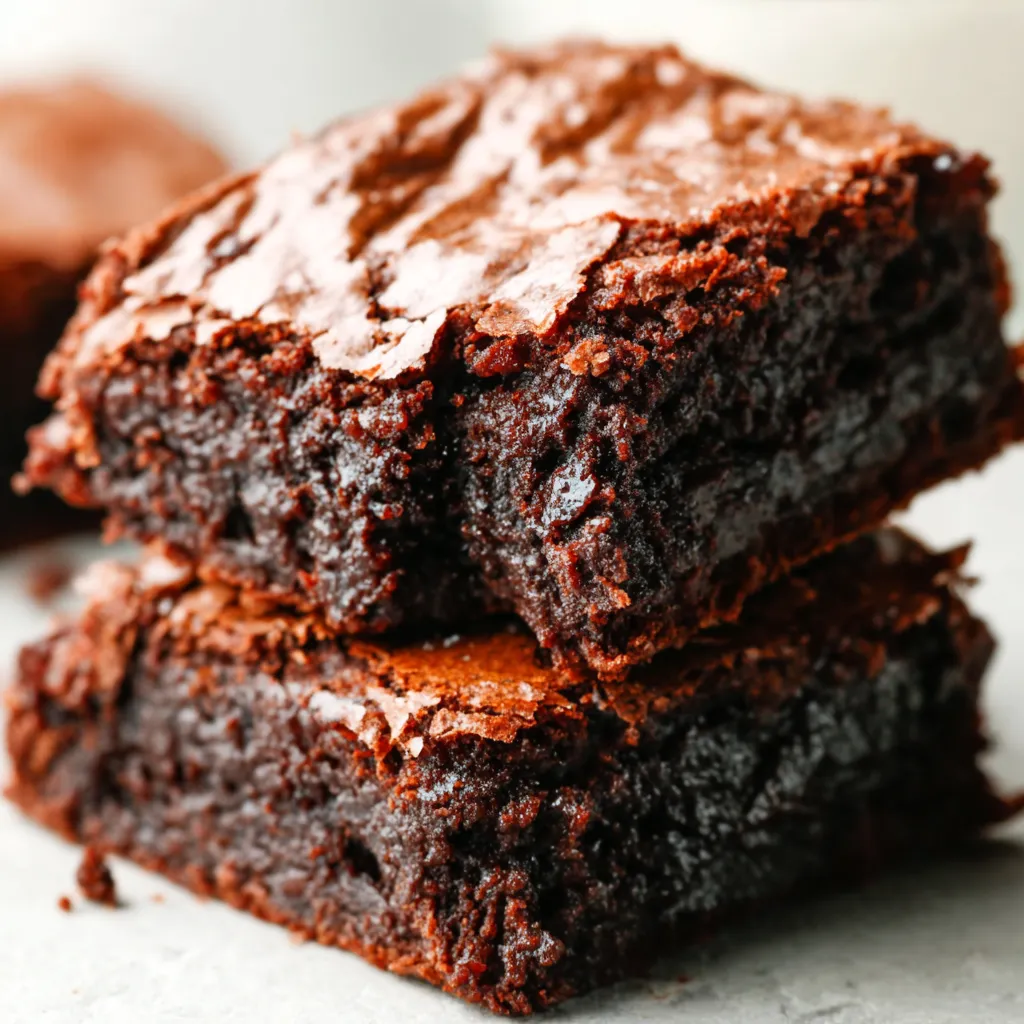
Achieving that coveted, paper-thin crackly top while maintaining a center as dense as fudge relies entirely on the way your sourdough discard emulsifies with melted chocolate and butter rather than just acting as a filler.
While most bakers view sourdough discard as a byproduct to be hidden, in this recipe, it is the primary architectural element that creates a sophisticated depth of flavor and a superior, chewy structure.
The mild acidity in the discard reacts beautifully with the sugars and fats, breaking down the gluten just enough to ensure the brownie is never tough, but always decadently rich.
The Sourdough Discard Brownies Difference
- The Acidic Edge: The natural lactic acid in the sourdough discard cuts through the intense sweetness of the chocolate, creating a balanced profile that keeps you reaching for another piece.
- Emulsification Mastery: Sourdough starter acts as a natural emulsifier, binding the fats and liquids more effectively than flour alone, resulting in a glossy, uniform crumb.
- Texture Engineering: By using discard, we introduce moisture and fermentation notes that produce a “fudgy” result that is far superior to standard cocoa-based recipes.
The Building Blocks
When we talk about making the best brownies of your life, the quality of your ingredients is the hill we are going to die on.
Because we are using sourdough discard, which introduces its own hydration and acidity, every other component must be measured with precision to ensure the fat-to-flour ratio remains perfect.
- Unsalted Butter: (Provides the fat base and a creamy mouthfeel without adding extra saltiness).
- High-Quality Dark Chocolate (60-70% cacao): (Melting real chocolate into the batter provides the “fudge” factor that cocoa powder alone cannot achieve).
- Granulated Sugar: (Essential for creating that shiny, crackly meringue-like crust on top).
- Brown Sugar: (Adds moisture and a hint of molasses for extra chewiness).
- Sourdough Discard: (The secret weapon for moisture, tang, and structural integrity).
- Large Eggs: (The binding agent that provides lift and richness).
- Dutch-Processed Cocoa Powder: (Provides a deep, dark color and a smooth chocolate flavor that isn’t too acidic).
- All-Purpose Flour: (Just enough to provide structure without making the brownies cakey).
- Sea Salt: (Crucial for heightening the chocolate notes and balancing the sugars).
- Vanilla Bean Paste or Extract: (Adds an aromatic layer that rounds out the fermentation notes of the sourdough).
Pantry Substitutions
- Butter Alternative: You can use browned butter for a nuttier flavor, or a high-quality vegan butter stick if you are avoiding dairy.
- Sugar Swaps: If you run out of brown sugar, you can use all granulated sugar with a tablespoon of molasses, though the texture will be slightly less moist.
- Chocolate Variations: Semi-sweet chocolate chips can be used in a pinch, but reduce the added sugar slightly to compensate for the higher sugar content in the chips.
- Flour Options: A 1-to-1 gluten-free flour blend works surprisingly well here because the sourdough discard already provides so much moisture and binding power.
- The Discard: If your starter is very fresh (active), the brownies will rise slightly more; if it is old “discard,” the tang will be more pronounced.
Level Up This Recipe

If you want to take these from “best ever” to “world-class,” consider browning your butter before mixing it with the chocolate.
The toasted milk solids in brown butter harmonize with the fermented notes of the sourdough to create a flavor profile that tastes like high-end artisanal chocolate.
Another chef’s secret is to add a teaspoon of espresso powder to the dry ingredients; it won’t make the brownies taste like coffee, but it will make the chocolate taste “more like chocolate.”
For those who love a bit of fruitiness, you might consider how these techniques apply to Fudgy Chocolate Covered Strawberry Brownies, where the fruit adds a fresh dimension.
Finally, don’t be afraid to fold in toasted walnuts or pecans for a textural contrast that breaks up the dense, fudgy interior.
Mastering Sourdough Discard Brownies
The process is as much about the “how” as it is about the “what,” so take your time with the mixing stages.
Step 1: The Melt and Mingle
Preheat your oven to 350°F (175°C) and line an 8×8 inch baking pan with parchment paper, leaving an overhang on the sides for easy removal.In a heat-proof bowl over a pot of simmering water (a double boiler), melt your butter and chopped dark chocolate together until completely smooth and glossy.
Remove from the heat and let it cool for about five minutes so you don’t scramble the eggs in the next step.
Step 2: The Aeration Phase
In a separate large bowl, whisk the eggs, granulated sugar, and brown sugar vigorously for at least 3 to 5 minutes.You are looking for the “ribbon stage” where the mixture becomes pale, thick, and falls off the whisk in ribbons—this is the secret to the crackly top.
While these are unique, the technique is similar to what you would use for a classic Fudgy Brownies recipe.
Step 3: Integrating the Sourdough
Gently whisk the cooled chocolate and butter mixture into the egg and sugar mixture until fully combined.Fold in your sourdough discard and vanilla extract, stirring until no white streaks of starter remain in the dark chocolate batter.
If you enjoy this hybrid texture, you might also find interest in Fudgy Brookies, which combine two dessert worlds.
Step 4: The Dry Fold
Sift the cocoa powder, flour, and salt directly over the wet ingredients to ensure there are no clumps.Using a rubber spatula, gently fold the dry ingredients into the wet ones until just combined—over-mixing at this stage will develop too much gluten and make the brownies tough.
The batter should be thick, dark, and look incredibly decadent at this point.
Step 5: The Bake
Pour the batter into your prepared pan and smooth the top with your spatula, then sprinkle a bit of extra sea salt over the surface if you like.Bake for 25 to 30 minutes, or until the edges are set and a toothpick inserted into the center comes out with a few moist crumbs attached.
Do not over-bake; sourdough discard brownies continue to set as they cool, and an over-baked brownie is a dry brownie.
Avoid These Pitfalls
Complete the Menu
Once these brownies have cooled and you’ve managed to resist eating the whole pan, it’s time to think about how to serve them.
A cold glass of whole milk is the traditional choice, but the complexity of the sourdough also pairs beautifully with a sharp espresso or a glass of red wine like a Cabernet Sauvignon.
If you are serving these for a dinner party, a dollop of crème fraîche or mascarpone whipped cream can highlight the tang of the sourdough perfectly.
For a fruit-forward spread, you could serve these alongside Roasted Cherry Brownies or Fudgy Strawberry Brownies for a variety of chocolate experiences.
If you are looking for something slightly lighter but still chocolatey, these are a great companion to Chocolate Zucchini Brownies for a balanced dessert table.
Remember that these brownies actually taste better the next day, as the flavors of the sourdough and chocolate continue to meld and deepen over time.
You can store them in an airtight container at room temperature for up to four days, or freeze them for up to three months for a quick chocolate fix whenever the craving strikes.
The density of these brownies makes them particularly good candidates for being served chilled straight from the refrigerator, which enhances their chewy, fudge-like quality.
Whatever way you choose to serve them, the addition of sourdough discard ensures that they will be a conversation starter and a permanent fixture in your baking rotation.
Did you change any ingredients? Let me know in the comments how you made this recipe your own!
What specific role does the sourdough discard play in this brownie recipe?
Beyond adding flavor, the sourdough discard acts as a natural emulsifier and primary architectural element. Its natural acidity reacts with sugars and fats to ensure a fudgy, chewy structure while breaking down gluten to prevent the brownies from becoming tough.
How can I ensure my brownies have a shiny, crackly top?
To achieve the iconic crackly top, you must whisk the eggs and granulated sugar vigorously for 3 to 5 minutes until the mixture reaches the ‘ribbon stage’—where it becomes pale, thick, and falls off the whisk in ribbons.
Can I use sourdough discard straight from the refrigerator?
No, you should always bring your discard to room temperature before mixing. Using cold discard can cause the melted chocolate and butter to seize up, resulting in a lumpy batter.
How should these brownies be stored and how long do they stay fresh?
You can store these brownies in an airtight container at room temperature for up to four days, or freeze them for up to three months. They often taste better the next day as the sourdough and chocolate flavors continue to meld and deepen.
Best Easy Sourdough Discard Brownies
Ingredients
Equipment
Method
- Preheat your oven to 350°F (175°C) and line an 8×8 inch baking pan with parchment paper, leaving an overhang on the sides for easy removal.
- In a heat-proof bowl set over a pot of simmering water (double boiler), melt the butter and chopped dark chocolate together until completely smooth and glossy.
- Remove the chocolate mixture from the heat and let it cool for about five minutes to prevent scrambling the eggs.
- In a separate large bowl, whisk the eggs, granulated sugar, and brown sugar vigorously for 3 to 5 minutes until the mixture reaches the ‘ribbon stage’ (pale, thick, and falling in ribbons).
- Gently whisk the cooled chocolate and butter mixture into the egg and sugar mixture until fully combined.
- Fold in the room-temperature sourdough discard and vanilla extract, stirring until no white streaks of starter remain.
- Sift the cocoa powder, flour, and sea salt directly over the wet ingredients to ensure there are no clumps.
- Using a rubber spatula, gently fold the dry ingredients into the wet ones until just combined, being careful not to over-mix and develop too much gluten.
- Pour the batter into the prepared pan, smooth the top with a spatula, and sprinkle a bit of extra sea salt over the surface.
- Bake for 25 to 30 minutes, or until the edges are set and a toothpick inserted into the center comes out with a few moist crumbs attached.
- Allow the brownies to cool completely in the pan, ideally for 2 hours, to allow the fudgy structure to set before slicing.


