
Achieving that legendary contrast between shattering-crisp breading and a silky, dashi-soaked egg center isn’t actually about the fry time—it’s all about the “two-pour” egg technique where you add the whites first and the yolks last to preserve that velvety, restaurant-quality texture.
If you’ve ever ordered a Katsudon at a bustling shop in Tokyo, you know that the magic lies in that specific moment when the crispy pork cutlet meets the steaming rice and a ribbon of barely-set egg.
It is a comforting hug in a bowl, balancing the salty-sweet notes of mirin and soy with the deep, oceanic umami of dashi broth.
Today, I’m going to walk you through every tiny detail to make sure your kitchen smells like a professional izakaya and your katsu stays crisp until the very last bite.
The Japanese Katsu Bowls Difference
- Double-Dredge Texture: We use a specific layering technique with flour and egg that creates a “glue” for the panko, ensuring the breading doesn’t slide off during the simmer.
- Dashi-Egg Synergy: By using a high-quality dashi base, the egg transforms into a savory custard that coats the rice rather than just being a scrambled topping.
- The Steam Control: This method focuses on resting the katsu properly so the residual heat finishes the cooking, leaving the meat incredibly juicy and tender.
Key Ingredients for Success
To get this right, we have to talk about your shopping bag because the quality of your breadcrumbs and your broth will make or break the final dish.
Think of these ingredients as the building blocks of your comfort; when they are right, the cooking process becomes effortless.
- Pork Loin or Chicken Breast: (For the classic bite; pork loin offers a richer fat cap while chicken is leaner).
- Panko Breadcrumbs: (Crucial for that light, airy crunch that doesn’t soak up too much oil).
- Dashi Stock: (The soul of the dish; provides the essential sea-salt umami profile).
- Mirin: (For a gentle sweetness and a beautiful sheen on the sauce).
- Japanese Soy Sauce: (Lighter and more nuanced than standard grocery store soy sauce).
- High-Quality Short-Grain Rice: (Starchy enough to hold the sauce without turning into mush).
- Fresh Eggs: (Ideally pasture-raised for those vibrant orange yolks that look stunning against the white rice).
- Neutral Oil: (Grapeseed or vegetable oil for a clean fry that doesn’t mask the flavor of the meat).
Swaps & Alternatives
- Tofu Katsu: If you’re looking for a vegetarian version, extra-firm tofu pressed well and breaded exactly like the pork works beautifully.
- Gluten-Free: Use crushed rice crackers or gluten-free panko and tamari instead of soy sauce to keep the dish safe for everyone.
- Air-Fryer Option: If you want to skip the deep fry, spray your panko-coated cutlets heavily with oil and air fry at 400°F until golden.
- Beef Katsu: For a luxury twist, use a thin-sliced ribeye or sirloin, keeping the frying time very short to maintain a medium-rare center.
- Quick Broth: If you don’t have dashi, a light chicken stock with a splash of fish sauce can mimic the umami in a pinch.
Level Up This Recipe

If you want to take your Japanese Katsu Bowls to a gourmet level, consider adding a thin layer of shredded mozzarella cheese between the katsu and the egg.
It melts into the breading and creates a cheese-pull experience that is incredibly popular in modern Japanese street food stalls.
Another chef’s secret is to toast your panko breadcrumbs in a dry pan with a little bit of butter before dredging; this ensures a deep golden color even if you are baking or air-frying the cutlets.
You can also infuse your simmering sauce with a few slices of fresh ginger or a star anise to add a layer of aromatic complexity that cuts through the richness of the fried meat.
The Method: Step-by-Step
Step 1: Preparing the Meat
Start by taking your pork loin or chicken and pounding it to an even thickness of about half an inch. This is the most important part because uneven meat leads to raw centers or burnt edges. Make small vertical cuts into the fat cap of the pork to prevent the meat from curling up like a bowl when it hits the hot oil.Step 2: The Breading Station
Set up three bowls: one with seasoned flour, one with beaten egg, and one with a generous amount of panko. Dredge the meat in flour and shake off the excess until it’s just a light dust. Dip it into the egg, then press it firmly into the panko, making sure every single crevice is covered in those crunchy flakes.Step 3: The Golden Fry
Heat your oil to 340°F (170°C)—if you don’t have a thermometer, drop a single panko crumb in; it should sizzle and rise immediately. Fry the cutlets for about 3-4 minutes per side until they are a deep, mahogany gold. Let them rest on a wire rack for at least 5 minutes; resting allows the juices to redistribute so they don’t leak out and make your rice soggy.Step 4: The Simmering Sauce
In a small, shallow pan (like an omelet pan), combine your dashi, soy sauce, mirin, and a pinch of sugar. Add thinly sliced onions and let them simmer until they become translucent and have soaked up all that brown liquid. Slice your rested katsu into thick strips and lay it directly on top of the bubbling onions.Step 5: The Two-Pour Egg Technique
Lightly beat two eggs, but don’t over-mix them; you want to see distinct streaks of white and yellow. Pour about two-thirds of the egg (mostly the whites) around the katsu and cover the pan with a lid for 30 seconds. Open the lid, pour the remaining yolks over the center, cover for another 15 seconds, and then immediately slide the whole thing over a bowl of hot rice.Where People Go Wrong
Complete the Menu
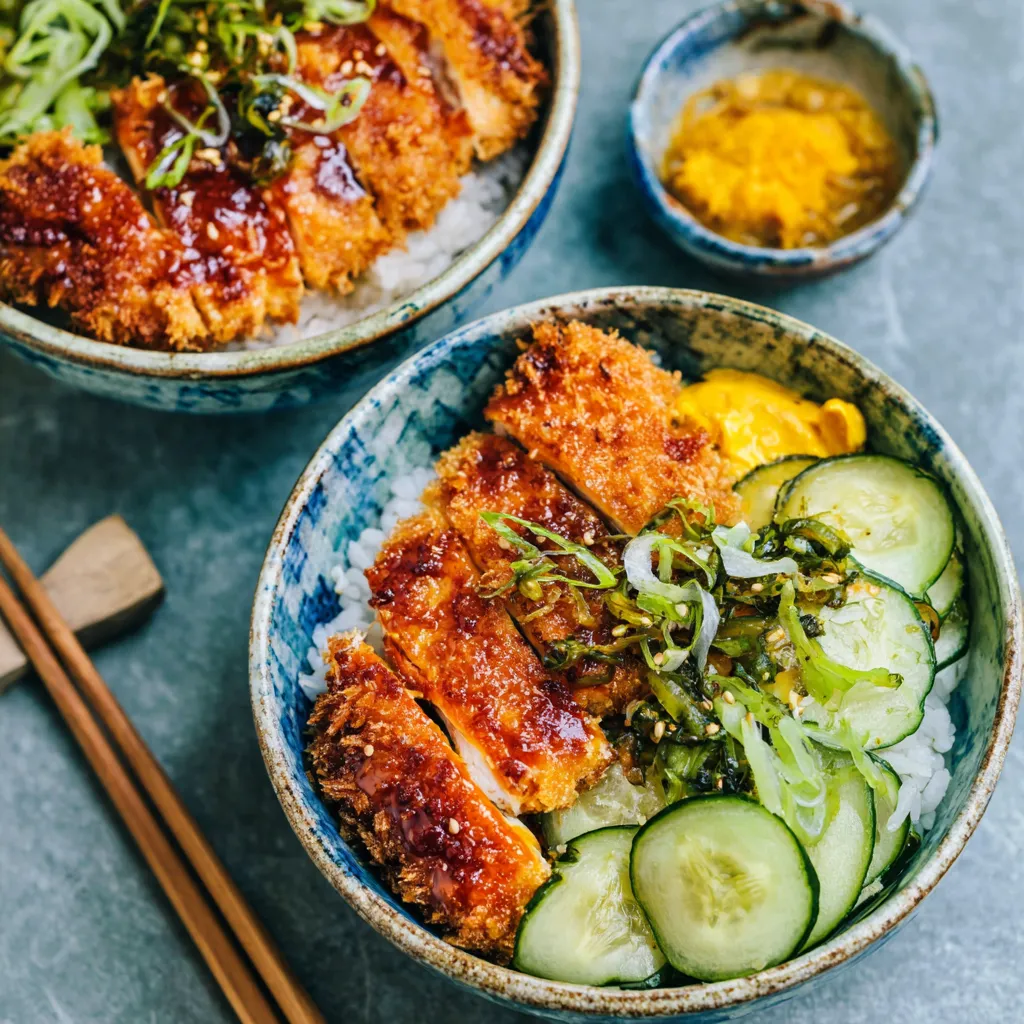
While the Katsu bowl is a meal in itself, it’s even better when surrounded by a few bright, acidic sides to balance the fried components.
I always recommend serving this with a side of Asian Cucumber salad; the vinegary crunch provides a necessary palate cleanser between bites of rich pork.
If you’re hosting a dinner party and want to go all out, start the meal with a light Gyoza Soup to warm up the appetite.
For those nights when you want the flavors of Japan but are looking for something a bit lighter, you might try an Egg Roll In A Bowl as a healthy alternative for your meal prep.
If you have family members who aren’t fans of breaded foods, you can easily pivot and make a Teriyaki Chicken Rice Bowl using the same short-grain rice you prepared for the katsu.
And for the noodle lovers in the house, a side of Saucy Ramen Noodles can turn a simple bowl into a full Japanese feast that rivals any
What is the ‘two-pour’ egg technique and why is it important?
The ‘two-pour’ technique involves adding the egg whites to the pan first and the yolks last. This preserves a velvety, restaurant-quality texture, ensuring the eggs remain soft and runny rather than turning into a solid, overcooked omelet.
How can I prevent the katsu breading from getting soggy or falling off?
To prevent the breading from sliding off, use a double-dredge layering technique with flour and egg to create a ‘glue’ for the panko. To maintain crispiness, let the katsu rest on a wire rack for 5 minutes after frying and never simmer it in the sauce for more than one minute.
What can I use as a substitute if I do not have dashi stock?
If you don’t have dashi, you can use a light chicken stock with a splash of fish sauce. This combination mimics the deep, oceanic umami profile essential to the soul of a Japanese katsu bowl.
How should I prepare the meat to ensure it cooks evenly?
Pound the pork or chicken to an even thickness of about half an inch to avoid raw centers or burnt edges. Additionally, make small vertical cuts into the fat cap of the pork to prevent the meat from curling up when it hits the hot oil.
Best Japanese Katsu Bowls (Katsudon)
Ingredients
Equipment
Method
- Pound the pork or chicken to an even thickness of 1/2 inch using a meat mallet. Make small vertical cuts into the fat cap of the pork to prevent curling during frying.
- Season the meat with salt and pepper. Set up a breading station: one bowl with flour, one with one beaten egg, and one with panko breadcrumbs.
- Dredge the meat in flour, shaking off the excess. Dip into the beaten egg, then press firmly into the panko until fully coated.
- Heat neutral oil to 340°F (170°C) in a heavy pan. Fry the cutlets for 3-4 minutes per side until they reach a deep mahogany gold.
- Remove the katsu and let it rest on a wire rack for at least 5 minutes to keep the breading crisp. Slice into thick strips.
- In a small shallow pan, combine dashi, soy sauce, mirin, and sugar. Add the sliced onions and simmer over medium heat until translucent.
- Place the sliced katsu strips directly on top of the simmering onions.
- Lightly beat the remaining two eggs, leaving visible streaks of whites and yolks. Pour two-thirds of the egg (mostly whites) around the katsu and cover with a lid for 30 seconds.
- Remove the lid, pour the remaining yolks over the center of the katsu, cover for another 15 seconds, and then remove from heat.
- Carefully slide the katsu and egg mixture over a bowl of hot rice, ensuring the sauce soaks into the grains. Garnish with green onions if desired.


