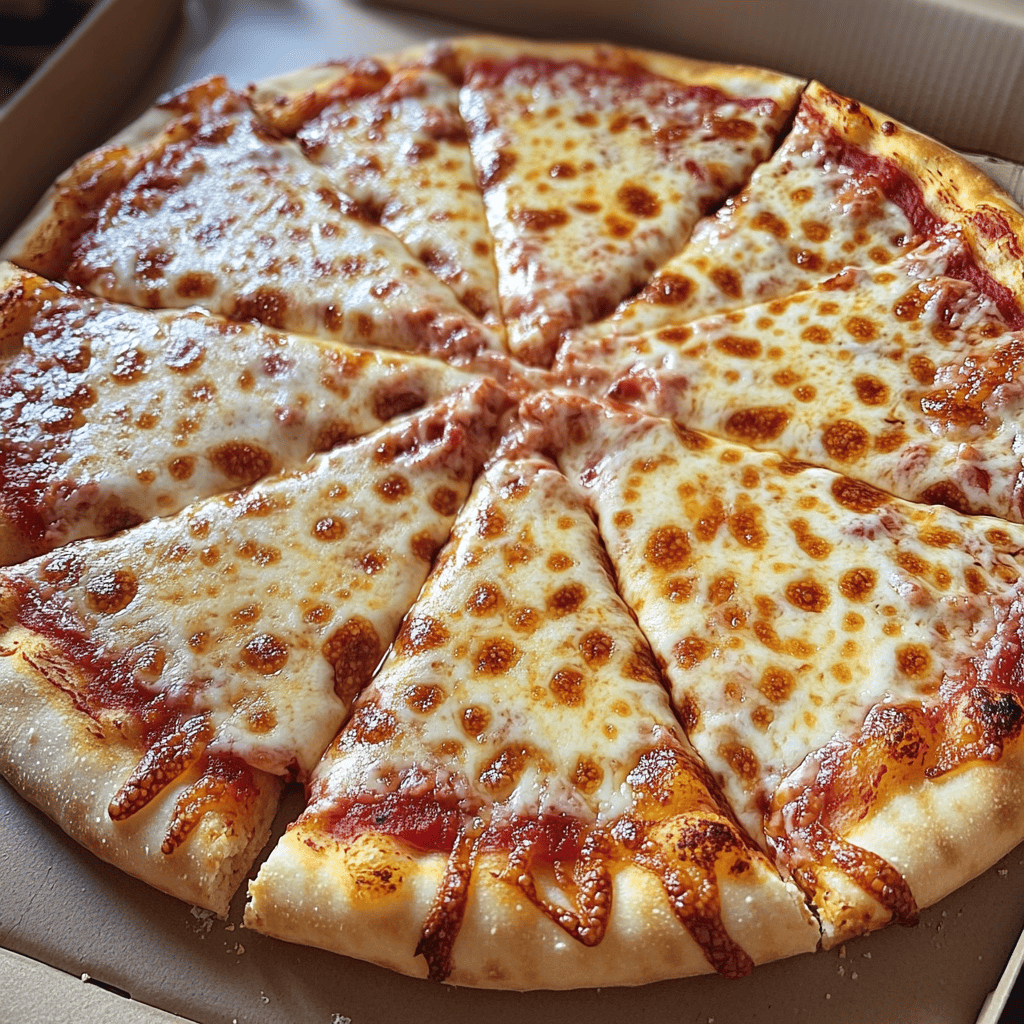
Have you ever bitten into a slice of homemade pizza that made you close your eyes and savor the moment? That perfect balance of crispy yet chewy crust, tangy sauce, melted cheese, and harmonious toppings? Creating restaurant-quality homemade pizza isn’t just a culinary achievement—it’s a gateway to memorable family dinners, entertaining friends, and expressing your creativity in the kitchen. As someone who spent years perfecting my pizza game, I’m excited to share the secrets that transformed my homemade pizza from merely acceptable to absolutely magnificent.
The journey to perfect homemade pizza involves understanding a few fundamental principles and techniques that professionals use but rarely share outside their kitchens. Whether you’re a busy parent looking to elevate your Friday pizza night or an enthusiastic home cook eager to master a new skill, these secrets will revolutionize your approach to homemade pizza forever.
The Foundation of Great Pizza: Understanding the Dough
When I first started making homemade pizza, I couldn’t figure out why my crusts never matched the texture and flavor of my favorite pizzerias. After countless experiments and conversations with professional pizza makers, I discovered that the magic begins with the dough—and it’s simpler than you might think.
The Perfect Flour for Homemade Pizza
The most significant secret to exceptional homemade pizza lies in selecting the right flour. While all-purpose flour works in a pinch, it lacks the protein content needed for that characteristic chew and structure. Instead, reach for:
- Bread flour: With a protein content of around 12-14%, bread flour creates a chewier, more structured crust that can handle toppings without becoming soggy.
- 00 flour: This finely milled Italian flour (pronounced “double zero”) creates the perfect balance between crisp and tender, especially when cooked at high temperatures.
- The best compromise: A 50/50 blend of bread flour and all-purpose flour creates an excellent homemade pizza dough that doesn’t require specialty ingredients.
What most home cooks don’t realize is that changing just this one ingredient can transform your pizza from good to great.
The Cold, Slow Rise: Your Secret Weapon
Perhaps the most important secret to incredible homemade pizza is something professional pizzerias do that most home recipes don’t mention: the long, cold fermentation. After making your dough:
- Instead of letting it rise at room temperature for an hour, place it in the refrigerator.
- Allow it to slowly ferment for at least 24 hours (48-72 hours is even better).
- Remove it from the refrigerator about 1-2 hours before you plan to bake.
This slow fermentation process develops complex flavors, improves texture, and makes the dough easier to work with. The first time I tried this method, the difference was so dramatic that I never went back to same-day dough. The pizza had a subtle tanginess and depth of flavor that made it taste authentically artisanal.
Hydration Matters: Finding the Perfect Balance
Another professional secret involves understanding dough hydration—the ratio of water to flour. Most homemade pizza recipes are too dry, leading to dense, tough crusts.
For truly exceptional homemade pizza, aim for:
- 65-70% hydration: This means using 65-70 grams of water for every 100 grams of flour.
- Proper kneading technique: With higher hydration, the dough will feel stickier, but resist the urge to add more flour. Instead, use a bench scraper and the “stretch and fold” method rather than traditional kneading.
Working with a properly hydrated dough takes practice, but the airy pockets and crisp-yet-tender texture are worth the learning curve.
The Hidden Power of Temperature in Homemade Pizza
One of the biggest challenges in creating pizzeria-quality pizza at home is achieving the right cooking temperature. Most home ovens max out around 500°F (260°C), while professional pizza ovens can reach 800-900°F (425-480°C). This temperature difference dramatically affects the final result.
Maximizing Your Home Oven’s Potential
To overcome this limitation and create the best homemade pizza possible:
- Preheat thoroughly: Turn your oven to its maximum temperature and preheat for at least 45-60 minutes, not just the 10-15 minutes most recipes suggest.
- Use a baking steel or stone: These cooking surfaces store heat energy and transfer it rapidly to your pizza dough, creating that coveted crisp bottom crust. For best results, place your stone or steel in the oven during the entire preheat period.
- Position matters: Place your baking surface on the top rack position, about 6-8 inches from the broiler. This setup mimics the intense top heat of a professional pizza oven.
- Harness the broiler: For the last 1-2 minutes of baking, switch from bake to broil. This blast of top heat creates those beautiful charred spots on your crust and toppings that signal a perfectly cooked pizza.
When I implemented these temperature techniques, my homemade pizza immediately improved by at least 50%. Friends started asking if I had installed a special pizza oven!
The Par-Bake Method for Foolproof Results
For those times when you’re topping your homemade pizza with ingredients that release a lot of moisture (like fresh mozzarella or vegetables), try this professional technique:
- Roll out and shape your dough.
- Bake it naked (without toppings) for 2-3 minutes.
- Remove, add your sauce and toppings, then return to the oven to complete baking.
This par-baking technique prevents the dreaded soggy center that plagues many homemade pizzas, especially those with multiple toppings.
Sauce Secrets: Less Is More, But Make It Count
The sauce is your chance to establish the flavor foundation of your homemade pizza. Many home cooks make the mistake of using too much sauce or over-complicating it. Professional pizzerias understand that sauce should complement—not overwhelm—the other elements.
The 5-Minute No-Cook Pizza Sauce
The best pizza sauce is often the simplest. This quick no-cook sauce delivers bright, fresh flavor that elevates any homemade pizza:
- In a food processor, combine one 14.5-ounce can of whole peeled San Marzano tomatoes (drained), 1 tablespoon olive oil, 1 teaspoon salt, 1 clove of garlic, and a pinch of dried oregano.
- Pulse 3-4 times until just combined but still textured—never blend until smooth.
- Taste and adjust seasoning if needed.
That’s it! No cooking required. The high heat of your oven will concentrate the flavors during baking. This sauce can be made in advance and refrigerated for up to a week, improving in flavor each day.
Application Technique Matters
When adding sauce to your homemade pizza:
- Use less than you think you need—about 3-4 tablespoons for a 12-inch pizza.
- Start from the center and spiral outward, leaving a ½-inch border for the crust.
- Use the back of a spoon or ladle to spread in a thin, even layer.
This restrained approach prevents the crust from becoming soggy and allows the flavor of your carefully crafted dough to shine through.
Cheese Selection: Blend Your Way to Perfection
While 100% mozzarella is the standard for homemade pizza, professional pizzerias often use strategic cheese blends to create the perfect balance of flavor, melt, and stretch.
The Ideal Pizza Cheese Blend
For homemade pizza that hits all the right notes:
- Low-moisture, whole-milk mozzarella: 60-70% of your cheese blend, provides the classic stretch and mild flavor
- Provolone: 15-20% for additional stretch and slight sharpness
- Low-moisture whole-milk Jack cheese: 10-15% for improved meltability
- Parmesan or Pecorino Romano: 5-10% for umami and savory depth
This blend creates a complex flavor profile while maintaining that picture-perfect cheese pull we all love. Grate the cheese yourself rather than using pre-shredded varieties, which contain anti-caking agents that affect melt quality.
The Power of Restraint
Another professional secret: use less cheese than you think you need. For a 12-inch homemade pizza, 4-5 ounces of cheese is plenty. Spread it evenly, leaving small gaps where the sauce can peek through. This balance ensures each bite has the perfect ratio of crust, sauce, and cheese.
Topping Techniques for Maximum Flavor
When it comes to toppings, homemade pizza offers endless possibilities. However, professionals know that proper preparation and thoughtful combinations make all the difference.
Pre-Cooking for Flavor Concentration
Most vegetables contain high water content that can make your pizza soggy. The solution:
- Quickly sauté mushrooms, bell peppers, onions, and other watery vegetables until they just begin to soften and release their moisture.
- Allow them to cool completely before adding to your pizza.
- For greens like spinach, massage with a small amount of olive oil and salt first.
This simple step removes excess moisture and concentrates flavor, resulting in perfectly cooked toppings that enhance your homemade pizza rather than compromising it.
Strategic Layering
The order in which you apply toppings significantly impacts your final result:
- Sauce first (obviously)
- Half of your cheese blend
- Meats and pre-cooked vegetables
- Remaining cheese
- Delicate items like fresh herbs
This layering technique ensures everything cooks evenly and creates that appealing visual appearance with ingredients peeking through the melted cheese.
Common Homemade Pizza Questions Answered
Over years of teaching friends and family my pizza techniques, these are the most frequently asked questions I encounter:
Can I make pizza dough ahead of time?
Absolutely! In fact, pizza dough improves with time. Make it up to 5 days in advance and store it in the refrigerator. You can also freeze portioned dough balls for up to 3 months—just thaw in the refrigerator overnight before using.
Why does my homemade pizza stick to the peel?
This common frustration happens when the dough sits too long on the peel before baking. To prevent sticking:
- Use plenty of flour, cornmeal, or semolina on your peel.
- Assemble your pizza quickly once the dough is on the peel.
- Every 30 seconds, gently shake the peel to ensure the dough remains loose.
- If you need more time, consider assembling on parchment paper, then sliding both onto the stone.
How do I achieve a crispy bottom crust?
For that coveted crispy bottom:
- Make sure your stone or steel is thoroughly preheated (at least 45 minutes).
- Don’t overload with toppings or sauce.
- For extra insurance, sprinkle some semolina on your stone/steel just before sliding the pizza onto it.
- For seriously problematic ovens, start the pizza on the stovetop in a cast-iron skillet, then transfer to the oven to finish.
Can I use active dry yeast instead of instant?
Yes! Simply dissolve the active dry yeast in the warm water called for in the recipe and let it sit for 5-10 minutes until foamy before proceeding with the recipe as written. Increase the amount by 25% (if the recipe calls for 1 teaspoon of instant, use 1¼ teaspoons of active dry).
Taking Your Homemade Pizza to the Next Level
Once you’ve mastered the basics, these advanced techniques will elevate your homemade pizza even further:
Flavored Dough Variations
Infuse your pizza dough with additional flavors by:
- Adding 1 tablespoon of honey for a slightly sweet crust that browns beautifully
- Incorporating 2 teaspoons of herbs like rosemary or oregano into the dry ingredients
- Substituting 25% of the water with beer for a more complex flavor profile
- Adding 1 tablespoon of garlic-infused olive oil for an aromatic crust
Creative Finishing Touches
Professional pizzerias often add final touches after baking:
- Drizzle high-quality extra virgin olive oil around the crust edge
- Sprinkle fresh herbs like basil or oregano over the hot pizza
- Add a light dusting of freshly grated Parmesan
- For spice lovers, a dash of chili oil or hot honey transforms a standard pizza into something special
These finishing elements add complexity and freshness that take homemade pizza from good to unforgettable.
Bringing It All Together: Your Perfect Pizza Plan
The journey to perfect homemade pizza requires patience and practice, but the rewards are immense. Remember these key principles:
- Give your dough time: The 24-72 hour cold fermentation is non-negotiable for exceptional flavor.
- Maximize heat: Preheat thoroughly and use a steel or stone positioned near the broiler.
- Practice restraint: Less sauce, less cheese, and fewer toppings often yield better results.
- Pay attention to details: From flour selection to finishing touches, each element matters.
My own pizza journey began with frustration but evolved into one of my greatest culinary joys. There’s something deeply satisfying about creating something so universally beloved from scratch, and watching family and friends gather around to enjoy it.
The next time you’re craving pizza, resist the urge to order delivery. Instead, pull out your flour and give these professional secrets a try. You might be surprised to discover that the best pizza in town is now coming from your own kitchen. After all, the real secret to perfect homemade pizza isn’t any single technique—it’s the love and care you put into making something special for the people you care about.
Happy pizza making!
Quick Starter Recipe: Basic Pizza Dough
To help you begin your homemade pizza adventure, here’s my foolproof dough recipe:
Ingredients:
- 500g bread flour or 00 flour (about 4 cups)
- 325g water (about 1⅓ cups), room temperature
- 10g salt (about 2 teaspoons)
- 3g instant yeast (about 1 teaspoon)
- 15g olive oil (about 1 tablespoon)
Method:
- Combine flour and yeast in a large bowl.
- Add water and mix until no dry flour remains.
- Cover and let rest for 20 minutes (this is called autolyse).
- Add salt and oil, then mix until fully incorporated.
- Cover and let rest for 15 minutes.
- Perform 3-4 sets of stretch and folds, waiting 15 minutes between each set.
- Shape into a tight ball, place in an oiled container, and refrigerate for 24-72 hours.
- Remove from refrigerator 1-2 hours before baking.
- Divide, shape, top, and bake at your oven’s highest temperature on a preheated stone or steel.
Remember, perfect homemade pizza is within your reach—and it starts with this dough. The journey is just as rewarding as the destination!

