
I remember the first time my grandmother made cherry cobbler. The scent of warm cherries and buttery biscuits filled her cozy kitchen, and I knew I was in for something truly special. She always insisted on using fresh cherries from her garden, but sometimes, in the dead of winter, she’d pull out a bag of frozen ones, and the cobbler was just as delicious. Today, I’m sharing all my secrets for the most amazing Warm Cherry Cobbler Recipe – Fresh or Frozen! you’ll ever make! I promise you, it’s easier than you think, and the results are absolutely divine!
Warm Cherry Cobbler: The Ultimate Comfort Dessert

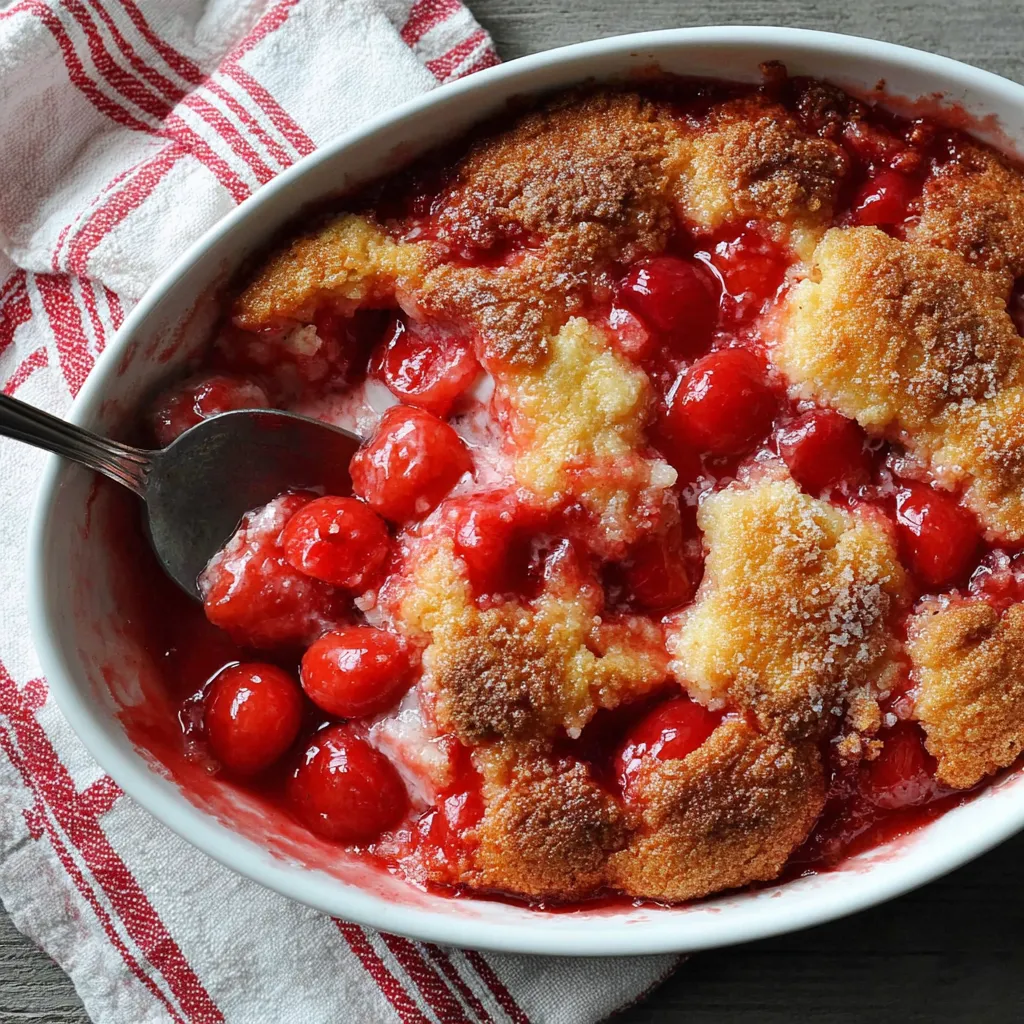
There’s just something undeniably comforting about a warm cherry cobbler. Maybe it’s the sweet, slightly tart cherries mingling with the buttery, biscuit-like topping, or maybe it’s the memories it evokes of cozy kitchens and loved ones. Whatever the reason, this dessert is a guaranteed crowd-pleaser, and the best part is, it’s incredibly easy to make. And the fact that you can use fresh or frozen cherries makes it a year-round treat!
Why This Cherry Cobbler Recipe Works
This isn’t just any cherry cobbler recipe. It’s *the* cherry cobbler recipe. I’ve tweaked and perfected it over years to ensure it’s:
- Foolproof: Even if you’re a baking novice, you can nail this recipe.
- Versatile: Fresh or frozen cherries? No problem!
- Quick: From start to finish, you’ll have a bubbling, golden-brown cobbler in under an hour.
- Incredibly Delicious: Seriously, the combination of flavors and textures is out of this world.
Ingredients You’ll Need
Let’s gather our ingredients. Don’t worry, you probably have most of them already!
For the Cherry Filling:
- 6 cups fresh or frozen pitted cherries (if using fresh, make sure they are pitted!)
- ¾ cup granulated sugar (adjust to taste depending on the sweetness of your cherries)
- 2 tablespoons cornstarch
- 1 tablespoon lemon juice (brightens the flavor and balances the sweetness)
- ½ teaspoon almond extract (optional, but adds a lovely depth of flavor)
- 1/4 teaspoon salt
For the Cobbler Topping:
- 1 ½ cups all-purpose flour
- ¾ cup granulated sugar
- 1 ½ teaspoons baking powder
- ¼ teaspoon salt
- 6 tablespoons cold unsalted butter, cut into cubes
- ¾ cup milk (or buttermilk for a tangier flavor!)
- 2 tablespoons melted butter, for brushing
- Turbinado sugar, for sprinkling (optional, but adds a lovely crunch and sparkle)
Step-by-Step Instructions: Making Your Warm Cherry Cobbler
Okay, let’s get baking! Follow these simple steps, and you’ll have a delectable cherry cobbler in no time.
- Preheat your oven to 375°F (190°C). This is crucial! A hot oven ensures the cobbler topping bakes properly and the cherries get nice and bubbly.
- Prepare the cherry filling: In a large bowl, combine the cherries, sugar, cornstarch, lemon juice, almond extract (if using), and salt. Gently toss everything together until the cherries are evenly coated. The mixture should start to look a little syrupy.
- Pour the cherry filling into a 9×13 inch baking dish. Make sure the cherries are evenly distributed in the dish.
- Make the cobbler topping: In a separate bowl, whisk together the flour, sugar, baking powder, and salt. This ensures even distribution of the leavening agent (baking powder).
- Cut in the cold butter: Add the cold, cubed butter to the dry ingredients. Using a pastry blender or your fingertips, cut the butter into the flour mixture until it resembles coarse crumbs. You want to see small pieces of butter throughout the mixture—these little pockets of butter will create flaky layers in the topping.
- Add the milk: Pour in the milk (or buttermilk) and stir until just combined. Be careful not to overmix! Overmixing will develop the gluten in the flour, resulting in a tough topping. The batter will be slightly lumpy, and that’s perfectly fine.
- Drop spoonfuls of the cobbler topping over the cherry filling. Don’t worry about covering the entire surface perfectly. You want some of the cherry filling to peek through. This creates a beautiful rustic look and allows the cherries to caramelize slightly.
- Brush the topping with melted butter. This helps the topping brown beautifully and adds extra richness.
- Sprinkle with turbinado sugar (optional). If you’re using turbinado sugar, sprinkle it evenly over the topping.
- Bake for 35-45 minutes, or until the topping is golden brown and the cherry filling is bubbling. Keep an eye on it! Baking times can vary depending on your oven. The topping should be nicely browned, and the cherry filling should be bubbling around the edges. If the topping starts to brown too quickly, you can loosely tent the dish with foil.
- Let cool slightly before serving. This is the hardest part! I know you’ll want to dive right in, but letting it cool for a few minutes allows the cherry filling to thicken slightly and prevents you from burning your mouth.
Success Tips: Your Guide to Cherry Cobbler Perfection
Want to guarantee a perfect cherry cobbler every time? Here are my top tips:
- Use cold butter: Cold butter is essential for creating a flaky, tender cobbler topping. Make sure your butter is straight from the refrigerator and cut it into cubes just before using.
- Don’t overmix the topping: Overmixing develops the gluten in the flour, resulting in a tough topping. Stir the wet and dry ingredients together until just combined. A few lumps are perfectly fine!
- Adjust the sugar to taste: The sweetness of your cherries will vary depending on the variety and ripeness. Taste the cherry filling before adding the topping and adjust the sugar accordingly.
- Use a deep dish: A 9×13 inch baking dish is ideal for this recipe. If you use a smaller dish, the cherry filling may bubble over.
- Let it rest: Letting the cobbler cool slightly before serving allows the cherry filling to thicken and prevents burns. Plus, the flavors meld together even more as it cools.
Variations and Add-ins: Get Creative with Your Cobbler
Once you’ve mastered the basic recipe, feel free to get creative and experiment with different variations and add-ins!
Spice It Up
A pinch of cinnamon, nutmeg, or ginger in the cherry filling can add a warm, comforting flavor. You could also add a dash of cardamom for a more exotic twist.
Add Nuts
Chopped pecans, walnuts, or almonds sprinkled over the topping before baking add a delightful crunch and nutty flavor.
Try Different Extracts
Instead of almond extract, try vanilla extract, rum extract, or even a hint of orange extract. Each extract will impart a unique flavor to the cherry filling.
Mix in Other Fruits
Combine cherries with other fruits like blueberries, raspberries, or peaches for a mixed fruit cobbler. Just make sure to adjust the sugar accordingly, as some fruits are sweeter than others.
Make Individual Cobblers
Divide the cherry filling and topping among ramekins for individual servings. This is a great option for entertaining or portion control.
Serving Suggestions: The Perfect Accompaniments
While warm cherry cobbler is delicious on its own, it’s even better with the right accompaniments.
- Vanilla Ice Cream: A classic pairing that never fails. The cold, creamy ice cream complements the warm, sweet cobbler perfectly.
- Whipped Cream: A dollop of freshly whipped cream adds a light and airy touch.
- Creme Fraiche: For a slightly tangy and sophisticated twist, try serving your cobbler with creme fraiche.
- Custard: A warm vanilla custard is another excellent option.
Make-Ahead and Storage Instructions
Want to get a head start on your cherry cobbler? Here’s how to make it ahead of time and store leftovers:
Make-Ahead Instructions
You can prepare the cherry filling and the cobbler topping separately up to 24 hours in advance. Store the cherry filling in an airtight container in the refrigerator. Store the dry ingredients for the topping in a separate container at room temperature. When you’re ready to bake, simply combine the wet and dry ingredients for the topping, assemble the cobbler, and bake as directed.
Storage Instructions
Store leftover cherry cobbler in an airtight container in the refrigerator for up to 3 days. Reheat in the oven or microwave until warmed through.
Freezing Instructions
For longer storage, you can freeze the baked cherry cobbler. Let it cool completely, then wrap it tightly in plastic wrap and foil. Freeze for up to 2 months. Thaw in the refrigerator overnight before reheating.
Cherry Cobbler vs. Cherry Crisp vs. Cherry Crumble: What’s the Difference?
You might be wondering what the difference is between a cherry cobbler, a cherry crisp, and a cherry crumble. While they all share a similar base of fruit filling and a topping, there are distinct differences:
- Cherry Cobbler: Features a biscuit-like topping that is dropped or spooned over the fruit filling.
- Cherry Crisp: Has a topping made from oats, flour, butter, and sugar that is scattered over the fruit filling. The oats give it a crispy texture.
- Cherry Crumble: Similar to a crisp, but the topping typically doesn’t include oats. It’s more of a streusel-like mixture of flour, butter, and sugar.
While each dessert has its own unique characteristics, they are all delicious in their own way! If you’re looking for a recipe with a crispy topping, you might also enjoy my PEACH COBBLER or even the PEACH COBBLER (the get in my belly version is especially indulgent!). And for something a bit lighter, consider the CHERRY SORBET DELIGHT or its simpler counterpart, the CHERRY SORBET BLISS! If you are looking for something that is like a pie, try my CHERRY PIE BITES BLISS!
The Perfect Dessert for Any Occasion
Whether you’re hosting a summer barbecue, celebrating a special occasion, or simply craving a comforting dessert, warm cherry cobbler is always a good idea. It’s easy to make, versatile, and guaranteed to please even the pickiest eaters. And since you can use fresh or frozen cherries, you can enjoy it year-round!
Why I Love This Recipe
I truly love this PEACH COBBLER recipe for so many reasons! Beyond its simplicity and deliciousness, it’s the memories it evokes. Every time I make it, I’m transported back to my grandmother’s kitchen, filled with the warm aroma of cherries and the sound of laughter. It’s a recipe that’s been passed down through generations, and I’m so excited to share it with you. I hope you enjoy it as much as my family does!
So, gather your ingredients, preheat your oven, and get ready to create a warm and comforting cherry cobbler that will delight your taste buds and warm your heart. Happy baking!
Can I use frozen cherries for this cobbler recipe?
Yes, you can use either fresh or frozen pitted cherries. The recipe works well with both.
How do I prevent the cobbler topping from becoming tough?
Avoid overmixing the cobbler topping batter. Stir the wet and dry ingredients together until just combined; a few lumps are perfectly fine.
How should I store leftover cherry cobbler?
Store leftover cherry cobbler in an airtight container in the refrigerator for up to 3 days. You can reheat it in the oven or microwave.
What is the difference between a cherry cobbler, crisp, and crumble?
A cobbler has a biscuit-like topping, a crisp has a topping with oats, and a crumble has a streusel-like topping without oats.
Easiest Cherry Cobbler Ever
Ingredients
Equipment
Method
- Preheat your oven to 375°F (190°C).
- In a large bowl, combine the cherries, sugar, cornstarch, lemon juice, almond extract (if using), and salt. Gently toss everything together until the cherries are evenly coated.
- Pour the cherry filling into a 9×13 inch baking dish.
- In a separate bowl, whisk together the flour, sugar, baking powder, and salt.
- Add the cold, cubed butter to the dry ingredients. Using a pastry blender or your fingertips, cut the butter into the flour mixture until it resembles coarse crumbs.
- Pour in the milk and stir until just combined. Be careful not to overmix.
- Drop spoonfuls of the cobbler topping over the cherry filling. Don’t worry about covering the entire surface perfectly.
- Brush the topping with melted butter.
- Sprinkle with turbinado sugar (optional).
- Bake for 35-45 minutes, or until the topping is golden brown and the cherry filling is bubbling. If the topping starts to brown too quickly, you can loosely tent the dish with foil.
- Let cool slightly before serving.


