
The Alchemy of Apple Crisp: A Scientific Breakdown
At its heart, apple crisp is a study in contrasts – soft versus crunchy, sweet versus tart, warm versus… well, still warm, but relatively less warm after a scoop of ice cream! The magic lies in understanding the chemical reactions at play. First, the apples. Heat causes them to soften as pectin, the structural component of their cell walls, breaks down. Adding a bit of acid (lemon juice, usually) helps to prevent excessive mushiness by cross-linking the pectin. Sugar draws out moisture from the apples, creating a syrupy sauce. The topping, the star of the show, is a mixture of flour, oats, butter, and sugar. The flour provides structure, the oats add texture and nutty flavor, and the butter… well, the butter is everything. Cold butter is crucial for creating pockets of steam, which lead to a flaky, crisp topping. The sugar caramelizes during baking, contributing to both flavor and that irresistible crunch. The ratio of these ingredients is paramount; too much flour and the topping will be dry and dense, too much butter and it will be greasy.The Ultimate Apple Crisp Recipe
Here’s the recipe that emerged from my experiments, the one I consider to be apple crisp perfection:Apple Filling
- 6-8 medium apples (such as Honeycrisp, Granny Smith, or a combination), peeled, cored, and sliced
- 2 tablespoons lemon juice
- 1/2 cup granulated sugar
- 2 tablespoons all-purpose flour
- 1 teaspoon ground cinnamon
- 1/4 teaspoon ground nutmeg
- 1/4 cup water
Crisp Topping
- 1 cup all-purpose flour
- 1 cup rolled oats
- 1 cup packed brown sugar
- 1/2 teaspoon baking powder
- 1/4 teaspoon salt
- 1/2 cup (1 stick) cold unsalted butter, cut into cubes
Instructions
- Prepare the Apples: In a large bowl, combine the sliced apples, lemon juice, granulated sugar, flour, cinnamon, nutmeg, and water. Toss to coat evenly.
- Assemble the Crisp: Pour the apple mixture into a 9×13 inch baking dish.
- Make the Topping: In a separate bowl, whisk together the flour, oats, brown sugar, baking powder, and salt. Cut in the cold butter using a pastry blender or your fingers until the mixture resembles coarse crumbs.
- Top and Bake: Sprinkle the topping evenly over the apple mixture. Bake in a preheated oven at 375°F (190°C) for 30-40 minutes, or until the topping is golden brown and the apples are tender.
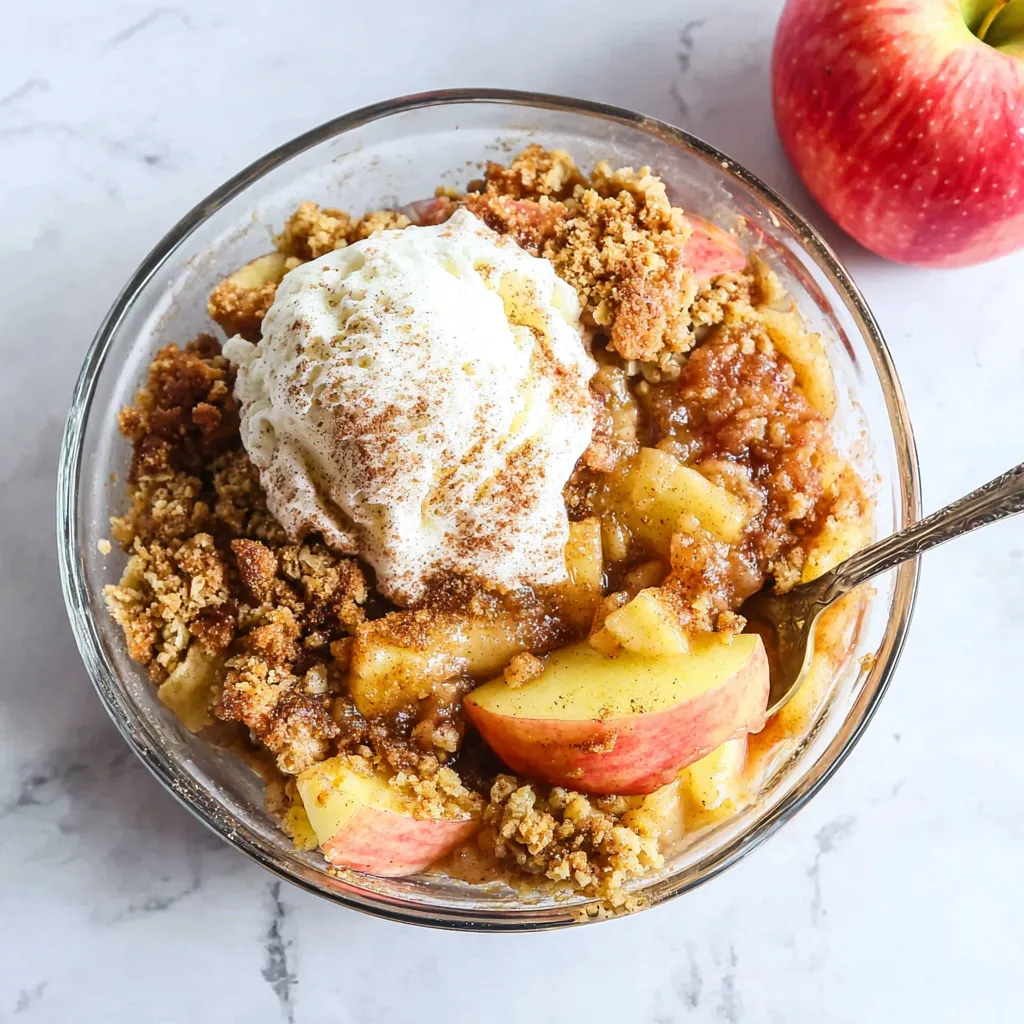
- Cool and Serve: Let the crisp cool slightly before serving. Serve warm, with a scoop of vanilla ice cream or a dollop of whipped cream, if desired.
The Crisper Whisperer: My Apple Crisp Investigation
My journey to apple crisp mastery was paved with good intentions and, frankly, some pretty terrible results. Like many of you, I initially thought it was just a matter of throwing some apples and a topping into a dish and hoping for the best. Oh, how wrong I was!Early Days: A Topping Tragedy
My first few attempts were a disaster. The topping was either rock-hard or a greasy mess. I tried using melted butter, which resulted in a soggy, uniformly brown crust. I tried using too much flour, which created a dry, crumbly topping that was more like sand than a crisp. I even tried a shortcut with pre-made oat topping once, which I regretted instantly. The flavor was artificial and lacked the comforting warmth of homemade. I briefly considered giving up and just settling for Apple Crisp from the bakery.The “Oat”standing Revelation
Then, I had an “Aha!” moment. I realized that the key was the cold butter and the balance of wet and dry ingredients. I started experimenting with different ratios, carefully measuring each ingredient and paying close attention to the texture of the topping before baking. I also discovered the importance of using rolled oats rather than quick oats. Rolled oats provide a heartier, chewier texture that holds up well during baking. Adding baking powder to the topping gave it just a little lift, creating a lighter, more airy crisp.Apple-solutely Delicious: The Apple Choice
The apple selection was another challenge. I initially used only Granny Smith apples, which are tart and hold their shape well. But I found that the crisp lacked depth of flavor. I then experimented with using only Honeycrisp apples, which are sweet and juicy. But they tended to become too soft and mushy during baking. The solution? A combination of both! The tartness of the Granny Smith balanced the sweetness of the Honeycrisp, creating a more complex and satisfying flavor profile. A little lemon juice was key to controlling the apple’s texture. Experimenting with spices led me to add nutmeg, a subtle touch that enhances the warm, comforting flavors of the crisp. I found similar results when making Apple Cinnamon Cookies.The Caramel Conundrum
I even briefly ventured into the world of caramel. Inspired by the richness of Caramel Apple Cheesecake Bars and Caramel Apple Cheesecake Heaven, I tried adding a layer of caramel sauce to the apple filling. While it was undeniably delicious, it also made the crisp incredibly rich and decadent. Ultimately, I decided that it detracted from the simplicity and elegance of the classic apple crisp. It was good, but not *ultimate* good.The Foolproof Method: Achieving Apple Crisp Perfection
After countless batches and meticulous adjustments, I’ve distilled my findings into a simple, foolproof method:- Use Cold Butter: Ensure the butter is thoroughly chilled before cutting it into the dry ingredients. This is non-negotiable!
- Don’t Overmix: Mix the topping ingredients just until combined. Overmixing will develop the gluten in the flour, resulting in a tough topping.
- Choose the Right Apples: A combination of tart and sweet apples provides the best flavor and texture.
- Don’t Skimp on the Spices: Cinnamon and nutmeg add warmth and depth of flavor.
- Bake Until Golden Brown: The topping should be golden brown and the apples should be tender.
- Let it Rest: Allow the crisp to cool slightly before serving. This allows the filling to thicken and the flavors to meld.
Why is it important to use cold butter when making the crisp topping?
Cold butter is crucial for creating pockets of steam, which leads to a flaky, crisp topping. If the butter is melted or too soft, the topping will be soggy.
What types of apples are recommended for the best flavor and texture in the apple crisp?
A combination of tart and sweet apples, such as Granny Smith and Honeycrisp, is recommended. The tartness of Granny Smith balances the sweetness of Honeycrisp, creating a more complex flavor profile.
What role does lemon juice play in the apple filling?
Lemon juice helps to prevent excessive mushiness in the apples by cross-linking the pectin, the structural component of their cell walls.
What happens if I overmix the crisp topping ingredients?
Overmixing the topping ingredients will develop the gluten in the flour, resulting in a tough topping. It’s best to mix just until combined.
Easy Apple Crisp
This easy apple crisp recipe delivers the perfect balance of tender, sweet apples and a crunchy, buttery topping. It’s a simple and foolproof method for achieving apple crisp perfection every time, with a delightful blend of textures and flavors.
Ingredients
Equipment
Method
- Prepare the Apples: In a large bowl, combine the sliced apples, lemon juice, granulated sugar, flour, cinnamon, nutmeg, and water. Toss to coat evenly.
- Assemble the Crisp: Pour the apple mixture into a 9×13 inch baking dish.
- Make the Topping: In a separate bowl, whisk together the flour, oats, brown sugar, baking powder, and salt. Cut in the cold butter using a pastry blender or your fingers until the mixture resembles coarse crumbs.
- Top and Bake: Sprinkle the topping evenly over the apple mixture. Bake in a preheated oven at 375°F (190°C) for 30-40 minutes, or until the topping is golden brown and the apples are tender.
- Cool and Serve: Let the crisp cool slightly before serving. Serve warm, with a scoop of vanilla ice cream or a dollop of whipped cream, if desired.
Notes
For best results, use cold butter and don’t overmix the topping. A combination of tart and sweet apples provides the best flavor. Store leftovers covered in the refrigerator for up to 3 days. You can reheat the crisp in the oven or microwave. For a richer flavor, consider adding a pinch of salt to the apple filling. Vanilla ice cream or whipped cream are excellent accompaniments.


