
I can still remember the summers spent at my grandmother’s house, the air thick with humidity and the scent of honeysuckle. But even more vividly, I recall the sound of sizzling oil and the anticipation of the treat that was to come: her perfectly crisp Fried Okra With Creamy Buttermilk Dip. It was a simple pleasure, but one that became synonymous with warmth, family, and the joy of good food. Today, I’m sharing all my secrets for the most amazing Fried Okra With Creamy Buttermilk Dip you’ll ever make, a dish that’s guaranteed to bring a little Southern sunshine to your table!
The Magic of Fried Okra and Buttermilk Dip

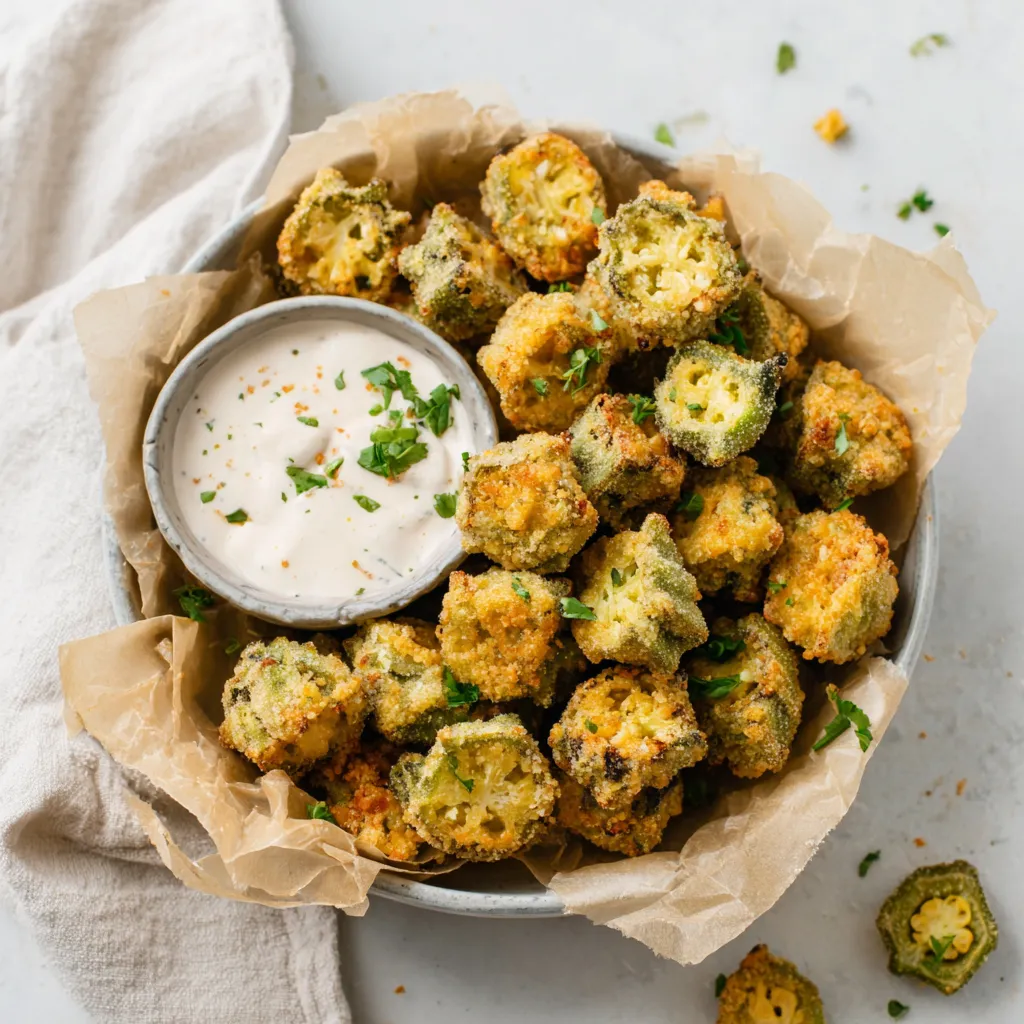
There’s something undeniably special about the combination of crispy, golden-brown okra and the cool, tangy buttermilk dip. It’s a classic Southern pairing that’s both comforting and incredibly satisfying. But achieving that perfect balance of textures and flavors can sometimes feel a little daunting. Don’t worry, friend, I’m here to guide you through every step of the process. We’ll banish soggy okra forever and create a dip so delicious, you’ll want to put it on everything!
Why This Recipe Works
This isn’t just any fried okra recipe. This is the fried okra recipe. I’ve spent years perfecting it, tweaking the ingredients and techniques until I achieved that ideal combination of crispy exterior, tender interior, and a dip that perfectly complements the okra’s earthy flavor. Here’s what sets this recipe apart:
- Double Dredging: The secret to truly crispy okra lies in a double dredge. This creates a thicker, more flavorful coating that holds up beautifully during frying.
- Buttermilk Soak: Soaking the okra in buttermilk tenderizes it and adds a subtle tang that’s just irresistible.
- Perfectly Seasoned Coating: We’re not just using flour here! A blend of cornmeal, flour, and spices creates a flavor profile that’s both savory and slightly sweet.
- Creamy Buttermilk Dip: This isn’t your average dip. We’re using a combination of buttermilk, mayonnaise, sour cream, and fresh herbs to create a dip that’s incredibly creamy, tangy, and flavorful.
Ingredients You’ll Need
Let’s gather our ingredients! Don’t be intimidated by the list; most of these are pantry staples. The key is to use fresh, high-quality ingredients for the best flavor.
For the Fried Okra:
- 1 pound fresh okra, washed and sliced into ½-inch rounds
- 1 cup buttermilk
- 1 cup all-purpose flour
- 1 cup yellow cornmeal
- 1 teaspoon salt
- 1/2 teaspoon black pepper
- 1/2 teaspoon garlic powder
- 1/4 teaspoon cayenne pepper (optional, for a little kick!)
- Vegetable oil, for frying
For the Creamy Buttermilk Dip:
- 1/2 cup buttermilk
- 1/4 cup mayonnaise
- 1/4 cup sour cream
- 2 tablespoons chopped fresh chives
- 1 tablespoon chopped fresh dill
- 1 tablespoon lemon juice
- 1/4 teaspoon salt
- 1/8 teaspoon black pepper
Step-by-Step Instructions
Alright, let’s get cooking! Follow these simple steps, and you’ll be enjoying crispy, delicious Fried Okra With Creamy Buttermilk Dip in no time.
- Prepare the Okra: Wash the okra thoroughly and pat it dry. Trim off the stem end and slice the okra into ½-inch rounds. Don’t worry if some of the seeds fall out; that’s perfectly normal.
- Buttermilk Soak: Place the sliced okra in a bowl and pour the buttermilk over it. Make sure all the okra is submerged. Let it soak for at least 30 minutes, or even up to an hour. This will tenderize the okra and help the coating adhere better.
- Prepare the Dredging Station: In a shallow dish, combine the flour, cornmeal, salt, pepper, garlic powder, and cayenne pepper (if using). Mix well to ensure all the ingredients are evenly distributed. This is where the magic happens! This seasoned coating is what gives our okra its incredible flavor.
- First Dredge: Remove a handful of okra from the buttermilk, letting any excess drip off. Dredge the okra in the flour mixture, making sure it’s completely coated. Shake off any excess flour.
- Second Dredge: Dip the dredged okra back into the buttermilk, then dredge it again in the flour mixture. This double dredging is crucial for achieving that extra-crispy texture. Make sure the okra is completely coated and shake off any excess flour.
- Heat the Oil: Pour about 2 inches of vegetable oil into a large, heavy-bottomed pot or Dutch oven. Heat the oil over medium-high heat until it reaches 350°F (175°C). You can use a deep-fry thermometer to monitor the temperature, or test the oil by dropping a small piece of okra into it. If it sizzles immediately, the oil is ready.
- Fry the Okra: Carefully add the okra to the hot oil in batches, making sure not to overcrowd the pot. Overcrowding will lower the oil temperature and result in soggy okra. Fry for 2-3 minutes per batch, or until the okra is golden brown and crispy.
- Drain the Okra: Use a slotted spoon to remove the fried okra from the oil and place it on a wire rack lined with paper towels to drain off any excess oil. This will help keep the okra crispy.
- Prepare the Buttermilk Dip: While the okra is frying, prepare the buttermilk dip. In a small bowl, whisk together the buttermilk, mayonnaise, sour cream, chives, dill, lemon juice, salt, and pepper until smooth and creamy. Taste and adjust the seasonings as needed.
- Serve Immediately: Serve the fried okra immediately while it’s still hot and crispy, with the creamy buttermilk dip on the side. Enjoy!
Success Tips for Perfect Fried Okra
Want to guarantee perfectly crispy and flavorful Fried Okra With Creamy Buttermilk Dip every time? Here are my top tips for success:
- Don’t Overcrowd the Pot: Frying the okra in batches is crucial. Overcrowding the pot will lower the oil temperature and result in soggy okra. Be patient and fry in small batches.
- Maintain the Oil Temperature: Keep a close eye on the oil temperature. If it gets too low, the okra will absorb too much oil and become greasy. If it gets too high, the okra will burn on the outside before it’s cooked through on the inside. Aim for a consistent temperature of 350°F (175°C).
- Use Fresh Okra: Fresh okra will always yield the best results. Look for okra that’s firm and bright green, with no blemishes or soft spots.
- Don’t Skip the Buttermilk Soak: Soaking the okra in buttermilk is essential for tenderizing it and adding flavor. Don’t skip this step!
- Season Generously: Don’t be afraid to season the flour mixture generously. The spices are what give the okra its incredible flavor.
Variations and Adaptations
Want to put your own spin on this classic recipe? Here are a few ideas to get you started:
- Spicy Fried Okra: Add a pinch of cayenne pepper to the flour mixture for a little extra heat. You can also add a dash of hot sauce to the buttermilk dip.
- Garlic Parmesan Fried Okra: Add grated Parmesan cheese and extra garlic powder to the flour mixture for a cheesy, garlicky twist.
- Cajun Fried Okra: Add Cajun seasoning to the flour mixture for a bold, flavorful kick.
- Vegan Fried Okra: Substitute the buttermilk with plant-based milk (such as almond or soy milk) and the mayonnaise and sour cream with vegan alternatives.
Serving Suggestions
Fried Okra With Creamy Buttermilk Dip is a delicious appetizer or side dish that pairs well with a variety of meals. Here are a few serving suggestions:
- Serve it as an appetizer with other Southern favorites like fried green tomatoes and hushpuppies.
- Serve it as a side dish with grilled chicken, steak, or fish.
- Add it to a salad for a crispy, flavorful topping.
- Serve it with a burger or sandwich for a Southern-inspired twist.
Make-Ahead and Storage Instructions
Want to get ahead of the game? Here’s how to make Fried Okra With Creamy Buttermilk Dip in advance and store any leftovers:
Make-Ahead Instructions:
You can prepare the okra and the buttermilk dip up to 24 hours in advance. Store the sliced okra in the buttermilk in the refrigerator. Store the buttermilk dip in a separate container in the refrigerator. When you’re ready to fry the okra, simply dredge it in the flour mixture and fry as directed.
Storage Instructions:
Fried okra is best served immediately, but leftovers can be stored in an airtight container in the refrigerator for up to 2 days. To reheat, spread the okra out on a baking sheet and bake in a preheated oven at 350°F (175°C) for 5-10 minutes, or until heated through and crispy. The buttermilk dip can be stored in an airtight container in the refrigerator for up to 3 days.
The Perfect Buttermilk Dip: A Deeper Dive
While the fried okra is undoubtedly the star of the show, the creamy buttermilk dip is the supporting actor that truly elevates this dish to another level. Let’s explore some tips and tricks for creating the perfect dip.
Choosing the Right Buttermilk
Buttermilk is a key ingredient in both the okra soak and the dip, so choosing the right one is important. Look for buttermilk that’s thick and tangy, with a slightly sour aroma. If you can’t find buttermilk at your local grocery store, you can easily make your own by adding 1 tablespoon of lemon juice or white vinegar to 1 cup of milk. Let it sit for 5 minutes, and it will thicken and sour, creating a buttermilk substitute.
Balancing Flavors
The key to a great buttermilk dip is balancing the tangy buttermilk with the creamy mayonnaise and sour cream. The fresh herbs add a bright, herbaceous note, while the lemon juice provides a touch of acidity. Taste the dip as you go and adjust the seasonings as needed. If you prefer a sweeter dip, you can add a pinch of sugar or honey. If you prefer a spicier dip, you can add a dash of hot sauce or cayenne pepper.
Experimenting with Herbs
Don’t be afraid to experiment with different herbs in your buttermilk dip. Chives and dill are classic choices, but you can also try parsley, cilantro, or even mint. Just be sure to use fresh herbs for the best flavor.
Why Fried Okra is More Than Just a Food
For many, including myself, Fried Okra With Creamy Buttermilk Dip is more than just a delicious dish; it’s a symbol of Southern hospitality, family gatherings, and cherished memories. It’s a dish that evokes feelings of comfort, warmth, and nostalgia.
When you make this recipe, you’re not just making a meal; you’re creating an experience. You’re sharing a piece of Southern culture and history with your family and friends. And you’re creating memories that will last a lifetime.
Conclusion
So there you have it – my ultimate recipe for Fried Okra With Creamy Buttermilk Dip. I hope you’ll give it a try and experience the magic for yourself. Remember to follow my tips for success, and don’t be afraid to experiment and put your own spin on the recipe. And most importantly, have fun! Cooking should be a joy, not a chore. So gather your ingredients, put on some music, and get ready to create a dish that’s sure to impress. I promise, you’ll be amazed at how delicious and satisfying this simple Southern classic can be. Happy frying!


