
The Chocolate Alchemy Behind the Bite
To truly understand how to create the ultimate fudgy chocolate thumbprint cookie, we need to delve into the science of baking. The key lies in controlling the moisture content and fat distribution within the cookie dough. Too much flour, and you’ll end up with a dry, crumbly cookie. Not enough, and it will spread into a thin, crispy disc. The type of chocolate matters too. Dutch-processed cocoa powder, for example, has a different pH than natural cocoa powder, influencing the cookie’s rise and texture. And let’s not forget the sugar! Granulated sugar contributes to crispness, while brown sugar adds moisture and chewiness. Getting this balance right is crucial. Furthermore, the temperature of the ingredients plays a vital role. Cold butter, for instance, will create a flakier cookie, while softened butter helps create a more tender texture. Finally, understanding the Maillard reaction, the chemical reaction between amino acids and reducing sugars that gives baked goods their characteristic color and flavor, is essential for achieving that deep, rich chocolate flavor we crave. It’s a complex dance of ingredients and temperatures, but mastering these fundamentals is the key to unlocking the perfect fudgy chocolate thumbprint cookie.The Ultimate Fudgy Chocolate Thumbprint Cookie Recipe

Yields
About 24 cookiesPrep Time
20 minutesCook Time
10-12 minutesIngredients
- 1 cup (2 sticks) unsalted butter, softened
- 3/4 cup granulated sugar
- 3/4 cup packed light brown sugar
- 2 large eggs
- 1 teaspoon vanilla extract
- 1 teaspoon almond extract (optional, but enhances the chocolate flavor)
- 2 cups all-purpose flour
- 3/4 cup Dutch-processed cocoa powder
- 1 teaspoon baking soda
- 1/2 teaspoon salt
- 1 cup semi-sweet chocolate chips, finely chopped (for the filling)
- 1/4 cup heavy cream (for the filling)
- 1 tablespoon unsalted butter (for the filling)
Instructions
- Prepare the Dough: In a large bowl, cream together the softened butter, granulated sugar, and brown sugar until light and fluffy. Beat in the eggs one at a time, then stir in the vanilla and almond extracts.
- Combine Dry Ingredients: In a separate bowl, whisk together the flour, cocoa powder, baking soda, and salt.
- Combine Wet and Dry: Gradually add the dry ingredients to the wet ingredients, mixing until just combined. Be careful not to overmix.
- Chill the Dough: Cover the dough and chill in the refrigerator for at least 30 minutes (or up to 2 hours). This helps prevent the cookies from spreading too much during baking.
- Prepare the Filling: While the dough is chilling, make the chocolate filling. In a microwave-safe bowl, combine the chopped chocolate chips, heavy cream, and butter. Microwave in 30-second intervals, stirring in between, until the chocolate is melted and smooth. Let it cool slightly while you shape the cookies.
- Shape the Cookies: Preheat oven to 350°F (175°C). Line baking sheets with parchment paper. Roll the chilled dough into 1-inch balls. Place the balls on the prepared baking sheets, leaving about 2 inches between each cookie.
- Make the Thumbprints: Use your thumb (or the back of a small spoon) to make an indentation in the center of each cookie.
- Fill the Cookies: Spoon about 1/2 teaspoon of the chocolate filling into each thumbprint.
- Bake: Bake for 10-12 minutes, or until the edges are set but the centers are still slightly soft.
- Cool: Let the cookies cool on the baking sheets for a few minutes before transferring them to a wire rack to cool completely. The filling will set as it cools.
The Great Thumbprint Cookie Caper: My Investigation
My quest for the perfect fudgy chocolate thumbprint cookie was not a straightforward path. Like many of you, I initially thought it was as simple as throwing some ingredients together and baking. My first few attempts were a disaster.The Flat Cookie Fiasco
Initially, my cookies spread out into thin, crispy wafers, bearing little resemblance to the plump, fudgy delights I envisioned. I realized the butter was too soft, and the dough wasn’t chilled enough. I had an ‘Aha!’ moment when I remembered my grandmother’s advice: “Cold dough, happy cookies!”The Dry Filling Debacle
Next, I tackled the filling. In early attempts, it would dry out, becoming hard and crumbly after baking. I experimented with different ratios of chocolate and cream, eventually discovering that adding a touch of butter to the filling created a smoother, more luxurious texture that remained soft and fudgy even after cooling.The Cocoa Powder Conundrum
Then, there was the cocoa powder. My initial batches tasted…flat. I experimented with different types of cocoa powder. Natural cocoa powder provided a lighter color and a slightly acidic tang, but Dutch-processed cocoa powder delivered a deeper, richer chocolate flavor. Ultimately, I chose Dutch-processed for its superior depth of flavor, perfectly complementing the semi-sweet chocolate in the filling. I realized the power of quality cocoa is what takes recipes like these, or the Fudgy Brookies, to the next level.The Sweet Spot Solution
Finally, balancing the sweetness was crucial. I found that using a combination of granulated sugar and brown sugar created the perfect balance of crispness and chewiness. The brown sugar also added a subtle molasses flavor that enhanced the overall richness of the cookie. I also realized that the best cookies, like the Lemon Raspberry Cookies, have a delicate balance between sweet and tart or sweet and salty.The Foolproof Fudgy Thumbprint Technique
After extensive experimentation, I’ve distilled the process down to these key steps, ensuring fudgy centers and perfectly shaped cookies every time:- Chill the Dough: This is non-negotiable. Chilling prevents excessive spreading and allows the flavors to meld. Aim for at least 30 minutes, or even longer for best results.
- Use Softened (Not Melted) Butter: Softened butter creams beautifully with the sugar, creating air pockets that contribute to a tender crumb. Melted butter will result in a flatter, greasier cookie.
- Don’t Overmix: Overmixing develops gluten, leading to a tough cookie. Mix until just combined, then stop.
- Use Dutch-Processed Cocoa Powder: For the richest, most intense chocolate flavor, opt for Dutch-processed cocoa powder.
- Add Butter to the Filling: A touch of butter in the chocolate filling keeps it smooth, fudgy, and prevents it from drying out.
- Spoon, Don’t Overfill: Add a generous spoonful to each cookie, but don’t overfill the thumbprints; otherwise, the filling might spill over during baking.
- Underbake Slightly: Bake until the edges are set but the centers are still slightly soft. The cookies will continue to set as they cool.
- Let Them Cool Completely: Resist the urge to eat them straight from the oven! Allow the cookies to cool completely on a wire rack. This allows the filling to set and the flavors to fully develop.
Why is chilling the dough important for these cookies?
Chilling the dough is non-negotiable as it prevents excessive spreading during baking and allows the flavors to meld together effectively.
What type of cocoa powder is recommended for the best chocolate flavor in the cookies?
Dutch-processed cocoa powder is recommended for the richest and most intense chocolate flavor in the cookies.
How do I prevent the chocolate filling from drying out and becoming hard?
Adding a touch of unsalted butter to the chocolate filling will help keep it smooth, fudgy, and prevent it from drying out after baking.
Why is it important not to overmix the cookie dough?
Overmixing the cookie dough develops gluten, which can result in a tough cookie. It’s best to mix the wet and dry ingredients until just combined.
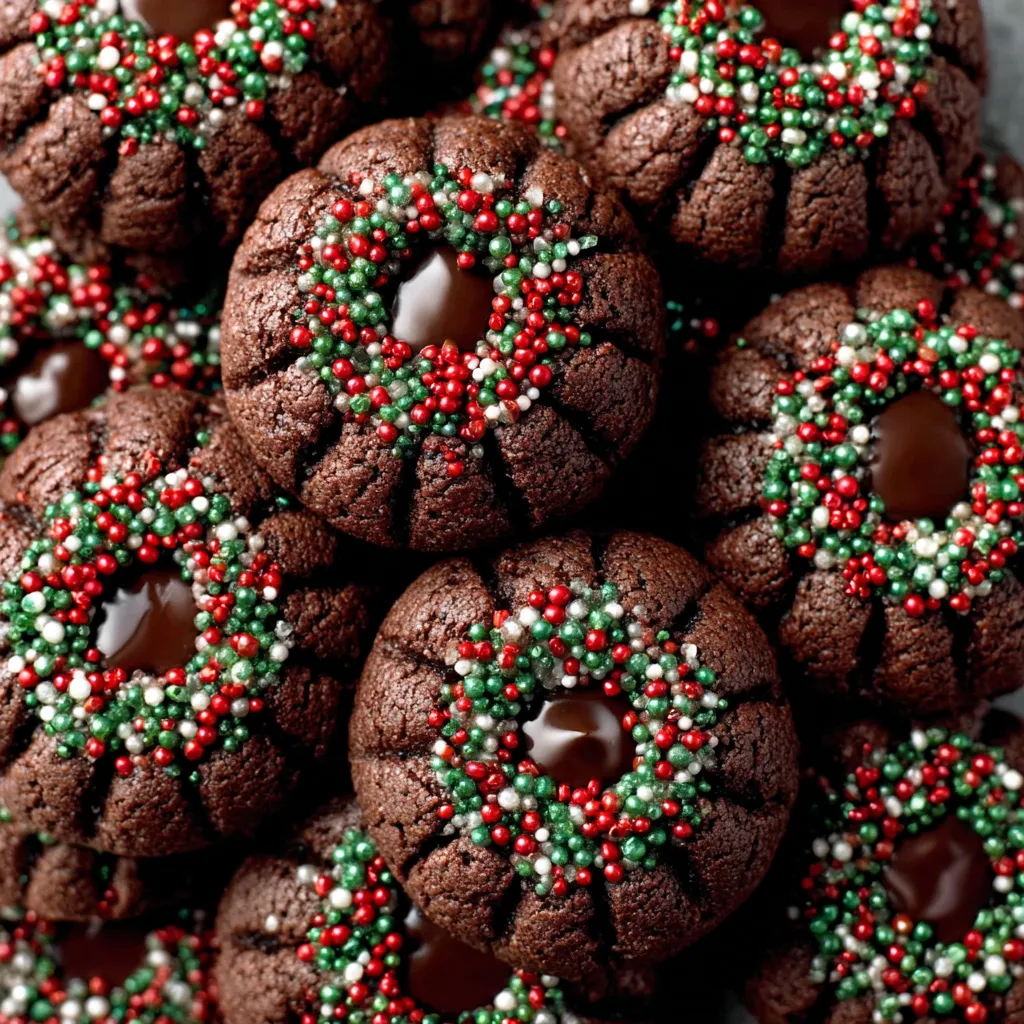
Fudgy Chocolate Thumbprint Cookies
These fudgy chocolate thumbprint cookies boast intensely chocolatey centers nestled in soft, chewy cookies. This recipe uses Dutch-processed cocoa powder and a touch of butter in the filling for a smooth, luxurious texture that stays soft even after cooling. Chilling the dough is key to preventing excessive spreading and achieving the perfect shape.
Ingredients
Equipment
Method
- Prepare the Dough: In a large bowl, cream together the softened butter, granulated sugar, and brown sugar until light and fluffy. Beat in the eggs one at a time, then stir in the vanilla and almond extracts.
- Combine Dry Ingredients: In a separate bowl, whisk together the flour, cocoa powder, baking soda, and salt.
- Combine Wet and Dry: Gradually add the dry ingredients to the wet ingredients, mixing until just combined. Be careful not to overmix.
- Chill the Dough: Cover the dough and chill in the refrigerator for at least 30 minutes (or up to 2 hours). This helps prevent the cookies from spreading too much during baking.
- Prepare the Filling: While the dough is chilling, make the chocolate filling. In a microwave-safe bowl, combine the chopped chocolate chips, heavy cream, and butter. Microwave in 30-second intervals, stirring in between, until the chocolate is melted and smooth. Let it cool slightly while you shape the cookies.
- Shape the Cookies: Preheat oven to 350°F (175°C). Line baking sheets with parchment paper. Roll the chilled dough into 1-inch balls. Place the balls on the prepared baking sheets, leaving about 2 inches between each cookie.
- Make the Thumbprints: Use your thumb (or the back of a small spoon) to make an indentation in the center of each cookie.
- Fill the Cookies: Spoon about 1/2 teaspoon of the chocolate filling into each thumbprint.
- Bake: Bake for 10-12 minutes, or until the edges are set but the centers are still slightly soft.
- Cool: Let the cookies cool on the baking sheets for a few minutes before transferring them to a wire rack to cool completely. The filling will set as it cools.
Notes
For the richest, most intense chocolate flavor, opt for Dutch-processed cocoa powder. Adding a touch of butter to the chocolate filling keeps it smooth, fudgy, and prevents it from drying out. Chilling the dough is non-negotiable; it prevents excessive spreading and allows the flavors to meld. Store cooled cookies in an airtight container at room temperature for up to 3 days.


