
Imagine sinking your fork into a rich, velvety smooth slice of cheesecake, swirled with the unmistakable tang and cocoa notes of red velvet cake. This isn’t just dessert; it’s an experience. Prepare to wow your family and friends with this show-stopping Red Velvet Cheesecake – I promise, it’s easier than you think!
Let’s Gather Our Ingredients
Here’s what you’ll need to create this masterpiece. Don’t worry, I’ll break it all down!
For the Red Velvet Cake Layer:
- 1 1/2 cups all-purpose flour
- 1 cup granulated sugar
- 1 teaspoon baking soda
- 1 teaspoon baking powder
- 1 teaspoon cocoa powder
- 1 teaspoon salt
- 1 cup buttermilk
- 1 large egg
- 1 teaspoon vanilla extract
- 1 ounce (2 tablespoons) red food coloring
- 1/2 cup vegetable oil
- 1 teaspoon white vinegar
For the Cheesecake Filling:
- 32 ounces cream cheese, softened
- 1 1/2 cups granulated sugar
- 4 large eggs
- 1/4 cup sour cream
- 1 teaspoon vanilla extract
For the Cream Cheese Frosting:
- 8 ounces cream cheese, softened
- 1/2 cup (1 stick) unsalted butter, softened
- 3 cups powdered sugar
- 1 teaspoon vanilla extract
- 2-4 tablespoons milk or cream (to adjust consistency)
Essential Tools You’ll Need

Having the right tools makes all the difference! These are my go-to items for making cheesecake:
- 9-inch springform pan
- Mixing bowls (large and medium)
- Electric mixer (stand mixer or hand mixer)
- Rubber spatula
- Measuring cups and spoons
- Parchment paper
- Aluminum foil
- Wire rack
Step-by-Step Instructions: Let’s Bake!
Okay, friend, let’s get baking! I’ll guide you through each step. Don’t be intimidated – it’s all about taking it one step at a time.
Making the Red Velvet Cake Layer:
- Preheat and Prep: Preheat your oven to 350°F (175°C). Grease and flour a 9-inch springform pan. You can also line the bottom with parchment paper for easier removal.
- Combine Dry Ingredients: In a large bowl, whisk together the flour, sugar, baking soda, baking powder, cocoa powder, and salt.
- Combine Wet Ingredients: In a separate bowl, whisk together the buttermilk, egg, vanilla extract, and red food coloring.
- Combine Wet and Dry: Gradually add the wet ingredients to the dry ingredients, mixing until just combined. Be careful not to overmix!
- Add Oil and Vinegar: Stir in the vegetable oil and vinegar until well combined. The vinegar helps activate the baking soda, creating a light and airy texture.
- Bake: Pour the batter into the prepared springform pan and bake for 25-30 minutes, or until a toothpick inserted into the center comes out clean.
- Cool Completely: Let the cake layer cool in the pan for 10 minutes before transferring it to a wire rack to cool completely.
- Trim (If Needed): Once cooled, if the cake layer is uneven, gently trim the top with a serrated knife to create a flat surface.
Making the Cheesecake Filling:
- Cream Cheese Prep: Ensure your cream cheese is softened to room temperature. This is crucial for a smooth, lump-free cheesecake. Trust me, I’ve learned this the hard way!
- Cream the Cheese: In a large bowl, beat the softened cream cheese with an electric mixer until smooth and creamy.
- Add Sugar: Gradually add the sugar, beating until well combined.
- Add Eggs: Add the eggs one at a time, beating well after each addition. Be careful not to overmix at this stage, as it can incorporate too much air and cause the cheesecake to crack.
- Add Sour Cream and Vanilla: Stir in the sour cream and vanilla extract until just combined.
Assembling and Baking the Red Velvet Cheesecake:
- Prepare the Pan: Wrap the bottom of the springform pan tightly with heavy-duty aluminum foil. This will help prevent water from seeping into the cheesecake during the water bath.
- Pour the Filling: Place the cooled red velvet cake layer back into the springform pan. Pour the cheesecake filling over the cake layer, spreading it evenly.
- Water Bath: Place the springform pan inside a larger roasting pan. Carefully pour hot water into the roasting pan until it reaches about halfway up the sides of the springform pan. This water bath creates a moist environment that helps the cheesecake bake evenly and prevents cracking.
- Bake: Bake in the preheated oven for 55-70 minutes, or until the edges of the cheesecake are set but the center still has a slight jiggle.
- Cool Slowly: Turn off the oven and let the cheesecake cool in the oven with the door slightly ajar for 1 hour. This gradual cooling process helps prevent cracking.
- Chill: Remove the cheesecake from the water bath and let it cool completely on a wire rack. Then, cover it with plastic wrap and refrigerate for at least 6 hours, or preferably overnight. This allows the cheesecake to fully set and develop its flavor.
Making the Cream Cheese Frosting:
- Soften Ingredients: Make sure your cream cheese and butter are softened to room temperature.
- Cream Together: In a large bowl, beat the softened cream cheese and butter with an electric mixer until smooth and creamy.
- Add Powdered Sugar: Gradually add the powdered sugar, beating until well combined.
- Add Vanilla and Milk: Stir in the vanilla extract and milk (or cream) until the frosting reaches your desired consistency. Add more milk if needed to thin it out.
Frosting and Serving:
- Frost the Cheesecake: Once the cheesecake is completely chilled, remove it from the springform pan. Spread the cream cheese frosting evenly over the top.
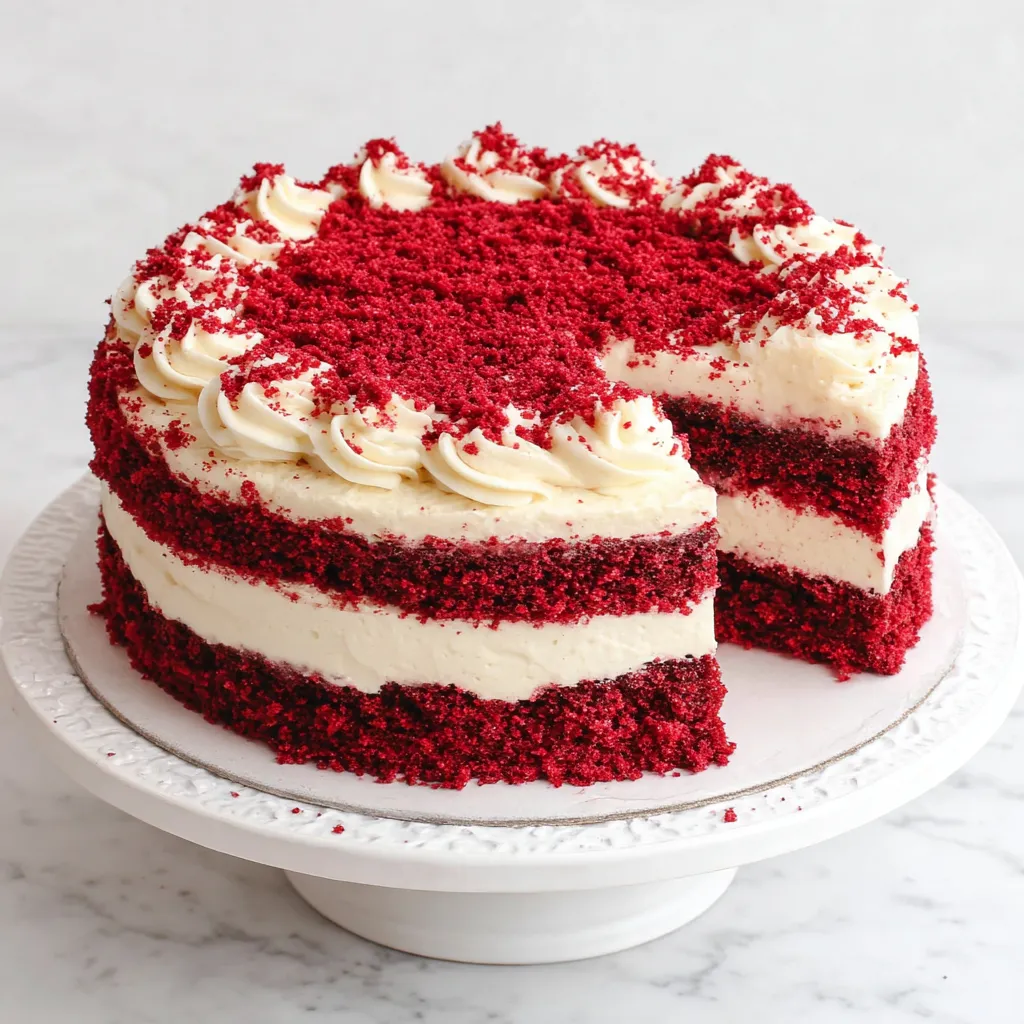
- Garnish (Optional): You can garnish the cheesecake with red velvet cake crumbs, chocolate shavings, or fresh berries for an extra touch of elegance.
- Slice and Serve: Slice the cheesecake with a sharp knife and serve chilled. Enjoy!
Troubleshooting Tips for Cheesecake Success
Cheesecake can be a little finicky, but don’t worry! Here are some common issues and how to fix them:
- Cracked Cheesecake: This is usually caused by baking the cheesecake at too high of a temperature or cooling it too quickly. Using a water bath and cooling the cheesecake gradually in the oven can help prevent cracking.
- Lumpy Filling: This is often due to using cold cream cheese. Make sure your cream cheese is softened to room temperature before beating it.
- Soggy Crust: This can happen if water seeps into the springform pan during the water bath. Make sure to wrap the bottom of the pan tightly with aluminum foil.
- Cheesecake Not Setting: Ensure you bake the cheesecake long enough and chill it for the recommended time. Sometimes, it just needs a little extra time in the fridge.
Variations and Creative Twists
Want to put your own spin on this Red Velvet Cheesecake? Here are a few ideas:
- Chocolate Chips: Add chocolate chips to the cheesecake filling for a richer, more decadent flavor.
- Oreo Crust: Use a crushed Oreo cookie crust instead of the red velvet cake layer for a fun twist.
- Berry Swirl: Swirl a berry puree (like raspberry or strawberry) into the cheesecake filling before baking for a fruity flavor.
- Red Velvet Strawberry Cheesecake: Add a layer of fresh strawberries between the red velvet cake and the cheesecake filling for a delicious combination.
More Cheesecake Inspiration!
If you’re a cheesecake fanatic like me, you’ll love these other recipes:
- Craving caramel and apples? Give these Caramel Apple Cheesecake Bars a try!
- These Samoa Cheesecake bars are a bite of heaven!
- Looking for something seasonal and cozy? You should try my recipe for Apple Cider Cheesecake.
- Or maybe you want a different version of apple cheesecake, try my Caramel Apple Cheesecake.
- Finally, if you want a southern classic, look no further than the Banana Pudding Cheesecake.
In Conclusion: Enjoy Your Masterpiece!
There you have it – a stunning Red Velvet Cheesecake that’s sure to impress. Baking takes practice, so don’t be discouraged if it doesn’t turn out perfectly the first time. The most important ingredient is always love (and maybe a little patience!). Happy baking, my friend!
Why is it important to use a water bath when baking this Red Velvet Cheesecake?
The water bath creates a moist environment that helps the cheesecake bake evenly and prevents cracking.
What causes a cheesecake to crack, and how can I prevent it?
Cracking is usually caused by baking the cheesecake at too high a temperature or cooling it too quickly. Using a water bath and cooling the cheesecake gradually in the oven can help prevent cracking.
Why is it important for the cream cheese to be softened before making the cheesecake filling?
Softened cream cheese is crucial for a smooth, lump-free cheesecake filling. Using cold cream cheese can result in a lumpy texture.
Can I substitute the red velvet cake layer with something else?
Yes, you can use a crushed Oreo cookie crust instead of the red velvet cake layer for a fun twist.
Irresistible Red Velvet Cheesecake
Ingredients
Equipment
Method
- Preheat oven to 350°F (175°C). Grease and flour a 9-inch springform pan, lining the bottom with parchment paper.
- In a large bowl, whisk together the flour, sugar, baking soda, baking powder, cocoa powder, and salt.
- In a separate bowl, whisk together the buttermilk, egg, vanilla extract, and red food coloring.
- Gradually add the wet ingredients to the dry ingredients, mixing until just combined.
- Stir in the vegetable oil and vinegar until well combined.
- Pour the batter into the prepared springform pan and bake for 25-30 minutes, or until a toothpick inserted into the center comes out clean.
- Let the cake layer cool in the pan for 10 minutes before transferring it to a wire rack to cool completely.
- Trim the top of the cooled cake layer with a serrated knife if it’s uneven.
- Ensure cream cheese is softened to room temperature.
- In a large bowl, beat the softened cream cheese with an electric mixer until smooth and creamy.
- Gradually add the sugar, beating until well combined.
- Add the eggs one at a time, beating well after each addition. Be careful not to overmix.
- Stir in the sour cream and vanilla extract until just combined.
- Wrap the bottom of the springform pan tightly with heavy-duty aluminum foil.
- Place the cooled red velvet cake layer back into the springform pan.
- Pour the cheesecake filling over the cake layer, spreading it evenly.
- Place the springform pan inside a larger roasting pan.
- Carefully pour hot water into the roasting pan until it reaches about halfway up the sides of the springform pan.
- Bake in the preheated oven for 55-70 minutes, or until the edges of the cheesecake are set but the center still has a slight jiggle.
- Turn off the oven and let the cheesecake cool in the oven with the door slightly ajar for 1 hour.
- Remove the cheesecake from the water bath and let it cool completely on a wire rack.
- Cover it with plastic wrap and refrigerate for at least 6 hours, or preferably overnight.
- Make sure cream cheese and butter are softened to room temperature.
- In a large bowl, beat the softened cream cheese and butter with an electric mixer until smooth and creamy.
- Gradually add the powdered sugar, beating until well combined.
- Stir in the vanilla extract and milk (or cream) until the frosting reaches your desired consistency.
- Once the cheesecake is completely chilled, remove it from the springform pan.
- Spread the cream cheese frosting evenly over the top.
- Garnish with red velvet cake crumbs, chocolate shavings, or fresh berries (optional).
- Slice and serve chilled.


