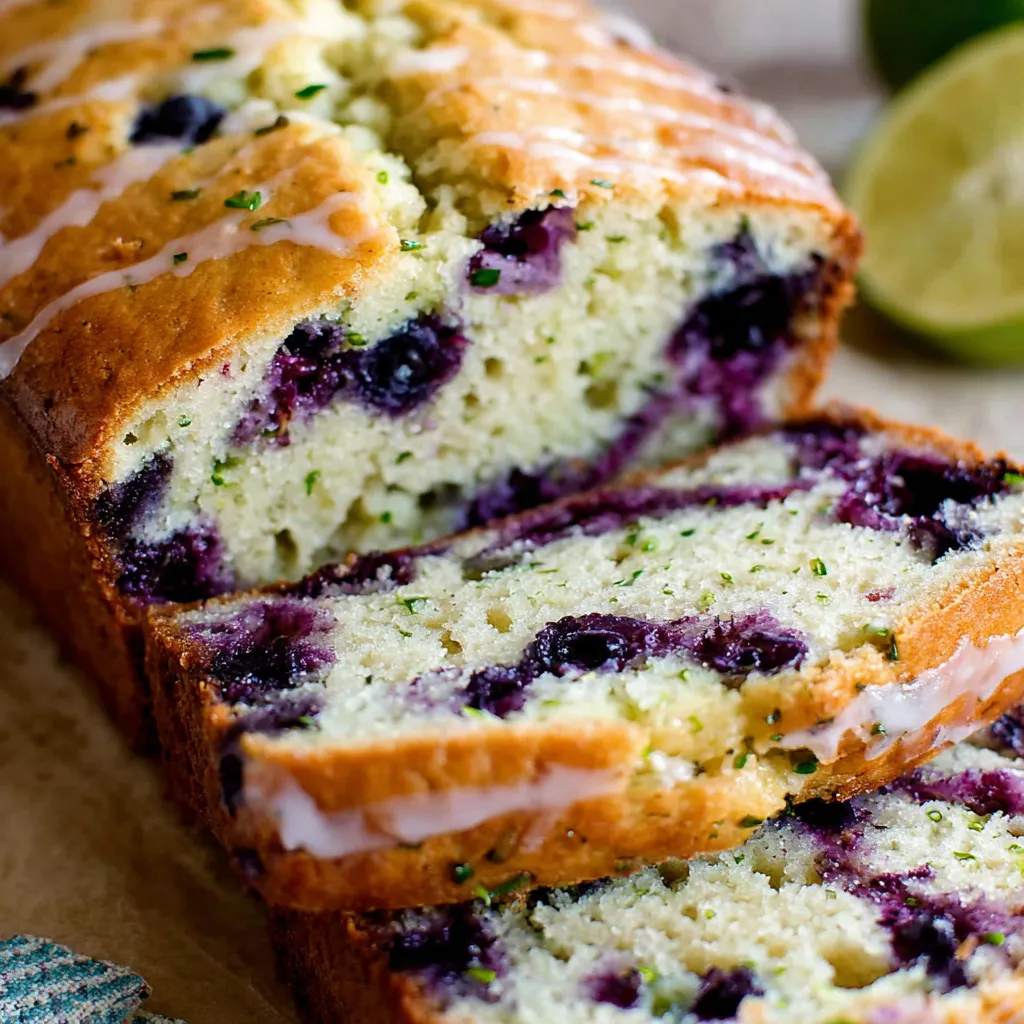
Lemon Blueberry Zucchini Bread: Surprisingly Healthy & Delicious?! 😉 If you’re anything like me, the idea of a “healthy” baked good often conjures up images of dense, dry, and flavorless creations. But what if I told you that this lemon blueberry zucchini bread not only satisfies your sweet tooth, but also sneaks in a host of nutritious ingredients? Get ready to be pleasantly surprised!
Unraveling the Secrets of Lemon Blueberry Zucchini Bread
Zucchini bread has long been a beloved treat, but have you ever thought about adding a twist of lemon and a burst of blueberries? This unique combination not only elevates the flavor profile, but also packs a powerful nutritional punch. Zucchini, the unsung hero of this recipe, is a versatile vegetable that provides a moist and tender texture to the bread, while also contributing a wealth of vitamins, minerals, and antioxidants.
The addition of fresh lemon zest and juice brightens up the overall flavor, lending a refreshing zing that perfectly complements the sweetness of the blueberries. Speaking of blueberries, these little superfoods are loaded with antioxidants, fiber, and a host of other beneficial nutrients that can support your overall health.
The Nutritional Powerhouse: Zucchini, Lemon, and Blueberries
One of the main reasons this lemon blueberry zucchini bread is considered a “secretly healthy” treat is the impressive nutritional profile of its key ingredients:
Zucchini
- High in vitamins A, C, and K, as well as manganese and potassium.
- Rich in antioxidants that can help protect against oxidative stress and inflammation.
- A good source of fiber, which can aid in digestion and promote feelings of fullness.
Lemons
- Packed with vitamin C, which supports immune function and skin health.
- Contain citric acid, which may help alkalize the body and support detoxification.
- Provide a refreshing, zesty flavor that brightens up baked goods.
Blueberries
- Bursting with antioxidants, including anthocyanins, which can help fight free radicals.
- A good source of fiber, vitamins, and minerals like vitamin C, vitamin K, and manganese.
- May have potential benefits for brain health, heart health, and blood sugar regulation.
By incorporating these nutrient-dense ingredients into a classic zucchini bread recipe, you’re not only creating a delicious treat, but also providing your body with a wealth of essential vitamins, minerals, and antioxidants.
Baking the Perfect Lemon Blueberry Zucchini Bread
Now that you know the health benefits of the key ingredients, let’s dive into the step-by-step process of baking this mouthwatering lemon blueberry zucchini bread:
Ingredients:
- 2 cups all-purpose flour
- 1 teaspoon baking soda
- 1/2 teaspoon salt
- 1/2 cup unsalted butter, softened
- 3/4 cup granulated sugar
- 2 large eggs
- 1 teaspoon vanilla extract
- 1 tablespoon lemon zest
- 2 tablespoons lemon juice
- 1 1/2 cups grated zucchini (about 1 medium zucchini)
- 1 cup fresh or frozen blueberries
Instructions:
- Preheat your oven to 350°F (175°C). Grease a 9×5-inch loaf pan with butter or non-stick cooking spray.
- In a medium bowl, whisk together the flour, baking soda, and salt. Set aside.
- In a large bowl, cream the softened butter and sugar until light and fluffy, about 2-3 minutes. Beat in the eggs one at a time, then stir in the vanilla extract, lemon zest, and lemon juice.
- Fold in the grated zucchini and blueberries until just combined.
- Gradually add the dry ingredients to the wet ingredients, mixing just until no dry pockets remain. Be careful not to overmix.
- Pour the batter into the prepared loaf pan and smooth the top with a spatula.
- Bake for 55-65 minutes, or until a toothpick inserted into the center comes out clean. Allow the bread to cool in the pan for 10 minutes before transferring it to a wire rack to cool completely.
The key to achieving the perfect texture is to not overmix the batter, as this can result in a dense and tough bread. Gently folding in the zucchini and blueberries ensures a moist and tender crumb. Be sure to let the bread cool completely before slicing, as this allows the flavors to meld and the texture to set.
Serving and Enjoying Your Lemon Blueberry Zucchini Bread
Once your lemon blueberry zucchini bread has cooled, it’s time to dive in and savor the flavors. This versatile bread can be enjoyed in a variety of ways:
- As a Snack: Slice a piece and enjoy it on its own, perhaps with a cup of tea or coffee.
- For Breakfast: Toast a slice and top it with a smear of cream cheese or a drizzle of honey.
- Dessert: Serve a warm slice with a scoop of vanilla ice cream or a dollop of whipped cream.
- Gifting: Wrap up a loaf and give it to friends, family, or neighbors as a thoughtful homemade treat.
No matter how you choose to enjoy it, this lemon blueberry zucchini bread is sure to delight your taste buds and leave you feeling satisfied, both physically and mentally. The combination of moist, tender bread, bright citrus notes, and bursts of juicy blueberries creates a truly irresistible and guilt-free indulgence.
Conclusion: A Healthier Twist on a Classic Favorite
In the end, “Lemon Blueberry Zucchini Bread: Secretly Healthy?! 😉” is a resounding yes. By incorporating nutrient-dense ingredients like zucchini, lemons, and blueberries, you can enjoy a delicious baked treat that not only satisfies your cravings but also provides your body with a wealth of essential vitamins, minerals, and antioxidants.
So the next time you’re craving a sweet and comforting bread, consider giving this lemon blueberry zucchini bread a try. Your taste buds (and your health) will thank you!

ULTIMATE CREAMY CHICKEN CHILI
Ingredients
Equipment
Method
- Place the chicken breasts in a large pot and cover with water. Bring to a boil, then reduce heat and simmer for 15-20 minutes, or until the chicken is cooked through. Remove the chicken from the pot and let it cool slightly. Shred the chicken with two forks and set aside. Save the chicken broth you used to cook the chicken for extra flavor!
- In a large pot or Dutch oven, heat the olive oil over medium heat. Add the diced onion and cook until softened, about 5 minutes. Add the minced garlic and jalapeño (if using) and cook for another minute, until fragrant.
- Stir in the canned green chiles, Great Northern beans, Cannellini beans, cumin, oregano, chili powder, salt, and pepper. Mix well to combine.
- Pour in the chicken broth (and reserved broth from cooking the chicken, if using). Bring the mixture to a boil, then reduce heat and simmer for 15-20 minutes, allowing the flavors to meld together.
- Add the shredded chicken to the pot and stir to combine. Heat through for a few minutes.
- Reduce the heat to low. Add the softened cream cheese and sour cream. Stir until the cream cheese is completely melted and the chili is smooth and creamy. Don't let the mixture boil after adding the cream cheese, or it might curdle.
- Stir in the lime juice.
- Taste the chili and adjust the seasoning as needed. Add more salt, pepper, cumin, or chili powder to your liking.
- Ladle the Creamy White Chicken Chili into bowls and garnish with your favorite toppings, such as shredded cheese, sour cream, avocado, cilantro, and tortilla chips. Serve hot.