Schoolhouse cafeterias hold a certain kind of magic, a place where simple, honest-to-goodness treats could make an ordinary Tuesday feel like a celebration. These Peanut Butter Lunch Lady Bars are a direct line to that memory, a recipe built not on fancy techniques but on the pure, unadulterated joy of a soft, chewy peanut butter base melting into a thick, creamy peanut butter frosting. It’s the kind of dessert that doesn’t ask for much but gives back everything in nostalgic comfort.
What you’ll have in the end is a pan of pure bliss, a bar that is unapologetically rich and satisfying. The base is dense and cookie-like, with a deep, toasted peanut flavor, while the frosting is a sweet, fluffy cloud that ties it all together. This isn’t just a dessert; it’s a feeling—the feeling of being cared for, one perfect, peanut-buttery square at a time.
Why This Method Works
- Room Temperature Ingredients: Using softened butter and room temperature eggs is the key to a smooth, emulsified batter. Cold ingredients don’t mix properly and can result in a dense, greasy base.
- The Warm Frosting Spread: Spreading the frosting while the base is still slightly warm is my secret. It helps the frosting melt just a tiny bit, making it incredibly easy to spread into a perfect, even layer.
- Don’t Overbake the Base: Pull the pan from the oven when the edges are just golden and the center looks slightly underdone. It will continue to cook as it cools, ensuring that perfectly soft and chewy texture we all love.
Gather Your Ingredients
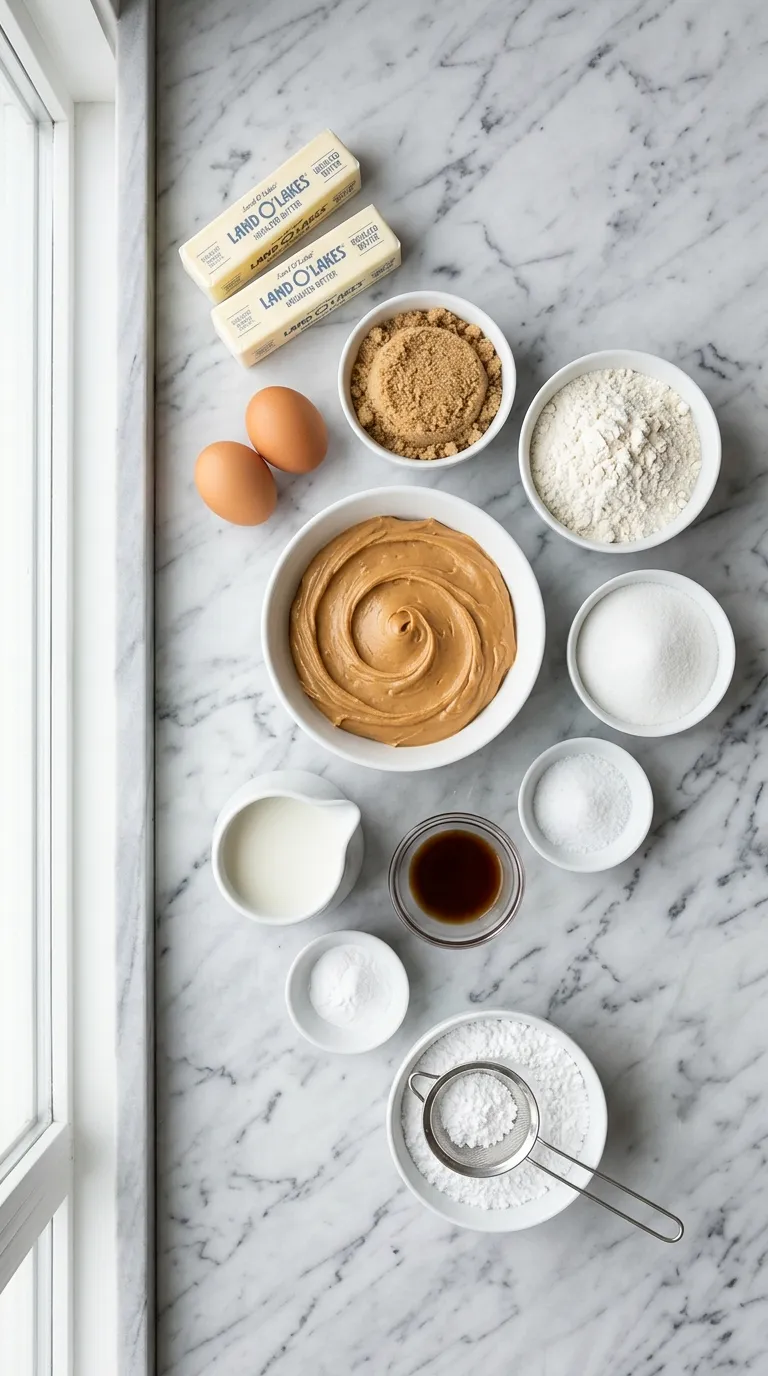
For the Peanut Butter Base:
- Unsalted Butter: (Must be softened to room temperature. This is non-negotiable for creaming properly with the sugar to create a light, tender crumb.)
- Creamy Peanut Butter: (Use a standard commercial brand like Jif or Skippy. Natural peanut butters can separate and create an oily result.)
- Light Brown Sugar: (Packed. It adds moisture and a wonderful, subtle caramel note that complements the peanut butter.)
- Granulated Sugar: (For sweetness and a classic cookie-like texture.)
- Large Eggs: (To bind everything together and add richness.)
- Vanilla Extract: (A splash enhances all the other flavors.)
- All-Purpose Flour: (The structural backbone of the bars.)
- Baking Soda: (For just the right amount of lift.)
- Salt: (To balance the sweetness.)
For the Peanut Butter Frosting:
- Unsalted Butter: (Again, softened to room temperature for a silky-smooth frosting.)
- Creamy Peanut Butter: (The star of the frosting, making it doubly delicious.)
- Powdered Sugar: (Sift it if it’s lumpy to guarantee a perfectly smooth texture.)
- Milk or Heavy Cream: (To thin the frosting to the perfect spreadable consistency.)
- Vanilla Extract: (Just a little bit rounds out the flavor.)
Simple Swaps
- Crunchy Peanut Butter: If you love a bit of texture, feel free to use crunchy peanut butter in the base. I recommend sticking with creamy for the frosting for a smoother finish.
- Gluten-Free Flour: A good quality 1-to-1 gluten-free baking flour blend can be substituted for the all-purpose flour.
- Alternative Milk: In the frosting, you can use almond milk, oat milk, or any other milk you have on hand instead of dairy milk.
- Dark Brown Sugar: If it’s all you have, dark brown sugar will work. It will give the bars a deeper, more molasses-forward flavor.
Make It Your Own
While this recipe is a classic for a reason, there’s always room to play in the kitchen. These are a few variations that have earned a permanent spot in my recipe box.For a bit of contrast, you can fold a cup of semi-sweet chocolate chips into the batter before pressing it into the pan. The little pockets of melted chocolate are a delightful surprise.
A sprinkle of flaky sea salt over the top of the frosting just before it sets is another wonderful touch. It cuts through the sweetness and makes the peanut butter flavor pop even more.
If you love the combination of peanut butter and fruit, you can spread a thin layer of your favorite jam (strawberry or grape works beautifully) over the warm base before adding the frosting.
The Time-Tested Method
1. Prepare Your Pan and Preheat
First things first, get your oven preheating to 350°F (175°C). Take a 9×13 inch baking pan and grease it lightly. I always recommend lining it with parchment paper, leaving a little overhang on two sides to act as “handles.” This will make lifting the bars out for easy cutting an absolute dream.2. Cream the Butter and Sugars
In a large bowl with a hand mixer or in the bowl of a stand mixer, beat the softened butter, creamy peanut butter, light brown sugar, and granulated sugar together on medium-high speed. You’ll want to continue mixing for a good 2-3 minutes, until the mixture is light, pale, and fluffy. This step whips air into the base, which is crucial for a tender texture.3. Combine the Wet and Dry Ingredients
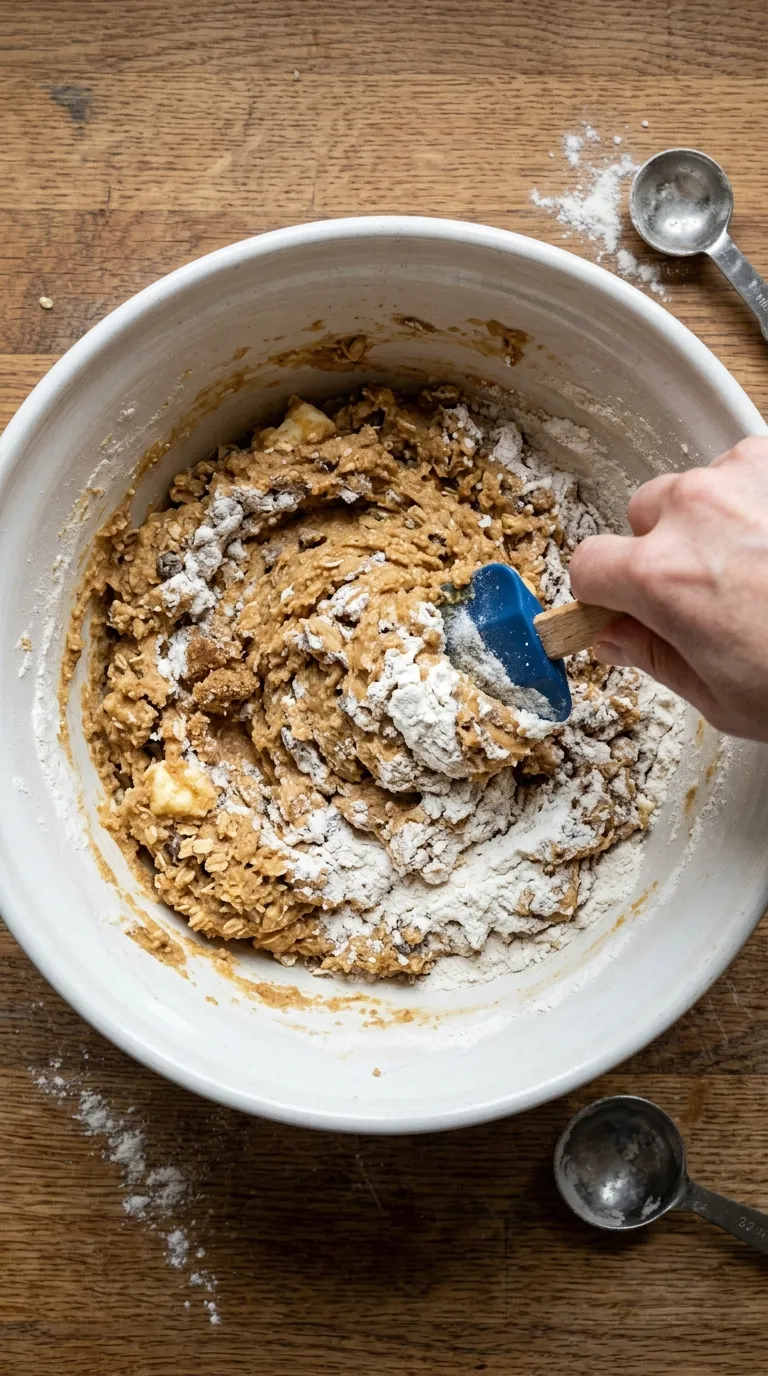
Add the eggs one at a time, beating well after each addition. Scrape down the sides of the bowl, then mix in the vanilla extract. In a separate, medium bowl, whisk together the flour, baking soda, and salt. With the mixer on low speed, gradually add the dry ingredients to the wet ingredients, mixing only until just combined. Be careful not to overmix here; a few streaks of flour are perfectly fine.4. Press and Bake the Base
Transfer the dough to your prepared pan. The dough will be thick and a bit sticky. Lightly grease your hands or a spatula to press it into an even layer across the bottom of the pan. Bake for 20-25 minutes, or until the edges are lightly golden brown and a toothpick inserted into the center comes out with moist crumbs attached. Let it cool on a wire rack for about 15-20 minutes while you make the frosting. It should be warm, but not piping hot.5. Whip Up the Peanut Butter Frosting
While the base cools slightly, make your frosting. In a large bowl, beat the softened butter and peanut butter together until smooth and creamy. Gradually add the powdered sugar, mixing on low speed until it’s incorporated. Add the vanilla and 2 tablespoons of milk. Increase the speed to medium-high and beat for 2-3 minutes until the frosting is light and fluffy. If it’s too thick, add more milk, one teaspoon at a time, until you reach a perfect, spreadable consistency. This frosting is similar in its simple, decadent nature to the one used in Peanut Butter Fudge, proving that sometimes the best things are the easiest.6. Frost and Chill
Drop spoonfuls of the frosting over the still-warm base. Use an offset spatula to gently spread it into an even layer. The warmth from the base will help it glide on smoothly. Let the bars cool completely at room temperature, or if you’re in a hurry, you can place them in the refrigerator for about an hour to help the frosting set. Once set, use the parchment handles to lift the bars out of the pan and cut them into squares. These bars are a wonderful alternative when you want a peanut butter treat without shaping individual cookies like Peanut Butter Blossoms or Reese’s Mini Cup Peanut Butter Cookies.Tips for Best Results
Over the years, I’ve learned a few little things that make a big difference. Keep these notes in mind, and your bars will turn out perfectly every single time.- Measure Flour Correctly: Don’t scoop the flour directly from the bag with your measuring cup. This compacts it and you’ll end up with too much, resulting in dry bars. Instead, spoon the flour into the measuring cup and level it off with a knife.
- Don’t Rush the Cooling: I know it’s tempting to slice into them right away, but letting the bars cool completely is essential. This allows the base to set up properly and ensures clean, neat cuts. If you cut them while warm, they will be crumbly.
- Storage is Simple: These bars can be stored in an airtight container at room temperature for up to 4 days, or in the refrigerator for a week. They are fantastic for making ahead. They’re as easy to store as my simple Sugar Cookie Bars.
- For a Crowd: This recipe easily doubles and can be baked in a half-sheet pan for a larger gathering. Just keep an eye on the baking time, as it may need a few extra minutes. These are always a hit, much like other easy-to-share treats such as Peanut Butter Bites or even Chocolate Peanut Butter Valentine Hearts when cut into shapes.
Perfect Pairings
These bars are a powerhouse of flavor all on their own, but they truly sing when served with a few simple accompaniments.The most classic pairing, of course, is a tall, cold glass of milk. It’s a combination that’s been loved by children and adults for generations for a very good reason.
For a more decadent dessert, serve a square slightly warmed with a scoop of vanilla bean ice cream. A drizzle of chocolate or caramel sauce over the top would not be out of place, either.
They are also the perfect companion to a hot cup of coffee or tea in the afternoon, providing that little boost of sweetness to get you through the rest of the day.
Know someone who loves Peanut Butter Lunch Lady Bars? Share this recipe with them
What type of peanut butter is best for this recipe?
For the best results, use a standard commercial creamy peanut butter like Jif or Skippy. The article advises against using natural peanut butters as they can separate and create an oily texture. You can use crunchy peanut butter in the base for added texture, but creamy is recommended for a smooth frosting.
How do I ensure the bars have a soft and chewy texture?
The key to a soft and chewy texture is to avoid overbaking the base. You should pull the pan from the oven when the edges are just golden and the center still looks slightly underdone. The bars will continue to cook as they cool, which prevents them from becoming dry.
Can I make these Peanut Butter Lunch Lady Bars gluten-free?
Yes, you can adapt this recipe to be gluten-free. The article suggests substituting the all-purpose flour with a good quality 1-to-1 gluten-free baking flour blend.
What is the best way to store these peanut butter bars?
Store the bars in an airtight container at room temperature for up to 4 days. If you need to keep them longer, they can be stored in the refrigerator for up to one week.
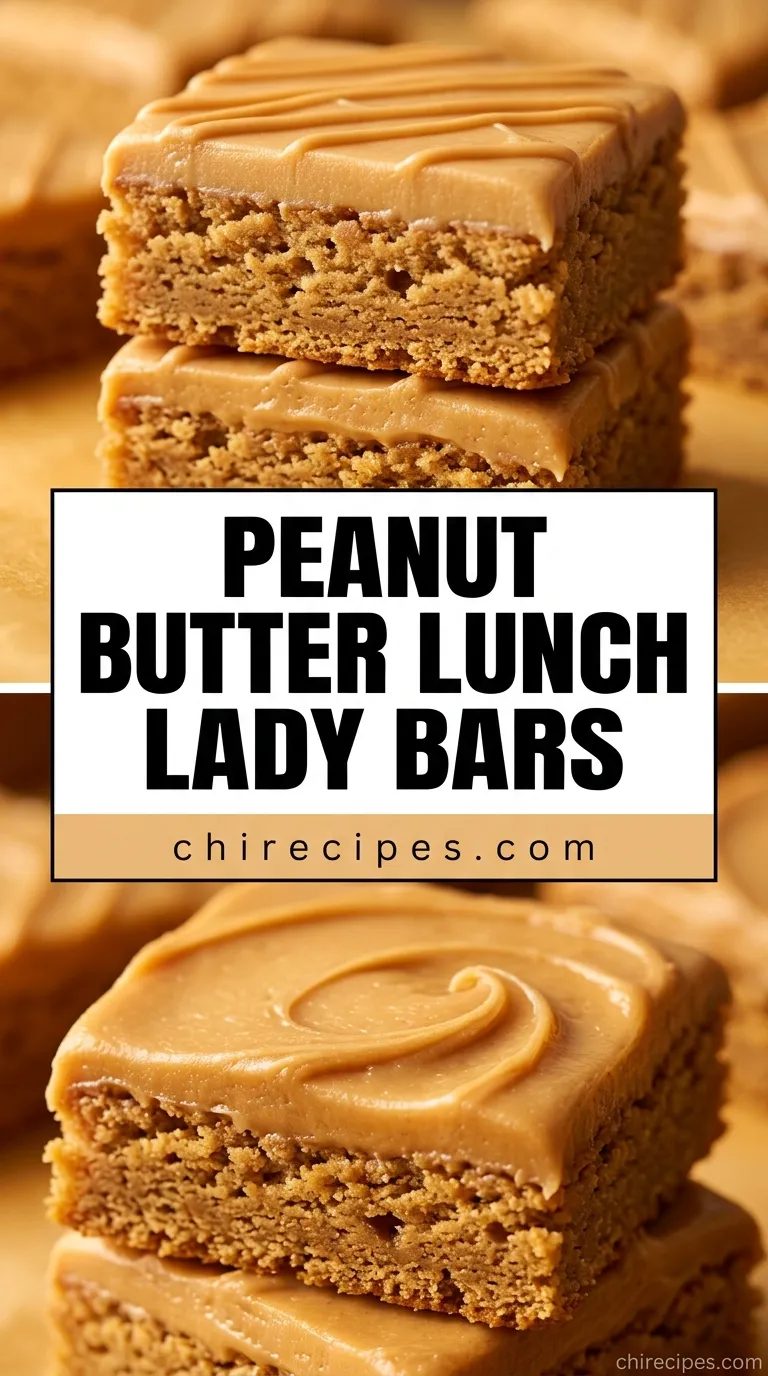
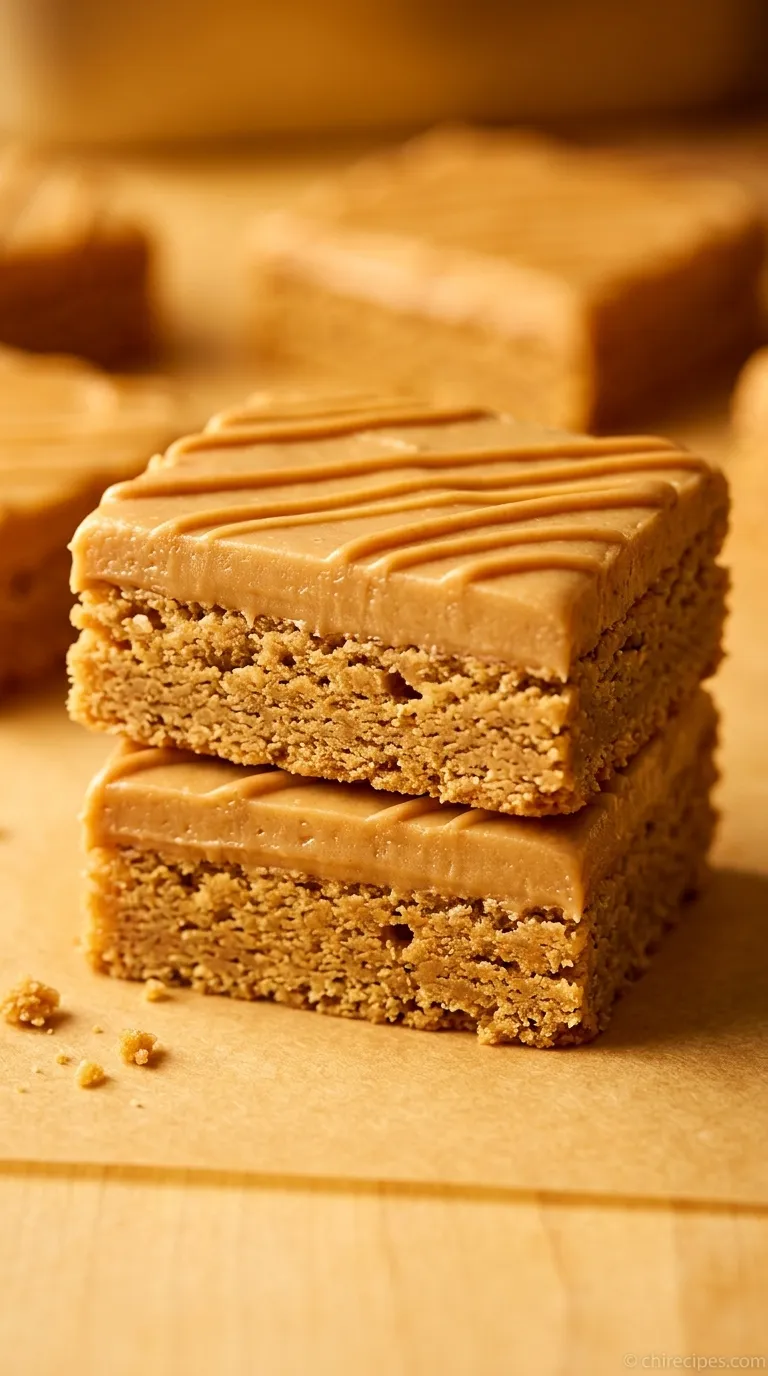
Peanut Butter Lunch Lady Bars
Ingredients
Equipment
Method
- Preheat your oven to 350°F (175°C). Grease a 9×13 inch baking pan and line it with parchment paper, leaving an overhang on two sides to use as handles.
- In a large bowl with a mixer, beat the softened butter, 1 cup of creamy peanut butter, light brown sugar, and granulated sugar on medium-high speed for 2-3 minutes until light and fluffy.
- Add the eggs one at a time, beating well after each. Scrape down the sides of the bowl, then mix in 2 teaspoons of vanilla extract.
- In a separate medium bowl, whisk together the all-purpose flour, baking soda, and salt.
- With the mixer on low speed, gradually add the dry ingredients to the wet mixture, mixing only until just combined. Do not overmix.
- Transfer the thick dough to the prepared pan. Lightly grease your hands or a spatula to press the dough into an even layer.
- Bake for 20-25 minutes, until the edges are lightly golden and the center is set but still soft. A toothpick should come out with moist crumbs. Let the base cool on a wire rack for 15-20 minutes.
- While the base cools, prepare the frosting. In a large bowl, beat the 1/2 cup of softened butter and 1 cup of creamy peanut butter until smooth. Gradually mix in the powdered sugar on low speed.
- Add 1 teaspoon of vanilla and 3 tablespoons of milk. Increase mixer speed to medium-high and beat for 2-3 minutes until light and fluffy. Add another tablespoon of milk if the frosting is too thick.
- Spread the frosting evenly over the still-warm base using an offset spatula. The warmth will help it glide on smoothly.
- Allow the bars to cool completely at room temperature, or in the refrigerator for about 1 hour to set the frosting faster. Once set, use the parchment handles to lift the bars from the pan and cut into squares.