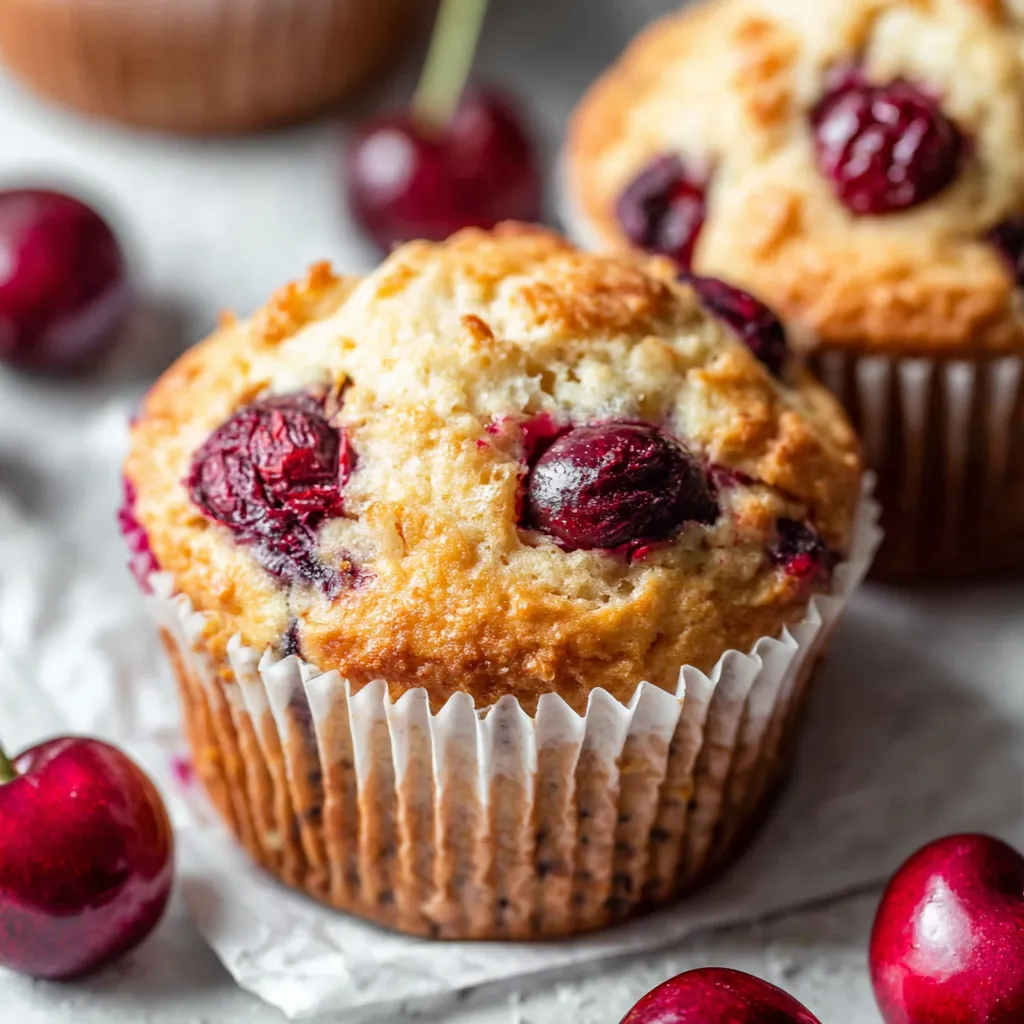
I can still remember the aroma wafting from my grandmother’s kitchen every summer. It was a mix of sunshine, laughter, and the unmistakable scent of baked goods. Her cherry muffins were legendary, and I’ve spent years trying to recapture that magic. Today, I’m sharing all my secrets for the most amazing Easy Cherry Muffins (Fresh and Easy) – Olives + Thyme you’ll ever make!
Easy Cherry Muffins: A Burst of Summer in Every Bite

There’s something incredibly comforting about a warm, freshly baked muffin. And when those muffins are bursting with juicy cherries? Pure bliss! These Easy Cherry Muffins are not just easy; they’re absolutely irresistible. I’m talking soft, tender crumbs, a hint of almond extract that perfectly complements the cherries, and a slight tang that keeps you coming back for more. Forget those dry, bland muffins you find in the store – these are in a league of their own.
I’ve tinkered with this recipe for years, making sure it’s foolproof, even for beginner bakers. Whether you’re using fresh, frozen, or even jarred cherries, I’ll walk you through every step to ensure muffin perfection. Get ready to impress your family and friends (or just treat yourself!) with these delightful cherry muffins. This recipe is so simple, the kids can help too! Get ready for some baking fun!
Why This Recipe Works
So, what makes these Easy Cherry Muffins so special? It’s all about the balance of flavors and the careful attention to detail. Here’s a peek behind the curtain:
- The Right Cherries: Fresh cherries are fantastic, but frozen work beautifully too, especially when cherries aren’t in season. I’ll even give you tips on using jarred cherries for a quick and easy treat.
- Almond Extract: A touch of almond extract enhances the cherry flavor and adds a sophisticated touch. It’s a game-changer!
- Buttermilk (or a Clever Substitute): Buttermilk adds moisture and a slight tang that elevates these muffins to the next level. Don’t have buttermilk? No problem! I’ll show you a simple trick to make your own.
- Gentle Mixing: Overmixing is the enemy of tender muffins. We’ll learn the art of gentle mixing to ensure a light and airy crumb.
- The Perfect Bake: Knowing when to pull the muffins from the oven is crucial. I’ll share my secrets for achieving that golden-brown perfection without drying them out.
Ingredients You’ll Need
Before we dive into the recipe, let’s gather our ingredients. Here’s what you’ll need to create these amazing Easy Cherry Muffins:
- All-Purpose Flour: The foundation of our muffins. Make sure to measure it correctly (more on that later!).
- Granulated Sugar: For sweetness and a bit of moisture.
- Baking Powder: Our leavening agent, responsible for that beautiful rise.
- Baking Soda: Works with the buttermilk to create a light and airy texture.
- Salt: Enhances the flavors of all the other ingredients.
- Eggs: Adds richness and structure.
- Buttermilk: For moisture, tang, and tenderness.
- Unsalted Butter, Melted: Adds flavor and richness.
- Almond Extract: A flavor enhancer that perfectly complements the cherries.
- Vanilla Extract: Adds warmth and depth of flavor.
- Fresh or Frozen Cherries, Pitted and Halved (or Jarred Cherries, Drained): The star of the show!
Step-by-Step Instructions: The Path to Muffin Perfection
Now for the fun part! Follow these easy steps, and you’ll be enjoying warm, delicious cherry muffins in no time. Don’t be intimidated – I’m here to guide you every step of the way. Remember, baking is a science, but it’s also an art. Have fun with it!
- Preheat your oven to 400°F (200°C). Line a 12-cup muffin tin with paper liners or grease it well. Trust me, you don’t want these beauties sticking!
- In a large bowl, whisk together the flour, sugar, baking powder, baking soda, and salt. Make sure everything is evenly distributed. We want that baking powder and soda working their magic!
- In a separate bowl, whisk together the eggs, buttermilk, melted butter, almond extract, and vanilla extract. The mixture should be smooth and creamy.
- Pour the wet ingredients into the dry ingredients and gently fold until just combined. This is crucial! Do not overmix! A few streaks of flour are okay. Overmixing develops the gluten and leads to tough muffins.
- Gently fold in the cherries. Be careful not to crush them. We want those cherries to stay plump and juicy.
- Fill the muffin cups about 2/3 full. Using an ice cream scoop can help you get even portions.
- Bake for 18-20 minutes, or until a toothpick inserted into the center comes out clean. Keep a close eye on them! Ovens vary, so start checking at 18 minutes. The tops should be golden brown and spring back lightly when touched.
- Let the muffins cool in the muffin tin for a few minutes before transferring them to a wire rack to cool completely. This prevents them from getting soggy.
- Enjoy! These muffins are best enjoyed warm, but they’re also delicious at room temperature.
Success Tips for the Best Cherry Muffins Ever
Want to guarantee muffin success? Here are my top tips and tricks for making these Easy Cherry Muffins absolutely perfect every single time:
- The Secret to Measuring Flour Correctly: This is where most baking mistakes happen! Spoon the flour into your measuring cup and level it off with a knife. Avoid scooping directly from the bag, as this compacts the flour and can lead to dry muffins.
- Don’t Overbake the Muffins! Pull them from the oven when they still look slightly underdone in the center. They will continue to bake as they cool. Overbaking leads to dry, crumbly muffins.
- Buttermilk Substitute: If you don’t have buttermilk, simply add 1 tablespoon of white vinegar or lemon juice to a liquid measuring cup, then fill with milk to equal 1 cup. Let it stand for 5 minutes, and you’ve got a homemade buttermilk substitute!
- Cherries, Cherries Everywhere: Feel free to experiment with different types of cherries. Sweet cherries, sour cherries, even a mix of both! Just be sure to pit them first! You can also use dried cherries if you rehydrate them first.
- Make-Ahead & Freezing Instructions: These muffins can be made ahead of time and stored in an airtight container at room temperature for up to 2 days. For longer storage, freeze them in a freezer-safe bag for up to 2 months. Thaw at room temperature before serving.
Variations to Spice Things Up
Once you’ve mastered the basic recipe, feel free to get creative! Here are a few variations to try:
- Chocolate Cherry Muffins: Add 1/4 cup of cocoa powder to the dry ingredients for a rich, chocolatey twist. You can also add chocolate chips!
- Lemon Cherry Muffins: Add the zest of one lemon to the wet ingredients for a bright, citrusy flavor.
- Cherry Almond Muffins: Top the muffins with sliced almonds before baking for added crunch and flavor.
- Spiced Cherry Muffins: Add 1/2 teaspoon of cinnamon and 1/4 teaspoon of nutmeg to the dry ingredients for a warm, comforting flavor.
Serving Suggestions
These Easy Cherry Muffins are delicious on their own, but they’re also fantastic with a few simple accompaniments. Here are some of my favorite ways to serve them:
- With a dollop of whipped cream or Greek yogurt.
- With a drizzle of honey or maple syrup.
- Alongside a cup of coffee or tea.
- As part of a brunch spread.
- As a sweet treat for a picnic or potluck.
More Cherry Delights
If you’re a cherry lover like me, you’re probably craving even more cherry goodness! Here are a few other cherry recipes you might enjoy:
For a refreshing treat on a hot day, you have to try CHERRY SORBET DELIGHT. It’s so easy to make and incredibly satisfying. Or, if you’re looking for an even simpler option, check out CHERRY SORBET BLISS – you won’t believe how delicious it is with just three ingredients! If you’re in the mood for something bite-sized, CHERRY PIE BITES BLISS are always a hit. They’re the perfect little indulgence.
And if you’re looking for something a little different, why not try ROASTED CHERRY BROWNIE? The roasted cherries add an incredible depth of flavor to the rich brownie. While we are at it, let’s also mention BLACKBERRY CLAFOUTIS. It’s definitely worth a try!
Recipe: Easy Cherry Muffins
Here’s the full recipe, all in one place for easy reference. Print it out, save it to your phone, or just keep this page bookmarked – you’ll be making these muffins again and again!
Yields: 12 muffins
Prep time: 15 minutes
Cook time: 18-20 minutes
Ingredients:
- 2 cups all-purpose flour
- 3/4 cup granulated sugar
- 2 teaspoons baking powder
- 1/2 teaspoon baking soda
- 1/4 teaspoon salt
- 2 large eggs
- 1 cup buttermilk
- 1/4 cup unsalted butter, melted
- 1 teaspoon almond extract
- 1 teaspoon vanilla extract
- 1 1/2 cups fresh or frozen cherries, pitted and halved (or jarred cherries, drained)
Instructions:
- Preheat your oven to 400°F (200°C). Line a 12-cup muffin tin with paper liners or grease it well.
- In a large bowl, whisk together the flour, sugar, baking powder, baking soda, and salt.
- In a separate bowl, whisk together the eggs, buttermilk, melted butter, almond extract, and vanilla extract.
- Pour the wet ingredients into the dry ingredients and gently fold until just combined. Do not overmix!
- Gently fold in the cherries.
- Fill the muffin cups about 2/3 full.
- Bake for 18-20 minutes, or until a toothpick inserted into the center comes out clean.
- Let the muffins cool in the muffin tin for a few minutes before transferring them to a wire rack to cool completely.
- Enjoy!
Notes:
- For best results, measure the flour correctly by spooning it into the measuring cup and leveling it off with a knife.
- Don’t overbake the muffins! Pull them from the oven when they still look slightly underdone in the center.
- If you don’t have buttermilk, you can make a substitute by adding 1 tablespoon of white vinegar or lemon juice to a liquid measuring cup, then filling with milk to equal 1 cup. Let it stand for 5 minutes.
- These muffins can be stored in an airtight container at room temperature for up to 2 days or frozen for up to 2 months.
Final Thoughts: Bake On!
There you have it – my foolproof recipe for Easy Cherry Muffins (Fresh and Easy) – Olives + Thyme! I hope you enjoy making and, more importantly, eating these delightful treats as much as I do. Remember, baking is all about experimenting and having fun. So, don’t be afraid to get creative and put your own spin on this recipe. And most importantly, don’t forget to share your delicious creations with the ones you love! Happy baking!
Can I use frozen or jarred cherries instead of fresh cherries in this muffin recipe?
Yes, you can! The recipe works well with fresh, frozen, or jarred cherries. If using jarred cherries, make sure to drain them well before adding them to the batter.
What’s the secret to getting tender, non-tough muffins?
The key is to avoid overmixing the batter. Gently fold the wet ingredients into the dry ingredients until just combined. A few streaks of flour are okay. Overmixing develops the gluten, which leads to tough muffins.
I don’t have buttermilk. Is there a substitute I can use?
Yes! You can make a buttermilk substitute by adding 1 tablespoon of white vinegar or lemon juice to a liquid measuring cup, then filling with milk to equal 1 cup. Let it stand for 5 minutes before using.
How should I properly measure the flour for these muffins?
For best results, spoon the flour into your measuring cup and level it off with a knife. Avoid scooping directly from the bag, as this compacts the flour and can lead to dry muffins.
PERFECT EASY CHERRY MUFFINS
Ingredients
Equipment
Method
- Preheat your oven to 400°F (200°C). Line a 12-cup muffin tin with paper liners or grease it well.
- In a large bowl, whisk together the flour, sugar, baking powder, baking soda, and salt.
- In a separate bowl, whisk together the eggs, buttermilk, melted butter, almond extract, and vanilla extract.
- Pour the wet ingredients into the dry ingredients and gently fold until just combined. Do not overmix!
- Gently fold in the cherries.
- Fill the muffin cups about 2/3 full.
- Bake for 18-20 minutes, or until a toothpick inserted into the center comes out clean.
- Let the muffins cool in the muffin tin for a few minutes before transferring them to a wire rack to cool completely.
- Enjoy!