
I can almost smell the cinnamon and nutmeg swirling through the air just thinking about it! Every year, as the leaves begin to turn, my grandmother would bake an absolutely divine pumpkin crisp. It wasn’t just a dessert; it was the scent of autumn and a warm hug all rolled into one. Today, I’m sharing all my secrets for the most amazing Easy Pumpkin Crisp you’ll ever make!
Why This Easy Pumpkin Crisp Will Become Your New Fall Favorite

Okay, friends, let’s be honest: fall is *the* season for baking. And while pumpkin pie certainly has its place, sometimes you just want something a little…easier. Something that comes together quickly, that’s wonderfully comforting, and that doesn’t require a delicate pie crust. That’s where this Easy Pumpkin Crisp comes in!
This isn’t your run-of-the-mill pumpkin dessert. We’re talking about a luscious, spiced pumpkin filling, topped with a buttery, oat-filled crisp that adds the perfect amount of texture and sweetness. It’s like a warm blanket on a chilly evening, but in dessert form. And trust me, your friends and family will be begging you for the recipe.
What Makes This Pumpkin Crisp So Special?
- The Simplicity: Forget fussy recipes and complicated techniques. This crisp is all about minimal effort, maximum flavor.
- The Texture: The creamy pumpkin filling paired with the crunchy oat topping is a match made in dessert heaven.
- The Flavor: The warm spices (cinnamon, nutmeg, ginger) perfectly complement the pumpkin, creating a truly autumnal experience.
- The Warmth: It’s like a hug in a bowl. Seriously, it’s the perfect cozy dessert for a chilly evening.
- It’s Adaptable: Got dietary restrictions? No problem! I’ll share tips on how to make this crisp gluten-free or vegan.
The Secret to the Perfect Pumpkin Filling
The heart of any great pumpkin crisp is, of course, the pumpkin filling. We want it to be smooth, creamy, and bursting with flavor. Here’s how we achieve pumpkin perfection:
Ingredients for the Pumpkin Filling:
- 1 (15-ounce) can pumpkin puree (not pumpkin pie filling!)
- 1/2 cup granulated sugar
- 1/4 cup packed brown sugar
- 1 teaspoon ground cinnamon
- 1/2 teaspoon ground nutmeg
- 1/4 teaspoon ground ginger
- 1/4 teaspoon ground cloves
- 1/4 teaspoon salt
- 1 large egg
- 1/2 cup evaporated milk
Step-by-Step Instructions for the Pumpkin Filling:
- Preheat your oven to 350°F (175°C). This ensures even baking and prevents the crisp from burning.
- In a large bowl, whisk together the pumpkin puree, granulated sugar, brown sugar, cinnamon, nutmeg, ginger, cloves, and salt. Make sure everything is evenly distributed for a consistent flavor.
- Add the egg and evaporated milk to the pumpkin mixture and whisk until smooth. The mixture should be creamy and lump-free.
- Pour the pumpkin filling into a greased 8×8 inch baking dish. Use butter or cooking spray to prevent sticking.
Crafting the Irresistible Crisp Topping
Now for the star of the show: the crisp topping! This is where the magic happens, where we get that delightful crunch that contrasts so beautifully with the creamy pumpkin filling. The beauty of a crisp is that it is generally easier to make than a PEACH COBBLER, however each one has its own delightful qualities.
Ingredients for the Crisp Topping:
- 1/2 cup all-purpose flour
- 1/2 cup rolled oats (not instant!)
- 1/2 cup packed brown sugar
- 1/4 teaspoon ground cinnamon
- 1/4 teaspoon salt
- 1/2 cup (1 stick) cold unsalted butter, cut into cubes
- 1/2 cup chopped pecans or walnuts (optional, but highly recommended!)
Step-by-Step Instructions for the Crisp Topping:
- In a medium bowl, whisk together the flour, oats, brown sugar, cinnamon, and salt. This ensures the dry ingredients are evenly distributed.
- Add the cold, cubed butter to the dry ingredients. Using a pastry blender or your fingertips, cut the butter into the dry ingredients until the mixture resembles coarse crumbs. Don’t overmix! You want to see small pieces of butter throughout the mixture; this is what creates that flaky, crispy texture.
- Stir in the chopped pecans or walnuts (if using). These add a wonderful nutty flavor and extra crunch.
- Sprinkle the crisp topping evenly over the pumpkin filling. Make sure to cover the entire surface for maximum crispiness.
Baking Your Easy Pumpkin Crisp to Golden Perfection
Almost there! Now it’s time to bake your Easy Pumpkin Crisp until it’s bubbly and golden brown. This is the hardest part because the aroma is going to drive you crazy!
Baking Instructions:
- Bake in the preheated oven for 35-40 minutes, or until the topping is golden brown and the filling is bubbly. A toothpick inserted into the center of the filling should come out clean (or with just a few moist crumbs).
- Let the crisp cool for at least 15 minutes before serving. This allows the filling to set slightly and prevents you from burning your mouth (trust me, I’ve been there!).
Serving Suggestions: The Perfect Pairings
Your Easy Pumpkin Crisp is delicious all on its own, but why stop there? Here are a few serving suggestions to take it to the next level:
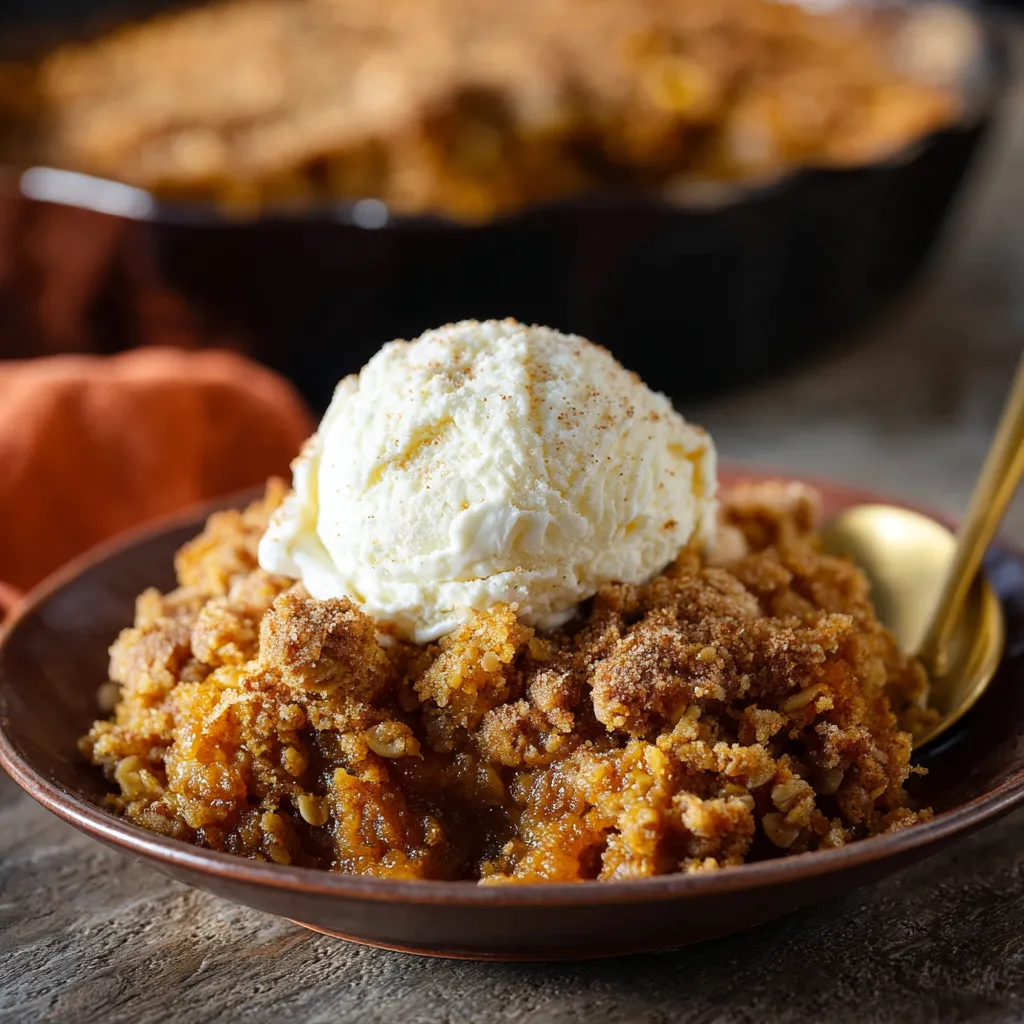
- A scoop of vanilla ice cream: The cold, creamy ice cream is the perfect complement to the warm, spiced crisp.
- A dollop of whipped cream: Light and airy whipped cream adds a touch of elegance.
- A drizzle of caramel sauce: For extra sweetness and indulgence.
- A sprinkle of chopped pecans or walnuts: For added texture and flavor.
- A cup of coffee or tea: The perfect accompaniment for a cozy autumn evening.
Success Tips for Your Easy Pumpkin Crisp
Okay, my friend, I want you to be 100% successful with this recipe. Here are my top tips for a guaranteed delicious Easy Pumpkin Crisp:
Golden Rules for a Perfect Crisp:
- Use Canned Pumpkin Puree, Not Pumpkin Pie Filling: This is crucial! Pumpkin pie filling already has spices and sugar added, which will throw off the flavor balance. You want pure, unsweetened pumpkin puree. This is key to keeping our easy pumpkin crisp easy!
- Don’t Overmix the Crisp Topping: Overmixing will develop the gluten in the flour, resulting in a tough topping instead of a light and crispy one. Mix until just combined.
- Use Cold Butter: Cold butter is essential for creating a flaky, crispy topping. Make sure the butter is straight from the fridge and cut into small cubes before adding it to the dry ingredients. Thinking of other fall desserts? You can also use similar tips in a Peach Crisp!
- Don’t Overbake: Overbaking will dry out the pumpkin filling and make the topping too hard. Bake until the topping is golden brown and the filling is bubbly. A toothpick inserted into the center should come out clean or with just a few moist crumbs.
- Let it Cool: I know it’s tempting to dive right in, but letting the crisp cool for at least 15 minutes allows the filling to set slightly and prevents burning your mouth. Plus, the flavors will meld together even more as it cools. Also, if you are looking for a easy breakfast idea for fall, you can also consider the Pumpkin Spice Overnight Oats!
- Make Ahead: You can assemble the crisp topping ahead of time and store it in the refrigerator for up to 2 days. Just sprinkle it over the pumpkin filling before baking.
Variations and Adaptations: Making It Your Own
The beauty of this recipe is that it’s incredibly versatile. Feel free to experiment and make it your own! Here are a few ideas:
- Gluten-Free: Use a gluten-free all-purpose flour blend in the crisp topping. Make sure to choose a blend that contains xanthan gum for the best texture.
- Vegan: Use a vegan butter alternative in the crisp topping and replace the egg in the pumpkin filling with 2 tablespoons of cornstarch mixed with 2 tablespoons of water.
- Add Spices: Experiment with different spices in the pumpkin filling, such as cardamom, allspice, or even a pinch of cayenne pepper for a little kick.
- Add Fruit: Mix in some chopped apples or pears to the pumpkin filling for added flavor and texture.
- Change Up the Nuts: Use different nuts in the crisp topping, such as almonds, walnuts, or pecans. If you like the addition of cream cheese you could also consider the Pumpkin Bread with Cream Cheese Frosting!
The Easy Pumpkin Crisp Recipe
Ingredients:
Pumpkin Filling:
- 1 (15-ounce) can pumpkin puree (not pumpkin pie filling!)
- 1/2 cup granulated sugar
- 1/4 cup packed brown sugar
- 1 teaspoon ground cinnamon
- 1/2 teaspoon ground nutmeg
- 1/4 teaspoon ground ginger
- 1/4 teaspoon ground cloves
- 1/4 teaspoon salt
- 1 large egg
- 1/2 cup evaporated milk
Crisp Topping:
- 1/2 cup all-purpose flour
- 1/2 cup rolled oats (not instant!)
- 1/2 cup packed brown sugar
- 1/4 teaspoon ground cinnamon
- 1/4 teaspoon salt
- 1/2 cup (1 stick) cold unsalted butter, cut into cubes
- 1/2 cup chopped pecans or walnuts (optional)
Instructions:
- Preheat oven to 350°F (175°C). Grease an 8×8 inch baking dish.
- Make the Filling: In a large bowl, whisk together pumpkin puree, granulated sugar, brown sugar, cinnamon, nutmeg, ginger, cloves, and salt. Add egg and evaporated milk; whisk until smooth. Pour into prepared baking dish.
- Make the Topping: In a medium bowl, whisk together flour, oats, brown sugar, cinnamon, and salt. Cut in cold butter using a pastry blender or your fingertips until mixture resembles coarse crumbs. Stir in nuts (if using).
- Sprinkle topping evenly over pumpkin filling.
- Bake for 35-40 minutes, or until topping is golden brown and filling is bubbly.
- Let cool for at least 15 minutes before serving.
Enjoy! This recipe is a keeper, I promise! It’s easier than baking a PEACH COBBLER or pie, but just as satisfying.
Conclusion: Embrace the Cozy Season
And there you have it: the most incredible Easy Pumpkin Crisp you’ll ever make! I hope this recipe brings you as much joy as it brings my family every fall. It’s more than just a dessert; it’s a tradition, a memory, and a taste of pure comfort. So, gather your loved ones, bake up a batch of this delicious crisp, and embrace the cozy season. Happy baking!
What’s the key difference between pumpkin puree and pumpkin pie filling when making this crisp?
It’s crucial to use canned pumpkin puree, not pumpkin pie filling. Pumpkin pie filling already contains spices and sugar, which will throw off the flavor balance of the recipe. You want pure, unsweetened pumpkin puree.
How do I ensure the crisp topping has the best possible texture?
Don’t overmix the crisp topping, use cold butter cut into small cubes, and ensure the butter remains in small pieces throughout the mixture. Overmixing develops the gluten, resulting in a tough topping. Cold butter creates a flaky, crispy texture.
Can I make this pumpkin crisp gluten-free or vegan?
Yes! For a gluten-free version, use a gluten-free all-purpose flour blend in the crisp topping, preferably one containing xanthan gum. For a vegan version, use a vegan butter alternative in the crisp topping and replace the egg in the pumpkin filling with 2 tablespoons of cornstarch mixed with 2 tablespoons of water.
Why is it important to let the pumpkin crisp cool before serving?
Letting the crisp cool for at least 15 minutes allows the filling to set slightly and prevents burning your mouth. Plus, the flavors will meld together even more as it cools.
Easy Pumpkin Crisp: Fall Perfection
Ingredients
Equipment
Method
- Preheat oven to 350°F (175°C). Grease an 8×8 inch baking dish.
- In a large bowl, whisk together pumpkin puree, granulated sugar, brown sugar, cinnamon, nutmeg, ginger, cloves, and salt.
- Add egg and evaporated milk to the pumpkin mixture; whisk until smooth.
- Pour the pumpkin filling into the prepared baking dish.
- In a medium bowl, whisk together flour, oats, brown sugar, cinnamon, and salt.
- Cut in cold butter using a pastry blender or your fingertips until the mixture resembles coarse crumbs. Don’t overmix.
- Stir in nuts (if using).
- Sprinkle the crisp topping evenly over the pumpkin filling.
- Bake for 35-40 minutes, or until topping is golden brown and filling is bubbly. A toothpick inserted into the center of the filling should come out clean or with just a few moist crumbs.
- Let cool for at least 15 minutes before serving.


