
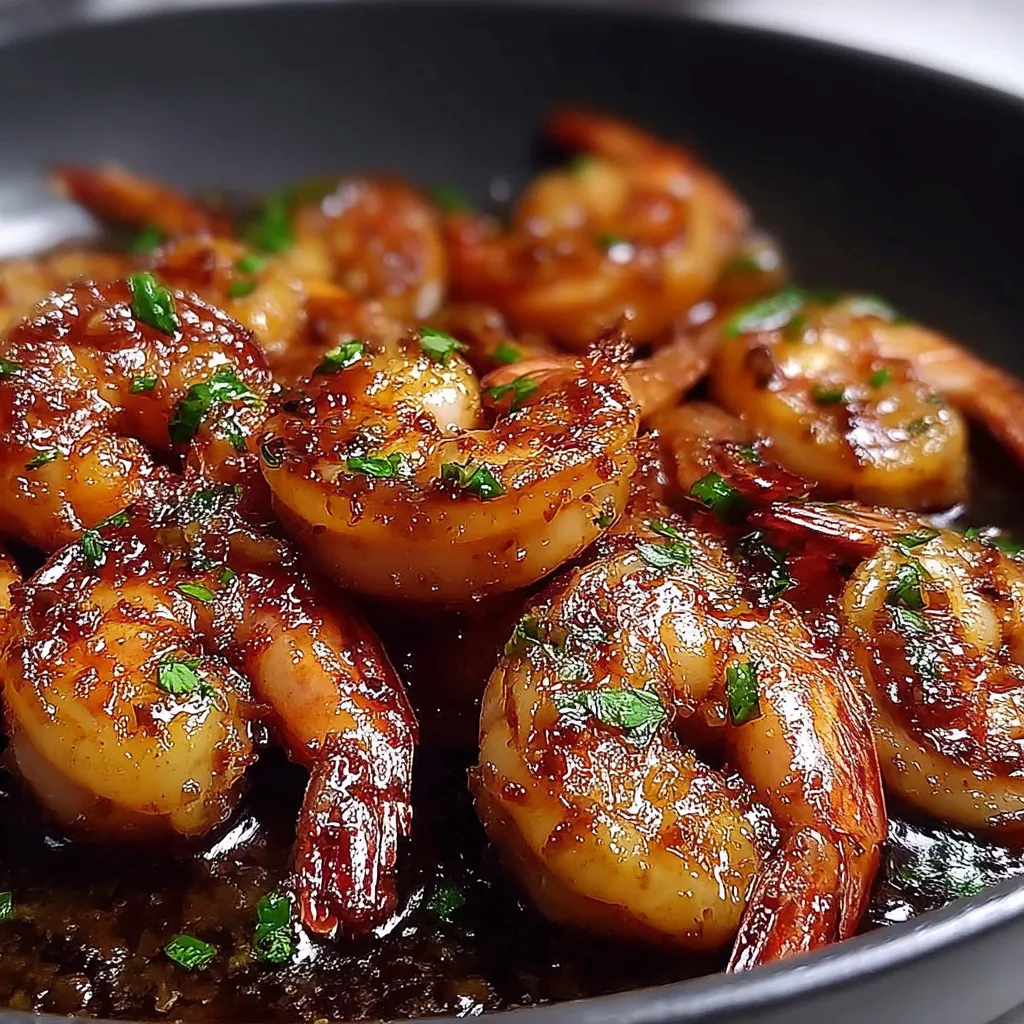
After years of making this dish for busy weeknights and last-minute guests, I’ve found that the secret to perfect Honey Garlic Shrimp lies not in complexity, but in mastering a simple, two-step dance: a quick sear for texture and a gentle simmer for flavor.
This method gives you plump, juicy shrimp cloaked in a glossy, perfectly balanced sauce every single time. It’s the only version you’ll ever need, and it comes together faster than you can set the table.
Let’s gather our simple ingredients and turn them into something truly special. You’re about to make a restaurant-quality meal with minimal fuss, and I’ll be right here to guide you through every step.
Why This Method Works
- Dry Shrimp are Happy Shrimp: Patting your shrimp bone-dry before cooking is non-negotiable. It ensures a beautiful sear instead of a sad steam, giving you that lovely texture.
- Two-Stage Sauce Magic: We cook the garlic gently to sweeten it, then build the sauce in the same pan. This captures all the delicious browned bits from the shrimp, creating a sauce with incredible depth.
- The Simmer Sets the Glaze: Returning the shrimp to the sauce for just a minute allows them to finish cooking gently and soak up the flavor, while the sauce thickens into a sticky glaze that clings perfectly.
Gather Your Ingredients
Using fresh, good-quality ingredients makes all the difference in a simple recipe like this. Each one has a specific job to do in creating that perfect sweet, savory, and garlicky harmony.- 1 pound (450g) large shrimp, peeled and deveined: (Size matters here; larger shrimp (21/25 or 31/40 count) are more forgiving and won’t overcook as quickly).
- Salt and black pepper: For seasoning the shrimp.
- 2 tablespoons neutral oil: (Like avocado or vegetable oil, for its high smoke point to get a good sear).
- 4-5 cloves garlic, minced: (Fresh is best! It mellows and sweetens as it cooks).
- 1/3 cup honey: (The star of the show, providing a floral sweetness that balances the garlic).
- 1/4 cup low-sodium soy sauce: (The salty, umami backbone. Using low-sodium lets you control the salt level).
- 1 tablespoon rice vinegar or fresh lemon juice: (The essential acid that brightens the whole dish and cuts through the richness).
- 1 tablespoon unsalted butter: (Stirred in at the end for a luxurious, rounded flavor and silky sauce).
- Optional garnish: Thinly sliced green onions and sesame seeds.
Pantry Substitutions
Don’t let a missing ingredient stop you! Cooking is about adaptability.- Honey: An equal amount of pure maple syrup will work, though the flavor will be different.
- Soy Sauce: Tamari is a great gluten-free swap. In a pinch, coconut aminos will do, but you may need to reduce the honey slightly as they are sweeter.
- Rice Vinegar/Lemon Juice: Apple cider vinegar or white wine vinegar are fine alternatives.
- Butter: A teaspoon of toasted sesame oil added at the end gives a wonderful nutty depth instead.
Ways to Change It Up

- Spicy Kick: Add 1-2 teaspoons of sriracha or a pinch of red pepper flakes to the sauce mixture.
- Ginger Boost: Add a tablespoon of freshly grated ginger with the garlic for a zesty, warming note.
- Vegetable Medley: Sauté bell peppers, snap peas, or broccoli florets in the pan after removing the shrimp, then proceed with the sauce.
- Creamy Version: Stir in a tablespoon or two of heavy cream or full-fat coconut milk with the butter for a richer, saucier result.
The Method: Step-by-Step
Follow these steps in order, and you cannot go wrong. Have all your ingredients measured and ready before you heat the pan—this cooks fast!Step 1: Prepare the Shrimp
Pat the shrimp thoroughly dry with paper towels. This is the most important step for a good sear. Season them lightly with salt and pepper on both sides.Step 2: Sear to Perfection
Heat the oil in a large skillet or wok over medium-high heat until it shimmers. Add the shrimp in a single layer, working in batches if needed to avoid crowding. Cook for just 1-2 minutes per side until they turn pink and are lightly browned. Remove them to a plate immediately.Step 3: Build the Sauce
Reduce the heat to medium. In the same pan, add the minced garlic and cook for about 30 seconds until fragrant—don’t let it burn! Pour in the honey, soy sauce, and vinegar. Whisk it together, scraping up any delicious browned bits from the bottom of the pan.Step 4: Simmer and Glaze
Let the sauce simmer for 2-3 minutes, until it bubbles and thickens slightly. Reduce the heat to low and stir in the butter until it melts and makes the sauce glossy. Add the seared shrimp back into the pan, along with any accumulated juices.Step 5: The Final Coat
Toss the shrimp gently in the sauce for 1-2 minutes, just until they are heated through and beautifully coated. The sauce will continue to thicken as it coats the shrimp. Remove from heat immediately.My Kitchen Notes
Perfect Pairings
This versatile shrimp deserves a proper stage. For a light meal, serve it over a bed of fluffy white rice or cauliflower rice to soak up every drop of that glorious sauce.If you’re feeling more ambitious, it’s fantastic with a simple vegetable stir-fry or steamed broccoli. It also makes a fabulous filling for lettuce wraps for a low-carb option.
And if you love this flavor profile, you must explore its potential across other dishes. The same sweet-savory principle creates magic in a Honey Sesame Chicken Stir Fry or even with something as simple as Honey Garlic Sausage. It’s a truly versatile combination.
First time making Honey Garlic Shrimp? I hope this guide made it easy. Let me know how it turned out!
What is the most important step for getting a good sear on the shrimp?
Patting the shrimp thoroughly dry with paper towels before cooking is the most important step. This prevents steaming and ensures a beautiful sear and lovely texture.
Can I make substitutions if I don’t have all the ingredients?
Yes, the article provides several pantry substitutions. For example, you can use pure maple syrup instead of honey, tamari or coconut aminos for soy sauce, apple cider vinegar for rice vinegar, and toasted sesame oil instead of butter for a nutty flavor.
How can I tell if my shrimp are perfectly cooked and not overcooked?
Shrimp are done as soon as they form a loose “C” shape. If they curl into a tight “O” shape, they are overcooked and will be rubbery. They cook very quickly, typically in just 1-2 minutes per side.
What can I do if my honey garlic sauce is too thin?
If the sauce needs to thicken more, mix one teaspoon of cornstarch with one tablespoon of cold water. Whisk this slurry into the simmering sauce before adding the shrimp back in; it will thicken the sauce in seconds.
Quick Honey Garlic Shrimp
Ingredients
Equipment
Method
- Pat the shrimp thoroughly dry with paper towels. Season lightly on both sides with salt and black pepper.
- Heat the oil in a large skillet or wok over medium-high heat until shimmering. Add the shrimp in a single layer (cook in batches if necessary) and sear for 1-2 minutes per side until pink and lightly browned. Immediately transfer the shrimp to a plate.
- Reduce the heat to medium. In the same pan, add the minced garlic and cook for about 30 seconds until fragrant, being careful not to burn it.
- Pour the honey, soy sauce, and vinegar (or lemon juice) into the pan. Whisk together, scraping up any browned bits from the bottom of the pan.
- Let the sauce simmer for 2-3 minutes, until it bubbles and thickens slightly.
- Reduce heat to low and stir in the butter until melted and the sauce is glossy.
- Add the seared shrimp and any accumulated juices back into the pan. Gently toss the shrimp in the sauce for 1-2 minutes, until heated through and beautifully coated. The sauce will thicken further as it coats the shrimp. Remove from heat immediately.
- Garnish with sliced green onions and sesame seeds if desired. Serve immediately.


