The Sticky Situation: Decoding Sweet Chili Sauce

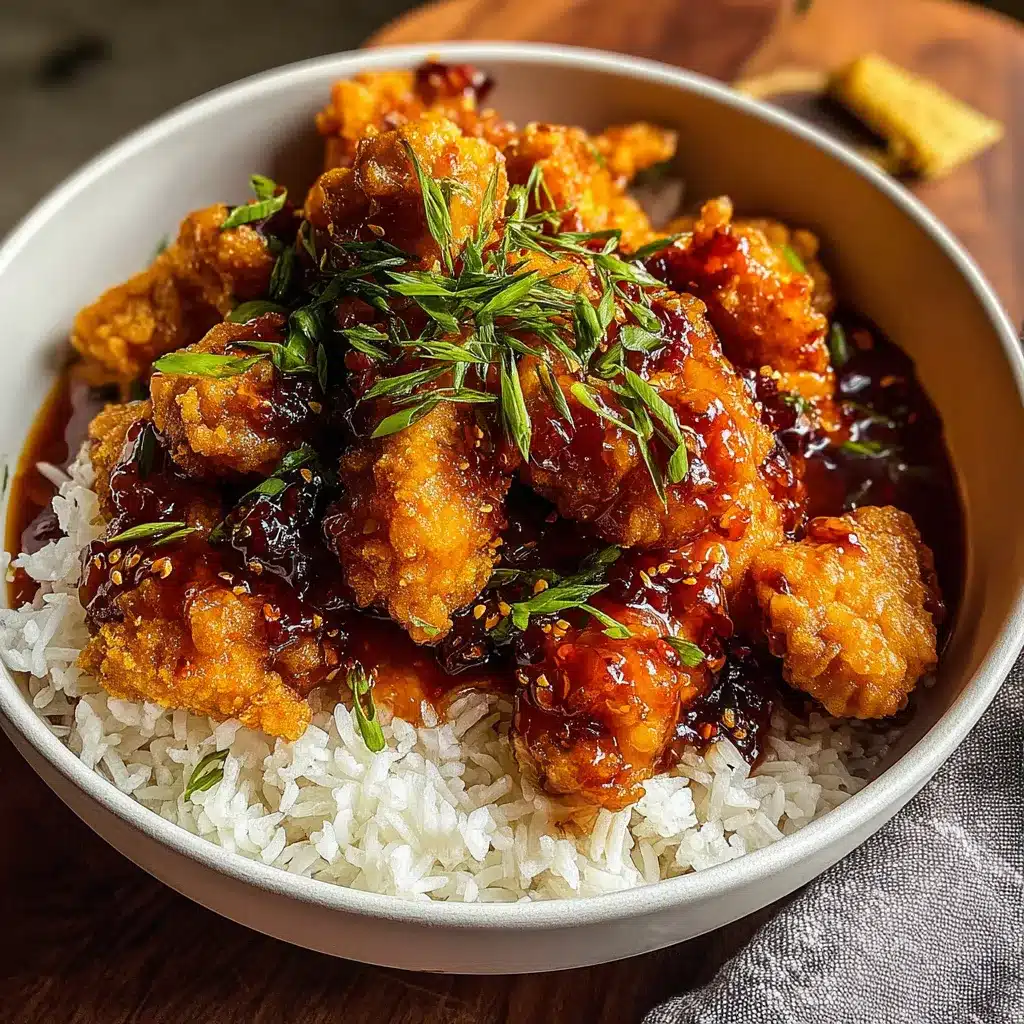
The Ultimate Sweet Chili Chicken Recipe
Key Equipment:
- Large non-stick skillet or wok
- Mixing bowls
- Measuring cups and spoons
Ingredients:
- 1.5 lbs boneless, skinless chicken thighs, cut into 1-inch pieces
- 1/4 cup cornstarch
- 1/4 teaspoon salt
- 1/4 teaspoon black pepper
- 2 tablespoons vegetable oil
- 1/2 cup sweet chili sauce
- 2 tablespoons soy sauce
- 1 tablespoon rice vinegar
- 1 tablespoon honey
- 1 teaspoon sesame oil
- 1 clove garlic, minced
- 1/2 teaspoon ginger, grated
- Optional garnishes: sesame seeds, chopped green onions, red pepper flakes
Step-by-Step Instructions:
- In a large bowl, toss the chicken pieces with cornstarch, salt, and pepper until evenly coated. This creates a light crust that helps the sauce adhere.
- Heat the vegetable oil in a large non-stick skillet or wok over medium-high heat.
- Add the chicken to the skillet in a single layer (work in batches if necessary to avoid overcrowding) and cook for 5-7 minutes, or until golden brown and cooked through. Ensure the internal temperature reaches 165°F (74°C).
- Remove the chicken from the skillet and set aside.
- In the same skillet, add the minced garlic and grated ginger. Sauté for about 30 seconds, or until fragrant, being careful not to burn them.
- Pour in the sweet chili sauce, soy sauce, rice vinegar, honey, and sesame oil. Stir to combine.
- Bring the sauce to a simmer and cook for 2-3 minutes, or until it thickens slightly. This step is crucial for achieving that sticky glaze.
- Add the cooked chicken back to the skillet and toss to coat evenly with the sauce.
- Continue to cook for another 1-2 minutes, allowing the sauce to cling to the chicken.
- Remove from heat and garnish with sesame seeds, chopped green onions, and red pepper flakes, if desired.
- Serve immediately over rice or noodles.
Sweet Chili Chicken: My Trials and Triumphs
My first few attempts were a disaster. The chicken was either undercooked and gummy, or the sauce was a sticky, burnt mess. I was so frustrated! Like many of you, I initially thought that using more sweet chili sauce would solve the flavor problem, but that only resulted in an overly sweet and sticky dish that lacked depth. I also tried using pre-cut chicken breasts, which resulted in dry, lackluster chicken. The sauce just couldn’t penetrate the thicker pieces. Then, I had an “Aha!” moment when I realized the importance of properly coating the chicken with cornstarch. It’s not just for thickening the sauce; it creates a light crust that allows the sauce to cling beautifully. I also experimented with different cuts of chicken. Using CHICKEN THIGHS (https://chirecipes.com/juiciest-chicken-thighs-ever/) instead of breasts was a game-changer. The higher fat content kept the chicken incredibly moist and tender, even when cooked at a relatively high heat. I also learned that patience is key when reducing the sauce. Rushing the process resulted in a thin, watery sauce that didn’t properly coat the chicken. It was a balancing act – too little time, and the sauce was thin; too much time, and it was burnt and bitter. I also played around with adding different flavor enhancers. A touch of soy sauce added umami and balanced the sweetness, while a splash of rice vinegar provided a necessary tang. Honey added a touch of depth and complexity to the sweetness, and the sesame oil brought a lovely nutty aroma. Finally, I discovered the importance of cooking the garlic and ginger separately before adding the sauce. This allowed their flavors to bloom and infuse the sauce with a more complex and aromatic profile. This is similar to how I create my GARLIC CHICKEN BROCCOLI BOWLS (https://chirecipes.com/garlic-chicken-broccoli-bowls/). I even tried making it in the AIR FRYER CHICKEN (https://chirecipes.com/air-fryer-chicken-perfection/) but I realized the sauce would just drip to the bottom.Sweet Chili Chicken: The Foolproof Technique
After numerous experiments, I’ve distilled the process down to a series of easy-to-follow steps that guarantee sweet chili chicken perfection every time.- Choose Chicken Thighs: Opt for boneless, skinless chicken thighs cut into 1-inch pieces for maximum flavor and moisture. They’re far more forgiving than chicken breasts.
- Coat Evenly with Cornstarch: Thoroughly coat the chicken pieces with cornstarch, salt, and pepper. This creates a light crust that helps the sauce adhere beautifully and provides a slight crispness.
- Don’t Overcrowd the Pan: Cook the chicken in batches if necessary to avoid overcrowding the skillet. Overcrowding lowers the temperature of the pan and results in steamed, rather than seared, chicken.
- Bloom the Aromatics: Sauté the minced garlic and grated ginger in the skillet before adding the sauce. This releases their essential oils and infuses the sauce with a deeper flavor. This is similar to the blooming of spices I do when making my FIESTA LIME CHICKEN.
- Simmer, Don’t Boil: Reduce the sauce over a gentle simmer, stirring frequently. This prevents burning and allows the flavors to meld together harmoniously.
- Coat Thoroughly: Add the cooked chicken back to the skillet and toss to coat evenly with the sauce. Ensure every piece is glistening with that sweet chili glaze.
- Garnish Generously: Don’t skimp on the garnishes! Sesame seeds, chopped green onions, and red pepper flakes add visual appeal and enhance the overall flavor profile.
Why does the recipe specifically call for chicken thighs instead of chicken breasts?
Chicken thighs are more forgiving than chicken breasts due to their higher fat content, making them more likely to stay moist and tender during cooking, even at higher temperatures.
What is the purpose of coating the chicken with cornstarch?
Coating the chicken with cornstarch creates a light crust that helps the sweet chili sauce adhere beautifully and provides a slight crispness to the chicken.
How do I prevent the sweet chili sauce from becoming burnt or too sticky?
Simmer the sauce over a gentle heat, stirring frequently to prevent burning and ensure the flavors meld together harmoniously. Also, ensure you are using the correct ratios of ingredients.
Why is it important to sauté the garlic and ginger before adding the other sauce ingredients?
Sautéing the minced garlic and grated ginger in the skillet before adding the sauce releases their essential oils, infusing the sauce with a deeper and more complex flavor.

Sweet Chili Chicken Perfection
Ingredients
Equipment
Method
- In a large bowl, toss the chicken pieces with cornstarch, salt, and pepper until evenly coated.
- Heat the vegetable oil in a large non-stick skillet or wok over medium-high heat.
- Add the chicken to the skillet in a single layer (work in batches if necessary to avoid overcrowding) and cook for 5-7 minutes, or until golden brown and cooked through. Ensure the internal temperature reaches 165°F (74°C).
- Remove the chicken from the skillet and set aside.
- In the same skillet, add the minced garlic and grated ginger. Sauté for about 30 seconds, or until fragrant, being careful not to burn them.
- Pour in the sweet chili sauce, soy sauce, rice vinegar, honey, and sesame oil. Stir to combine.
- Bring the sauce to a simmer and cook for 2-3 minutes, or until it thickens slightly.
- Add the cooked chicken back to the skillet and toss to coat evenly with the sauce.
- Continue to cook for another 1-2 minutes, allowing the sauce to cling to the chicken.
- Remove from heat and garnish with sesame seeds, chopped green onions, and red pepper flakes, if desired.
- Serve immediately over rice or noodles.


