Every baker eventually faces the great dessert dilemma: do you make a rich, fudgy brownie or a light, fluffy cupcake? It’s a choice between a dense, chocolate-packed square and a perfectly portioned, individually frosted cake. This recipe, my friend, is the delicious peace treaty in that culinary war, the one that says you don’t have to choose. It’s the best of both worlds, a culinary mashup that was simply meant to be.
What you’re about to create are not just brownies baked in a cupcake tin. These are brownie cupcakes, engineered from the ground up to deliver a crackly, paper-thin top that gives way to an intensely fudgy, melt-in-your-mouth center. They hold their shape perfectly, making them the ideal canvas for a swirl of creamy frosting, yet they retain every bit of that decadent, gooey brownie soul we all crave.
Why This Brownie Cupcakes Works
- Perfect Texture Fusion: This recipe masterfully combines the best qualities of both desserts—the crackly top and dense, fudgy interior of a perfect brownie with the convenient, portable shape of a cupcake.
- Incredibly Simple: Using melted butter and cocoa powder means no waiting for butter to soften and no need to melt chocolate. It’s a one-bowl wonder that comes together in minutes.
- Endlessly Customizable: These are a blank canvas for your creativity. From frostings to fillings to mix-ins, you can easily adapt them for any occasion or craving.
What You’ll Need

Here’s our grocery list:
- All-Purpose Flour: Provides the structure for our cupcakes. We use just enough to hold them together without making them cakey.
- Unsweetened Cocoa Powder: (The heart of our chocolate flavor). Use a good quality one for the richest, most intense taste. Dutch-process or natural will work here.
- Espresso Powder: (This is our secret weapon). It doesn’t make the cupcakes taste like coffee; it just deepens and enhances the chocolate flavor, making it more complex.
- Salt: A crucial ingredient that balances the sweetness and brings out the chocolate notes.
- Baking Powder: Gives just a tiny bit of lift, preventing the cupcakes from being overly dense bricks.
- Unsalted Butter, melted: (The key to a fudgy texture). Using melted butter, rather than creamed, is what gives brownies their characteristic chewiness.
- Granulated Sugar: Provides sweetness and contributes to that beautiful, crackly top.
- Light Brown Sugar, packed: (Adds moisture and chewiness). The molasses in brown sugar is essential for a soft, fudgy center that stays moist for days.
- Large Eggs, room temperature: (The primary binder). Room temperature eggs incorporate more easily into the batter, creating a smoother, more uniform texture.
- Vanilla Extract: Rounds out the flavors and adds a layer of aromatic warmth.
- Semi-Sweet Chocolate Chips: Because more chocolate is always a good idea! These create little pockets of melted chocolate throughout the cupcake.
Easy Substitutions
Don’t have everything on hand? No worries! Here are a few simple swaps you can make.- Butter: You can substitute an equal amount of neutral oil (like canola or vegetable oil) for the melted butter. The texture will be slightly less chewy but still delicious.
- Espresso Powder: If you don’t have any, you can simply omit it. The cupcakes will still be wonderfully chocolatey.
- Chocolate Chips: Feel free to swap the semi-sweet chips for milk chocolate, dark chocolate, white chocolate chips, or even peanut butter chips.
- Gluten-Free: For a gluten-free version, you can substitute the all-purpose flour with a good quality 1-to-1 gluten-free baking flour blend.
- Brown Sugar: If you’re out of light brown sugar, you can use all granulated sugar, but the cupcakes will be slightly less moist and chewy.
Fun Variations to Try
Think of this recipe as your starting point. Once you’ve mastered the basic brownie cupcake, the possibilities for customization are endless. It’s a fantastic base, much like my favorite Fudgy Brownie Bliss, which can be adapted in so many ways.Peanut Butter Lover’s Dream
After filling your cupcake liners halfway with batter, drop a mini peanut butter cup into the center of each one. Top with the remaining batter and bake as directed. The result is a molten peanut butter core that is absolutely irresistible.Salted Caramel Surprise
Fill the liners halfway, then spoon about a teaspoon of thick caramel sauce into the center. Cover with more batter and sprinkle the tops with a pinch of flaky sea salt before baking. The combination of rich chocolate and salty caramel is a classic for a reason.Fruity & Fudgy
For a fun twist, consider adding a fruit element. While these aren’t quite as elaborate as my Fudgy Chocolate Covered Strawberry Brownies, you can fold in a half-cup of freeze-dried raspberries or chopped dried cherries for a pop of tartness that cuts through the richness.Sourdough Discard Twist
If you’re a sourdough baker, you know the struggle of finding uses for discard. You can adapt this recipe to include some of that tangy starter, similar to how it’s used in these amazing Sourdough Discard Brownies, for an extra layer of flavor complexity.Step-by-Step Instructions
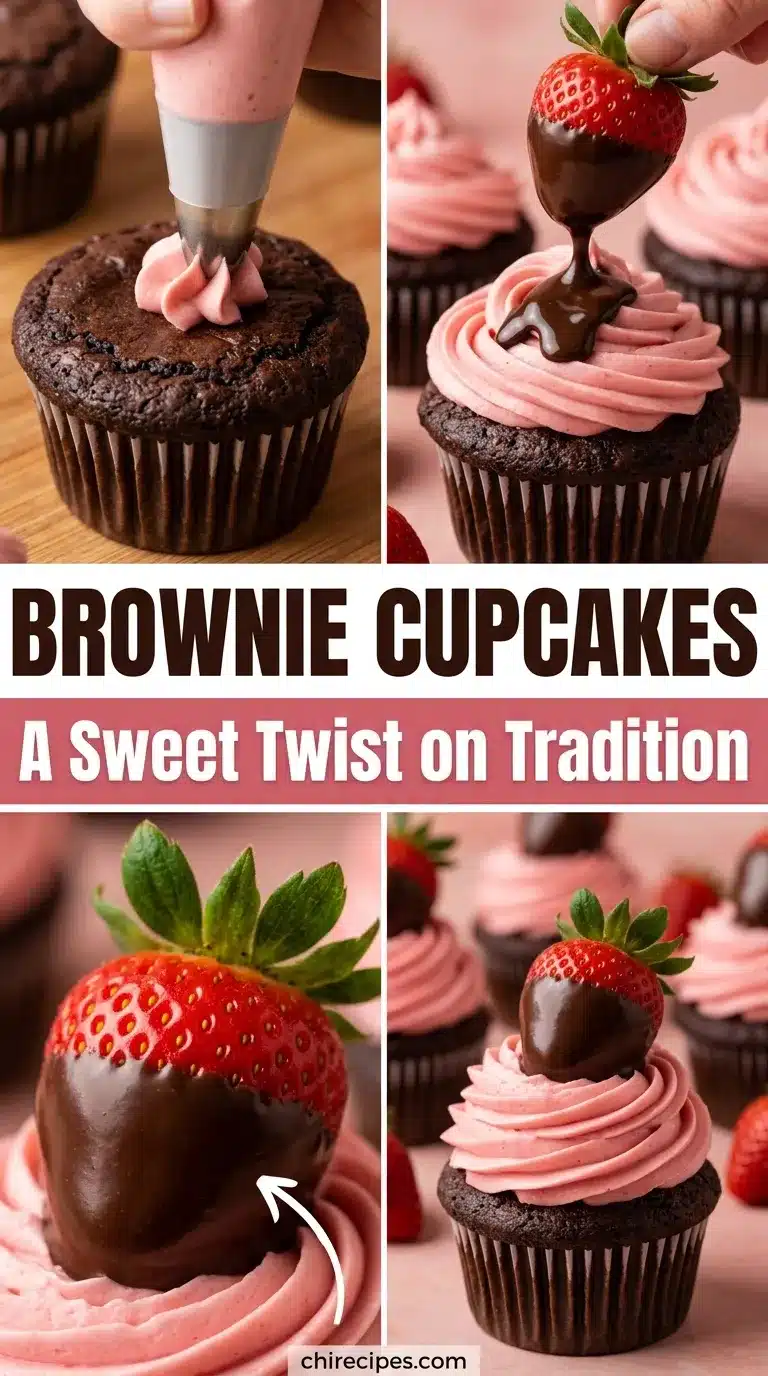
Step 1: Prep Your Station
First things first, preheat your oven to 350°F (175°C). This is a crucial step! A properly preheated oven ensures your brownie cupcakes bake evenly. Line a standard 12-cup muffin tin with paper liners. This prevents sticking and makes cleanup a breeze.Step 2: Whisk the Dry Ingredients
In a medium bowl, whisk together the all-purpose flour, unsweetened cocoa powder, espresso powder, salt, and baking powder. Whisking helps to aerate the ingredients and break up any lumps in the cocoa powder, ensuring a smooth, uniform batter. Set this bowl aside for now.Step 3: Combine the Wet Ingredients
In a separate, larger bowl, combine the melted butter with both the granulated and light brown sugars. Whisk them together vigorously for about a minute. The mixture should look glossy and well-combined. This step is key to developing that signature crackly brownie top.Step 4: Add the Eggs and Vanilla
Add the room temperature eggs to the sugar mixture, one at a time, whisking well after each addition until fully incorporated. Once the eggs are mixed in, stir in the vanilla extract. The batter should look smooth, shiny, and slightly thickened.Step 5: Combine Wet and Dry
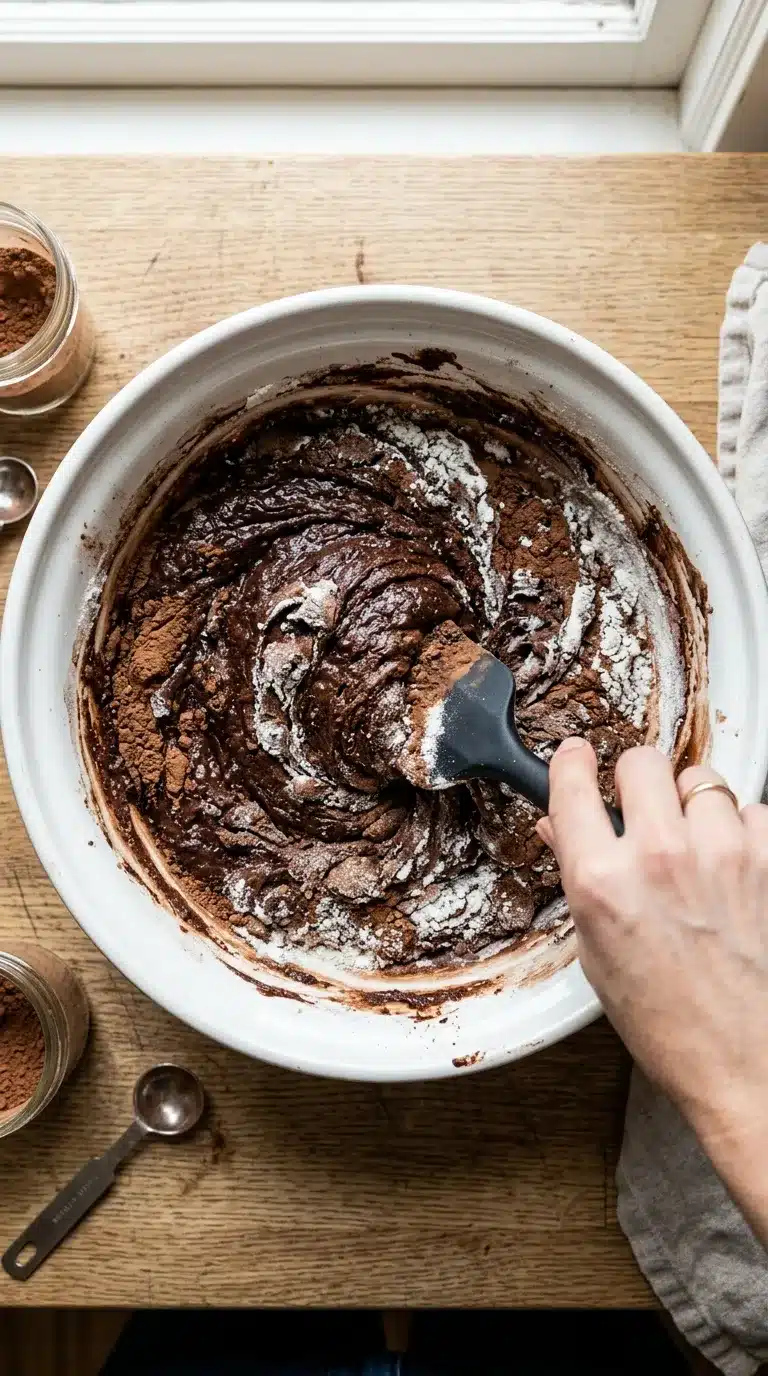
Now, pour the dry ingredients into the bowl with the wet ingredients. Using a rubber spatula, gently fold everything together until just combined. Be very careful not to overmix! A few streaks of flour are perfectly fine. Overmixing develops the gluten in the flour, which can lead to a tough, cakey texture instead of a fudgy one.Step 6: Fold in the Chocolate Chips
Gently fold in the semi-sweet chocolate chips. Save a few to sprinkle on top of the cupcakes before they go into the oven if you like that look. This is also the point where you would add any other mix-ins like nuts or chopped candy.Step 7: Fill and Bake
Using a cookie scoop or a large spoon, divide the batter evenly among the 12 prepared cupcake liners. They should be about two-thirds to three-quarters full. Sprinkle those reserved chocolate chips on top. Bake for 20-25 minutes.Step 8: The Doneness Test
The trickiest part is knowing when they’re done. You want them fudgy, not raw. Insert a wooden toothpick into the center of a cupcake. Unlike a regular cake, you don’t want it to come out clean. You’re looking for moist, fudgy crumbs attached to the toothpick. If it comes out with wet batter, they need a few more minutes.Step 9: Cool Completely
Let the brownie cupcakes cool in the muffin tin for about 10 minutes before transferring them to a wire rack to cool completely. This is the hardest part, I know! But allowing them to cool fully is essential for the texture to set properly. If you frost them while they’re still warm, the frosting will melt into a puddle.Expert Tips for Success
- Do Not Overmix: I can’t stress this enough! Once you add the flour, mix only until you no longer see big streaks of it. Overmixing will give you cakey, tough brownies instead of fudgy ones.
- Use Room Temperature Eggs: Cold eggs can cause the melted butter to seize and solidify, resulting in a lumpy batter. Room temperature eggs mix in smoothly, creating a more uniform and emulsified batter.
- Don’t Overbake: The key to a fudgy center is to pull them from the oven at the right moment. The residual heat will continue to cook them as they cool. Look for moist crumbs on your toothpick, not wet batter or a clean stick.
Serving Suggestions
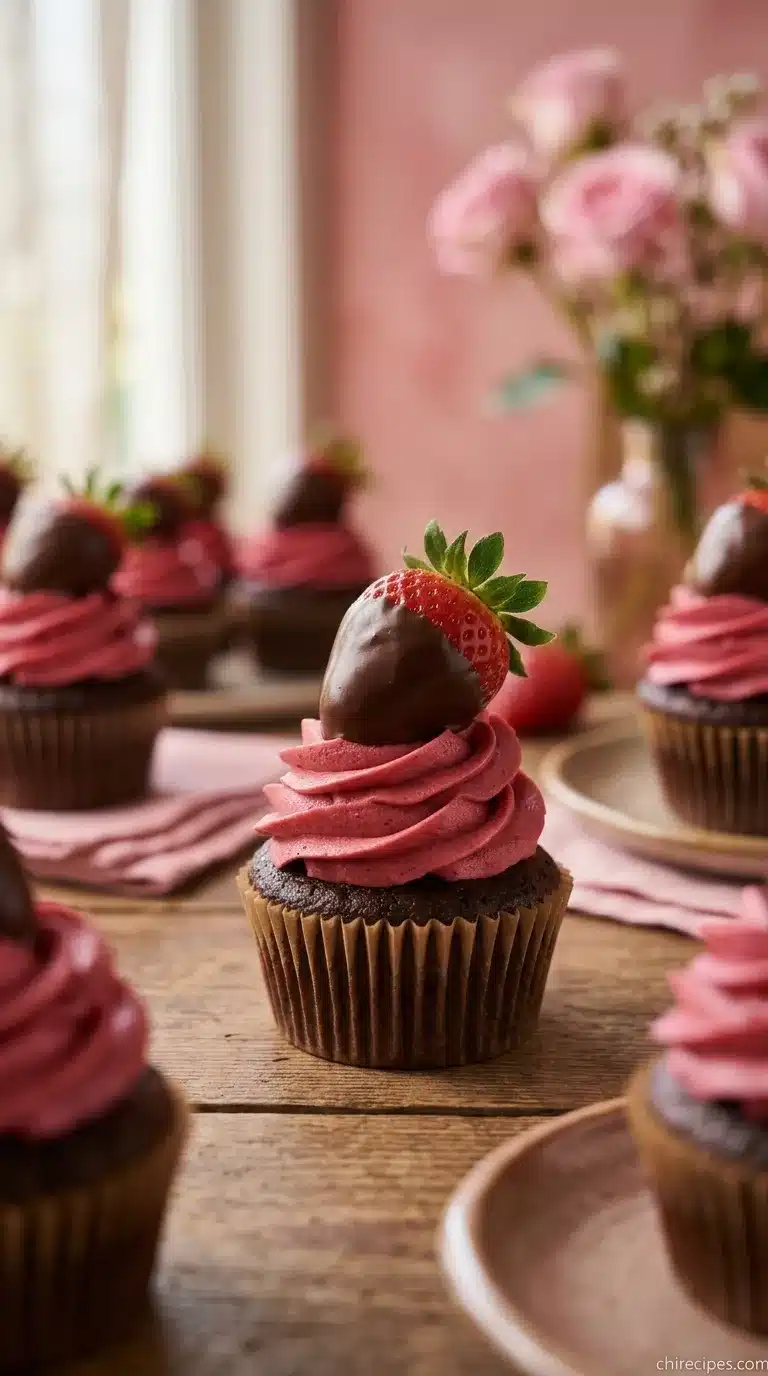
These brownie cupcakes are a showstopper all on their own, but they also play very well with others. They are far more decadent than your average cupcake, like my light and airy Strawberry Shortcake Cupcakes, so they pair best with simple accompaniments.A classic pairing is a scoop of high-quality vanilla bean ice cream. The contrast between the warm, fudgy cupcake and the cold, creamy ice cream is pure bliss. A drizzle of warm caramel or hot fudge sauce takes it to another level entirely.
For a fresher take, serve them with a side of fresh berries like raspberries or sliced strawberries. The slight tartness of the fruit beautifully cuts through the richness of the chocolate. A simple dollop of freshly whipped cream also works wonders.
These are perfect for parties because they are already portioned out. You can create a “cupcake bar” with different frostings and toppings like sprinkles, chopped nuts, and crushed cookies, letting guests customize their own. They are a much more manageable treat than, say, my elaborate Chocolate Covered Cherry Brownie Bombs, making them ideal for gatherings.
You can also frost them! A simple chocolate buttercream, a tangy cream cheese frosting, or even a festive peppermint frosting during the holidays would be fantastic. If you’re feeling fancy, you could even top them with a frosting similar to the one on these Pink Champagne Cupcakes for a truly unique flavor combination.
If you tried this recipe and loved it, please leave a 5-star rating below. It helps us so much
What makes these brownie cupcakes different from just baking brownies in a cupcake tin?
This recipe is specifically engineered to be a perfect fusion of both desserts. It delivers the signature crackly top and intensely fudgy center of a brownie, but in a structure that holds its cupcake shape perfectly, making it an ideal canvas for frosting.
What’s the secret to getting a fudgy texture instead of a cakey one?
The key to a fudgy texture lies in two main techniques from the recipe. First, using melted butter instead of creamed butter creates the characteristic chewiness. Second, it is crucial to avoid overmixing the batter after adding the flour, as this prevents the cupcakes from becoming tough and cakey.
How do I know when the brownie cupcakes are done baking?
To check for doneness, insert a wooden toothpick into the center of a cupcake. Unlike a traditional cake, you do not want it to come out clean. The ideal sign is when the toothpick comes out with moist, fudgy crumbs attached. If it has wet batter, it needs a few more minutes.
Can I make this recipe gluten-free?
Yes, you can make a gluten-free version of these brownie cupcakes. The article suggests substituting the all-purpose flour with a good quality 1-to-1 gluten-free baking flour blend.
The Brownie Cupcakes of Your Dreams
Ingredients
Equipment
Method
- Preheat your oven to 350°F (175°C). Line a standard 12-cup muffin tin with paper liners.
- In a medium bowl, whisk together the all-purpose flour, unsweetened cocoa powder, espresso powder, salt, and baking powder. Set aside.
- In a separate, larger bowl, whisk the melted butter with both the granulated and light brown sugars vigorously for about a minute until glossy and well-combined.
- Add the room temperature eggs one at a time, whisking well after each addition until fully incorporated. Stir in the vanilla extract.
- Pour the dry ingredients into the wet ingredients and gently fold with a rubber spatula until just combined. Be careful not to overmix; a few streaks of flour are fine.
- Gently fold in most of the semi-sweet chocolate chips, reserving a handful to sprinkle on top.
- Divide the batter evenly among the 12 prepared cupcake liners, filling them about two-thirds to three-quarters full. Sprinkle the reserved chocolate chips on top of each.
- Bake for 20-25 minutes. To check for doneness, insert a wooden toothpick into the center; it should come out with moist, fudgy crumbs attached, not wet batter.
- Let the brownie cupcakes cool in the muffin tin for 10 minutes before transferring them to a wire rack to cool completely before frosting or serving.