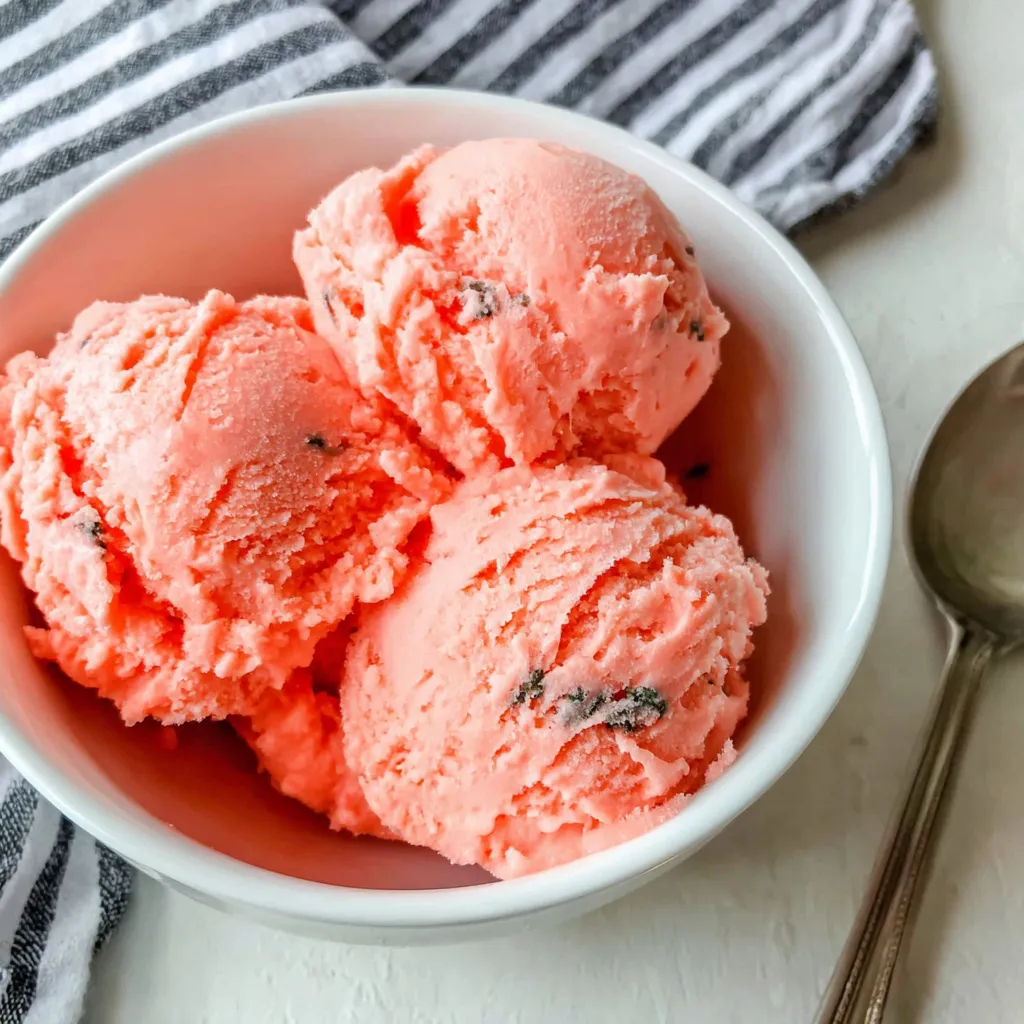
I remember scorching summer days spent at my grandma’s house, the air thick with humidity and the constant drone of cicadas. The only thing that could truly cut through the heat was a slice of ice-cold watermelon. But one year, Grandma decided to take things to the next level, transforming that simple pleasure into something extraordinary: Cool Tasty and fresh watermelon ice cream on cold ice. The taste was pure summer bliss, and I knew I had to learn her secrets. Today, I’m sharing all my secrets for the most amazing Cool Tasty and fresh watermelon ice cream on cold ice you’ll ever make!
The Magic of Watermelon Ice Cream

There’s something truly magical about transforming a humble watermelon into a creamy, dreamy ice cream. It’s not just about the taste; it’s about capturing the essence of summer in a single spoonful. Forget those store-bought, artificial-tasting ice creams. This recipe uses simple, fresh ingredients and a few clever tricks to create an ice cream that’s bursting with watermelon flavor and has a wonderfully smooth texture. Trust me, once you try homemade watermelon ice cream, you’ll never go back!
This recipe is surprisingly easy, even if you’ve never made ice cream before. The key is to use the freshest, ripest watermelon you can find. And while an ice cream maker is recommended for the best results, I’ll also share a no-churn method that works just as well. So, are you ready to dive in and create some watermelon ice cream magic?
Why This Watermelon Ice Cream Rocks:
- Unbelievably Fresh Flavor: The pure, unadulterated taste of watermelon shines through.
- Naturally Sweet: Watermelon is naturally sweet, so you won’t need a ton of added sugar.
- Creamy Texture: We’ll use a few tricks to ensure your ice cream is perfectly smooth and creamy, not icy.
- Easy to Make: Whether you have an ice cream maker or not, this recipe is a breeze.
- Kid-Friendly: What kid (or adult, for that matter!) can resist watermelon ice cream?
Ingredients You’ll Need
The beauty of this recipe lies in its simplicity. You only need a few key ingredients to create a truly spectacular ice cream.
- Fresh Watermelon: About 6 cups of cubed watermelon, seeded. Look for a watermelon that feels heavy for its size and has a deep, resonant sound when you tap it.
- Heavy Cream: 1 cup. This is essential for that creamy, luxurious texture. Don’t skimp on the fat content!
- Whole Milk: 1/2 cup. This helps to balance the richness of the heavy cream.
- Sugar: 1/2 cup granulated sugar. Adjust to taste, depending on the sweetness of your watermelon.
- Lemon Juice: 1 tablespoon. A touch of acidity brightens the watermelon flavor and helps prevent the ice cream from becoming too icy.
- Pinch of Salt: Enhances the sweetness and balances the flavors.
- Optional: A few fresh mint leaves for garnish.
Step-by-Step Instructions (Ice Cream Maker Method)
Follow these simple steps, and you’ll be enjoying homemade watermelon ice cream in no time!
- Prepare the Watermelon: Cut the watermelon into cubes and remove any seeds. You should have about 6 cups of cubed watermelon.
- Blend the Watermelon: Place the watermelon cubes in a blender or food processor and blend until completely smooth. You should have about 4 cups of watermelon puree.
- Strain the Watermelon Puree: Pour the watermelon puree through a fine-mesh sieve or cheesecloth-lined colander to remove any pulp. This step is crucial for achieving a super-smooth ice cream. Discard the pulp.
- Combine the Ingredients: In a large bowl, whisk together the strained watermelon puree, heavy cream, whole milk, sugar, lemon juice, and salt. Whisk until the sugar is completely dissolved. The mixture should be a pale pink color and smell intensely of watermelon.
- Chill the Mixture: Cover the bowl with plastic wrap and refrigerate for at least 4 hours, or preferably overnight. This allows the flavors to meld and the mixture to get thoroughly chilled, which is essential for proper freezing in the ice cream maker.
- Churn the Ice Cream: Pour the chilled watermelon mixture into your ice cream maker and churn according to the manufacturer’s instructions. This usually takes about 20-30 minutes. The ice cream is ready when it has a soft-serve consistency.
- Harden the Ice Cream (Optional): For a firmer ice cream, transfer the soft-serve ice cream to an airtight container and freeze for at least 2 hours before serving. This allows the ice cream to harden completely.
- Serve and Enjoy: Scoop the watermelon ice cream into bowls or cones and garnish with fresh mint leaves, if desired. Serve immediately and savor the taste of summer!
Step-by-Step Instructions (No-Churn Method)
Don’t have an ice cream maker? No problem! This no-churn method is just as easy and delivers a surprisingly creamy result.
- Prepare the Watermelon: Cut the watermelon into cubes and remove any seeds. You should have about 6 cups of cubed watermelon.
- Blend the Watermelon: Place the watermelon cubes in a blender or food processor and blend until completely smooth. You should have about 4 cups of watermelon puree.
- Strain the Watermelon Puree: Pour the watermelon puree through a fine-mesh sieve or cheesecloth-lined colander to remove any pulp. This step is crucial for achieving a super-smooth ice cream. Discard the pulp.
- Combine the Ingredients: In a large bowl, whisk together the strained watermelon puree, heavy cream, whole milk, sugar, lemon juice, and salt. Whisk until the sugar is completely dissolved.
- Freeze in Layers: Pour the watermelon mixture into a freezer-safe container. Place the container in the freezer for 1 hour. After 1 hour, remove the container from the freezer and use a fork to break up any ice crystals that have formed. Stir vigorously to redistribute the ice crystals. Repeat this process every 30 minutes for the next 2-3 hours. This step is essential to prevent large ice crystals from forming and to ensure a creamy texture.
- Final Freeze: After the initial freezing and stirring process, cover the container and freeze for at least 4 hours, or preferably overnight, until the ice cream is completely frozen.
- Serve and Enjoy: Let the ice cream sit at room temperature for 5-10 minutes before scooping. This will make it easier to scoop. Scoop into bowls or cones and garnish with fresh mint leaves, if desired. Serve immediately and enjoy!
Success Tips for Perfect Watermelon Ice Cream
Want to guarantee ice cream perfection? Follow these golden tips!
- Use the Best Watermelon: The flavor of your ice cream will only be as good as the watermelon you use. Choose a ripe, juicy watermelon that’s bursting with flavor.
- Strain, Strain, Strain: Don’t skip the straining step! Removing the pulp is essential for a super-smooth, creamy texture.
- Chill Thoroughly: Whether you’re using an ice cream maker or the no-churn method, chilling the mixture thoroughly is crucial for preventing ice crystals from forming.
- Don’t Overchurn (Ice Cream Maker): Overchurning can result in a grainy texture. Churn until the ice cream reaches a soft-serve consistency, then transfer it to the freezer to harden.
- Stir Frequently (No-Churn): The key to creamy no-churn ice cream is frequent stirring during the initial freezing process. Don’t skip this step!
Variations to Spice Things Up
Want to add a little twist to your watermelon ice cream? Here are a few fun variations to try:
- Watermelon Mint: Add a handful of fresh mint leaves to the blender when you’re pureeing the watermelon.
- Watermelon Lime: Substitute lime juice for lemon juice for a zesty twist.
- Watermelon Coconut: Substitute coconut milk for the whole milk for a tropical flavor.
- Spiked Watermelon: Add a splash of vodka or rum to the mixture before churning for an adult-only treat. Be careful not to add too much alcohol, as it can prevent the ice cream from freezing properly.
- Chocolate Chip Watermelon: Stir in mini chocolate chips after churning for a fun texture contrast.
While you’re experimenting with summer flavors, why not try making a WATERMELON LEMONADE to enjoy alongside your ice cream? The combination is incredibly refreshing!
Serving Suggestions
Watermelon ice cream is delicious on its own, but here are a few serving suggestions to elevate your experience:
- Classic Cone: Serve in a waffle cone or sugar cone for a classic ice cream experience.
- Ice Cream Sundae: Top with whipped cream, chocolate sauce, sprinkles, and a cherry for a decadent sundae.
- Watermelon Bowl: Hollow out a small watermelon and use it as a bowl for your ice cream. Garnish with watermelon wedges and mint leaves.
- Affogato: Pour a shot of hot espresso over a scoop of watermelon ice cream for a unique and delicious affogato.
- With Grilled Watermelon: Serve alongside a slice of GRILLED WATERMELON SUMMER BLISS for a surprisingly delicious combination of sweet and savory.
Storing Your Watermelon Ice Cream
To keep your watermelon ice cream fresh and delicious, store it in an airtight container in the freezer. Homemade ice cream tends to be a bit softer than store-bought ice cream, so it’s best to store it in the back of the freezer, where it’s coldest. Properly stored, watermelon ice cream will last for up to 2 weeks. However, I guarantee it won’t last that long because it will be eaten quickly!
And for a truly refreshing experience, consider blending up a WATERMELON SUMMER SIP to enjoy with your ice cream! Or maybe a WATERMELON SLUSHIE would be more to your liking? The possibilities are endless!
If you want another idea for those summer days, try WATERMELON SUMMER SMOOTHIE this is a great way to enjoy the taste of summer. Also, you should taste the WATERMELON SORBET. This is quick to make and enjoy.
Why Homemade Matters
In a world filled with processed foods and artificial flavors, there’s something incredibly satisfying about making your own ice cream from scratch. Not only do you control the ingredients, but you also get to experience the joy of creating something truly special. This watermelon ice cream is a testament to the fact that simple ingredients, combined with a little bit of love and effort, can create something truly extraordinary. So, ditch the store-bought stuff and give this recipe a try. I promise you won’t be disappointed!
And if you’re feeling adventurous, why not try experimenting with other fruit flavors? The possibilities are endless! Think mango sorbet, strawberry ice cream, or even a creamy avocado ice cream. The world of homemade ice cream is your oyster!
Conclusion
So there you have it – my complete guide to making the most amazing Cool Tasty and fresh watermelon ice cream on cold ice. With its vibrant flavor, creamy texture, and ease of preparation, this recipe is a guaranteed crowd-pleaser. Whether you’re enjoying it on a hot summer day or simply craving a taste of sunshine, this watermelon ice cream is sure to bring a smile to your face. So gather your ingredients, fire up your ice cream maker (or grab a freezer-safe container!), and get ready to experience the magic of homemade ice cream. Happy churning!
What makes this watermelon ice cream recipe different from store-bought options?
This recipe uses simple, fresh ingredients, captures the true essence of summer, and avoids artificial flavors, resulting in a more authentic and flavorful watermelon experience.
Is an ice cream maker absolutely necessary to make this recipe?
No, while an ice cream maker is recommended for the best results, the article also provides a no-churn method that delivers a surprisingly creamy result without needing any special equipment.
What is the key to achieving a smooth and creamy texture in watermelon ice cream?
Straining the watermelon puree to remove pulp and chilling the mixture thoroughly before churning (or freezing in the no-churn method) are crucial for preventing ice crystals and ensuring a smooth, creamy texture.
How long does homemade watermelon ice cream last in the freezer?
Properly stored in an airtight container in the back of the freezer, homemade watermelon ice cream will last for up to 2 weeks.
Watermelon Ice Cream
Ingredients
Equipment
Method
- Cut the watermelon into cubes and remove any seeds. You should have about 6 cups of cubed watermelon.
- Place the watermelon cubes in a blender or food processor and blend until completely smooth. You should have about 4 cups of watermelon puree.
- Pour the watermelon puree through a fine-mesh sieve or cheesecloth-lined colander to remove any pulp. Discard the pulp.
- In a large bowl, whisk together the strained watermelon puree, heavy cream, whole milk, sugar, lemon juice, and salt. Whisk until the sugar is completely dissolved.
- For Ice Cream Maker Method: Chill the mixture: Cover the bowl with plastic wrap and refrigerate for at least 4 hours, or preferably overnight.
- For Ice Cream Maker Method: Pour the chilled watermelon mixture into your ice cream maker and churn according to the manufacturer’s instructions. This usually takes about 20-30 minutes. The ice cream is ready when it has a soft-serve consistency.
- For Ice Cream Maker Method: For a firmer ice cream, transfer the soft-serve ice cream to an airtight container and freeze for at least 2 hours before serving.
- For No-Churn Method: Pour the watermelon mixture into a freezer-safe container. Place the container in the freezer for 1 hour. After 1 hour, remove the container from the freezer and use a fork to break up any ice crystals that have formed. Stir vigorously to redistribute the ice crystals. Repeat this process every 30 minutes for the next 2-3 hours.
- For No-Churn Method: After the initial freezing and stirring process, cover the container and freeze for at least 4 hours, or preferably overnight, until the ice cream is completely frozen.
- Let the ice cream sit at room temperature for 5-10 minutes before scooping. Scoop into bowls or cones and garnish with fresh mint leaves, if desired. Serve immediately and enjoy.