
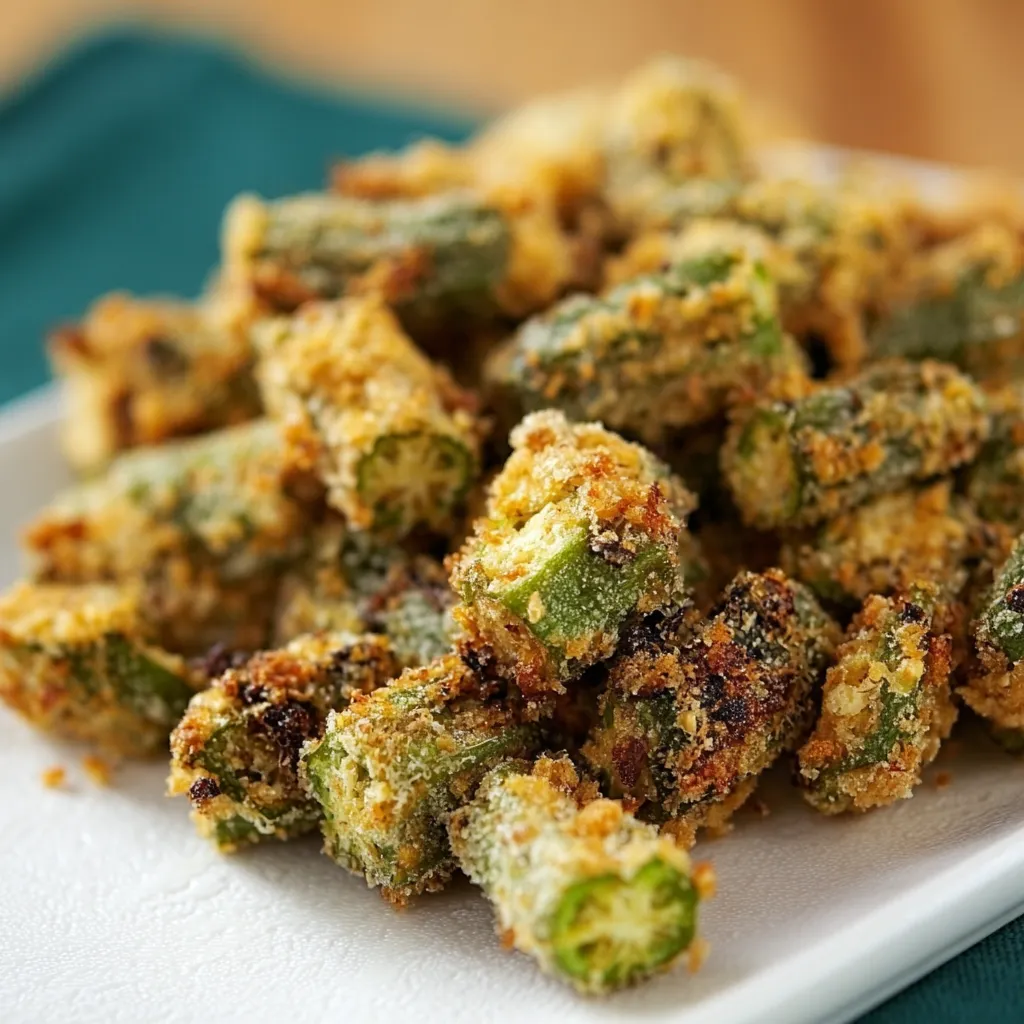
I’ll never forget the first time I tried okra. It was at my grandma’s house, and honestly, I wasn’t thrilled. That slimy texture everyone talks about? Yeah, it was there. But then, I discovered the magic of crunchy baked okra, and everything changed! The transformation from potentially mushy to delightfully crispy is nothing short of a culinary miracle. Today, I’m sharing all my secrets for the most amazing crunchy baked okra you’ll ever make!
Why You’ll Absolutely Love This Crunchy Baked Okra Recipe

Let’s be real, okra has a bit of a reputation. But trust me on this one. When prepared correctly, it’s a nutritional powerhouse that can be absolutely addictive. This recipe for crunchy baked okra is:
- Super Easy: Minimal ingredients and simple steps make this perfect for weeknight cooking.
- Incredibly Crispy: Say goodbye to slimy okra forever! The baking process transforms it into a crunchy delight.
- Healthy and Delicious: Packed with fiber and vitamins, this is a guilt-free snack or side dish.
- Versatile: Enjoy it as a snack, side dish, or even as a topping for salads and bowls.
- A Great Way to Sneak in Veggies: Even picky eaters will love this crispy, flavorful okra!
The Secret to the Perfect Crunchy Baked Okra
Okay, so what’s the secret? It’s all about preparation and technique. We’re going to tackle that “slimy” issue head-on and ensure maximum crispiness. Let’s get started!
Ingredients You’ll Need
- 1 pound fresh okra, washed and dried thoroughly
- 2 tablespoons olive oil (or avocado oil)
- 1 teaspoon garlic powder
- 1 teaspoon paprika
- 1/2 teaspoon onion powder
- 1/4 teaspoon cayenne pepper (optional, for a little kick!)
- Salt and freshly ground black pepper to taste
- Optional: 1/4 cup grated Parmesan cheese (for extra flavor and crispiness)
Step-by-Step Instructions: The Ultimate Crunchy Baked Okra Recipe
- Preheat your oven to 400°F (200°C). Make sure your oven is fully preheated for even cooking.
- Wash and thoroughly dry the okra. This is CRUCIAL! Excess moisture is the enemy of crispiness. Use a clean kitchen towel or even a salad spinner to remove as much water as possible.
- Trim the okra. Cut off the stem end of each okra pod. You can leave the pods whole or slice them into 1/2-inch thick rounds, depending on your preference. I personally like rounds for maximum surface area and crispiness.
- Toss the okra with olive oil. In a large bowl, toss the okra with the olive oil until it’s evenly coated. Make sure every piece gets a little love!
- Add the spices. Sprinkle the garlic powder, paprika, onion powder, cayenne pepper (if using), salt, and pepper over the okra. Toss again to ensure the okra is well coated with the spices. The aroma should already be making your mouth water!
- Optional: Add Parmesan cheese. If you’re using Parmesan cheese, add it to the bowl and toss to coat. This will create an extra crispy and flavorful crust.
- Arrange the okra on a baking sheet. Spread the okra in a single layer on a baking sheet lined with parchment paper. This prevents sticking and makes cleanup a breeze. Make sure the okra pieces aren’t overcrowded; this will help them crisp up evenly.
- Bake for 20-25 minutes. Bake the okra in the preheated oven for 20-25 minutes, or until it’s golden brown and crispy. Flip the okra halfway through the baking time to ensure even browning. Keep a close eye on it to prevent burning!
- Let cool slightly and serve. Remove the okra from the oven and let it cool slightly before serving. This will allow it to crisp up even further.
Success Tips for Crunchy Baked Okra
Want to guarantee perfectly crispy okra every single time? Here are my top tips:
- Dry, Dry, Dry! I can’t stress this enough. The drier the okra, the crispier it will be. After washing, pat it dry with paper towels or use a salad spinner to remove as much moisture as possible.
- Don’t Overcrowd the Pan: Overcrowding the baking sheet will steam the okra instead of baking it, resulting in soggy okra. Make sure the okra is spread in a single layer with plenty of space between each piece. If necessary, use two baking sheets.
- Use High Heat: Baking at a higher temperature (400°F/200°C) helps the okra crisp up faster.
- Don’t Skip the Parchment Paper: Parchment paper not only prevents sticking but also helps the okra crisp up by allowing air to circulate underneath.
- Experiment with Spices: Feel free to customize the spices to your liking. Smoked paprika, chili powder, or even a sprinkle of everything bagel seasoning can add a unique twist.
Variations on Crunchy Baked Okra
This recipe is a great starting point, but feel free to get creative and experiment with different flavors and ingredients. Here are a few ideas:
Spicy Crunchy Baked Okra
Add a pinch of cayenne pepper or a dash of hot sauce to the spice mixture for a spicy kick.
Lemon Pepper Crunchy Baked Okra
Add a teaspoon of lemon zest and a generous amount of freshly cracked black pepper to the spice mixture.
Garlic Parmesan Crunchy Baked Okra
Increase the amount of garlic powder and add an extra sprinkle of Parmesan cheese before baking.
Indian-Spiced Crunchy Baked Okra
Use a blend of Indian spices like turmeric, cumin, coriander, and garam masala for a flavorful twist.
Ranch-Flavored Crunchy Baked Okra
Toss the okra with a packet of ranch dressing mix before baking.
Serving Suggestions for Crunchy Baked Okra
This crunchy baked okra is incredibly versatile and can be enjoyed in a variety of ways:
- As a Snack: Enjoy it straight from the oven as a healthy and satisfying snack.
- As a Side Dish: Serve it alongside your favorite grilled meats, chicken, or fish.
- As a Salad Topping: Add it to salads for extra crunch and flavor.
- In Bowls: Top grain bowls or veggie bowls with crunchy baked okra for added texture and nutrients.
- With Dips: Serve it with your favorite dipping sauces like ranch dressing, hummus, or tzatziki.
Frequently Asked Questions (FAQs)
Can I use frozen okra?
While fresh okra is ideal for achieving maximum crispiness, you can use frozen okra if you thaw it completely and pat it dry very well before baking. Keep in mind that frozen okra may not be as crispy as fresh okra.
How do I store leftover crunchy baked okra?
Store leftover crunchy baked okra in an airtight container in the refrigerator for up to 3 days. However, keep in mind that it will lose some of its crispiness as it sits. To reheat, spread it on a baking sheet and bake at 350°F (175°C) for a few minutes until warmed through.
Can I make this in an air fryer?
Yes! Air frying is a great way to achieve extra crispy okra. Preheat your air fryer to 400°F (200°C) and cook the okra for 8-10 minutes, or until it’s golden brown and crispy, shaking the basket halfway through.
What if my okra is still slimy after baking?
If your okra is still slimy after baking, it’s likely because it wasn’t dried thoroughly enough or the baking sheet was overcrowded. Make sure to dry the okra well and spread it in a single layer on the baking sheet.
Can I add other vegetables to this recipe?
Absolutely! You can add other vegetables like bell peppers, onions, or zucchini to the baking sheet along with the okra. Just be sure to adjust the baking time as needed.
Nutritional Benefits of Okra
Beyond its delicious taste and satisfying crunch, okra is also packed with nutrients. It’s a good source of:
- Fiber: Promotes healthy digestion and helps regulate blood sugar levels.
- Vitamin C: Boosts the immune system and protects against cell damage.
- Vitamin K: Essential for blood clotting and bone health.
- Folate: Important for cell growth and development.
- Magnesium: Helps regulate blood pressure and supports muscle and nerve function.
So, not only is this crunchy baked okra recipe delicious, but it’s also good for you! It’s a win-win situation.
Final Thoughts: Time to Get Cooking!
I hope you’re as excited as I am to try this recipe for crunchy baked okra! It’s a simple, delicious, and healthy way to enjoy this often-overlooked vegetable. Remember to follow my success tips for guaranteed crispiness, and don’t be afraid to get creative with the spices and seasonings. Now, go ahead and preheat that oven – your taste buds will thank you!
Crispy Baked Okra: The Ultimate Healthy Crunchy Snack
Ingredients
Equipment
Method
- Preheat your oven to 400°F (200°C) and line a baking sheet with parchment paper.
- Thoroughly dry the okra using a clean towel or salad spinner. Trim stems and slice into 1/2-inch rounds, or leave whole if preferred.
- In a large bowl, toss okra with olive oil until evenly coated.
- Add garlic powder, paprika, onion powder, cayenne (if using), salt, and pepper. Toss well to coat. Add Parmesan if using and toss again.
- Spread okra in a single layer on the prepared baking sheet. Do not overcrowd.
- Bake for 20–25 minutes, flipping halfway, until golden and crispy. Watch closely near the end to avoid burning.
- Let cool slightly before serving. Enjoy as a snack, side, or crunchy topping!


