
I remember the first time I saw these whimsical treats – a friend brought them to a potluck, and they were gone in minutes! Everyone, kids and adults alike, were absolutely mesmerized by the vibrant colors and playful shape. That’s when I knew I needed to learn how to make my own version of this delightful dessert, and now I can share the secret to making the best, **Easy Fruity Pebbles Sushi – A Fun & Colorful Treat!** Today, I’m sharing all my secrets for the most amazing Fruity Pebbles Sushi you’ll ever make!
Get Ready to Roll: Making Fruity Pebbles Sushi

Are you ready for a treat that’s as fun to make as it is to eat? This Fruity Pebbles Sushi is a guaranteed crowd-pleaser. It’s perfect for birthday parties, after-school snacks, or just a rainy-day activity. Let’s dive into this easy and delicious recipe!
What You’ll Need: The Ingredients
Here’s what you’ll need to create this colorful masterpiece. Don’t worry, most of these ingredients are pantry staples!
- 6 cups Fruity Pebbles cereal: The star of the show! Make sure they are fresh for the best texture.
- 3 tablespoons unsalted butter: This helps bind everything together and adds a lovely richness.
- 1 (10 ounce) package marshmallows: I prefer mini marshmallows because they melt more evenly, but large ones work too.
- Optional: Gummy worms, Swedish Fish, or other candies: For the “filling” to mimic real sushi!
- Optional: Fruit leather: To act as “nori” (seaweed) to give it a more authentic sushi look.
- Optional: Shredded Coconut: To mimic rice
Step-by-Step Instructions: Let’s Get Rolling!
Now for the fun part! Follow these steps carefully, and you’ll have perfect Fruity Pebbles Sushi every time. Ready?
- Prepare Your Workspace: Line a 9×13 inch baking dish with parchment paper or lightly grease it. This will prevent sticking and make it easy to remove the finished sushi.
- Melt the Butter: In a large, microwave-safe bowl, melt the butter. This usually takes about 30-45 seconds, but keep an eye on it!
- Add the Marshmallows: Add the marshmallows to the melted butter.
- Microwave the Marshmallow Mixture: Microwave on high for 1-2 minutes, stirring halfway through. The marshmallows should be completely melted and smooth. Be careful, the bowl will be hot!
- Stir in the Fruity Pebbles: Immediately pour the Fruity Pebbles into the melted marshmallow mixture. Stir gently but thoroughly until the cereal is evenly coated.
- Press into the Prepared Dish: Pour the mixture into the prepared baking dish. Use a spatula or your hands (lightly greased or dampened) to press the mixture firmly and evenly into the dish. This is crucial for the sushi to hold its shape.
- Let it Cool: Allow the mixture to cool completely. This usually takes about 30 minutes to an hour. You can speed up the process by placing it in the refrigerator.
- Prepare the “Sushi” Rolls: Once cooled, lift the mixture out of the dish using the parchment paper. Place it on a cutting board.
- Cut into Strips: Cut the mixture into long strips, about 1-2 inches wide. These will be your “sushi rolls.”
- Add the “Filling” (Optional): Place a strip of fruit leather on your workspace. Then, take one strip of the Fruity Pebbles mixture and place it on the fruit leather. Now, place your gummy worm or other candy in the middle of the Fruity Pebbles strip.
- Roll it Up: Carefully roll the Fruity Pebbles mixture around the candy, using the fruit leather as a wrapper. If you aren’t using fruit leather, you can just leave it as is.
- Cut into Slices: Using a sharp knife, cut each strip into bite-sized “sushi” pieces.
- Serve and Enjoy!: Arrange the Fruity Pebbles Sushi on a platter and serve immediately. Get ready for the smiles!
Success Tips for Perfect Fruity Pebbles Sushi

Want to make sure your Fruity Pebbles Sushi is a guaranteed success? Follow these golden tips!
- Don’t Overcook the Marshmallows: Overcooked marshmallows will become hard and brittle. Microwave them just until they are melted and smooth.
- Work Quickly: Once the marshmallows are melted, work quickly to stir in the Fruity Pebbles and press the mixture into the dish. The marshmallow mixture will start to harden as it cools.
- Use Fresh Cereal: Stale Fruity Pebbles will result in a less flavorful and less vibrant sushi. Make sure your cereal is fresh!
- Grease Your Hands: When pressing the mixture into the dish, lightly grease your hands with butter or cooking spray to prevent sticking. Alternatively, use dampened hands.
- Get Creative with Fillings: Don’t be afraid to experiment with different fillings! Try using different types of candies, chocolate chips, or even a smear of peanut butter.
Variations and Twists
Want to put your own spin on this classic treat? Here are a few ideas to get you started:
- Chocolate Fruity Pebbles Sushi: Use Cocoa Pebbles instead of Fruity Pebbles for a chocolatey twist.
- Peanut Butter Fruity Pebbles Sushi: Add a tablespoon or two of peanut butter to the melted marshmallow mixture.
- Rainbow Fruity Pebbles Sushi: Use different colors of Fruity Pebbles to create a rainbow effect. You can layer the colors in the baking dish before pressing them down.
- Coconut Fruity Pebbles Sushi: Sprinkle shredded coconut over the top of the mixture before it cools for a tropical flavor.
- Use Rice Krispies: Use Rice Krispies instead of Fruity Pebbles for a less sweet version.
Level Up Your Sweet Treat Game!
Once you’ve mastered Fruity Pebbles Sushi, why not explore some other equally fun and delicious recipes? It’s amazing how versatile marshmallows are, aren’t they? If you like that marshmallowy texture, give my recipe for Caramel Apple Dream Bars a try.
Maybe you’re in the mood for something a little more refreshing? Then you might enjoy Blueberry Swirl Yogurt Bites. These frozen treats are perfect for a hot summer day, and they’re surprisingly easy to make.
Or, if you’re looking for something quick and easy for breakfast, you should try Fruity Pebbles Overnight Oats. They’re a great way to start your day with a burst of flavor and energy.
If you want to stick with the carnival vibe, why not try these Funnel Cake Bites? They are super easy to make, and a total crowd pleaser!
And speaking of crowd-pleasers, my Caramel Apple Cheesecake Dip is always a hit at parties. It’s creamy, sweet, and perfect for dipping apples, graham crackers, or pretzels.
Making Fruity Pebbles Sushi with Kids
This recipe is perfect for getting kids involved in the kitchen! Here are a few tips for making it a fun and safe experience:
- Let them measure ingredients: Measuring ingredients is a great way for kids to practice their math skills.
- Let them stir: Stirring the Fruity Pebbles into the marshmallow mixture is a fun and easy task for kids. Just make sure the mixture has cooled slightly so they don’t burn themselves.
- Let them press the mixture into the dish: Kids love getting their hands dirty! Let them use their hands (lightly greased or dampened) to press the mixture into the dish.
- Let them cut the sushi: With adult supervision, kids can use a plastic knife to cut the sushi into slices.
- Let them decorate: Let kids get creative with decorating the sushi with different candies and toppings.
Storage Instructions: Keeping Your Sushi Fresh
If you have any leftover Fruity Pebbles Sushi (which is unlikely!), here’s how to store it:
- Room Temperature: Store the sushi in an airtight container at room temperature for up to 2-3 days.
- Refrigerator: For longer storage, store the sushi in an airtight container in the refrigerator for up to a week.
- Freezer: While not ideal, you can freeze the sushi for up to a month. Wrap it tightly in plastic wrap and then place it in a freezer-safe container. Thaw at room temperature before serving. The texture may change slightly after freezing.
Troubleshooting: Common Issues and Solutions
Sometimes things don’t go as planned in the kitchen. Here are a few common issues and their solutions:
- The mixture is too sticky: If the mixture is too sticky, add a little more Fruity Pebbles cereal.
- The mixture is too hard: If the mixture is too hard, microwave it for a few seconds to soften it.
- The sushi is falling apart: If the sushi is falling apart, make sure you pressed the mixture firmly enough into the dish. You can also try adding a little more melted butter to the mixture.
- The marshmallows are burning: If the marshmallows are burning, reduce the microwave time or use a lower power setting.
- I can’t find Fruity Pebbles: You can substitute any crispy rice cereal (like Rice Krispies) or other similar cereal.
Recipe: Fruity Pebbles Sushi
Here’s a printable version of the recipe for your convenience:
Ingredients:
- 6 cups Fruity Pebbles cereal
- 3 tablespoons unsalted butter
- 1 (10 ounce) package marshmallows
- Optional: Gummy worms, Swedish Fish, or other candies
- Optional: Fruit leather
Instructions:
- Line a 9x13 inch baking dish with parchment paper or lightly grease it.
- In a large, microwave-safe bowl, melt the butter.
- Add the marshmallows to the melted butter.
- Microwave on high for 1-2 minutes, stirring halfway through.
- Immediately pour the Fruity Pebbles into the melted marshmallow mixture. Stir gently but thoroughly.
- Press the mixture firmly and evenly into the dish.
- Allow the mixture to cool completely.
- Lift the mixture out of the dish.
- Cut the mixture into long strips.
- Add the "filling" (optional).
- Roll it up (optional).
- Cut each strip into bite-sized "sushi" pieces.
- Serve and enjoy!
Frequently Asked Questions
Let’s tackle some common questions about making Fruity Pebbles Sushi:
- Can I use different cereal? Absolutely! Rice Krispies, Cocoa Pebbles, or even a mixture of cereals would work well.
- Can I make this ahead of time? Yes, you can make it a day or two in advance. Just store it in an airtight container.
- Is this recipe gluten-free? Fruity Pebbles are generally considered gluten-free, but always check the packaging to be sure.
- Can I use sugar-free marshmallows? Yes, sugar-free marshmallows will work, but the texture might be slightly different.
- How can I prevent the sushi from sticking to the knife? Lightly grease the knife with butter or cooking spray before cutting.
So, there you have it – a fun, colorful, and incredibly easy recipe for Fruity Pebbles Sushi! I hope you enjoy making and eating this treat as much as I do. Remember, the key to success is to have fun and get creative. Don’t be afraid to experiment with different flavors and fillings to create your own unique version. Happy rolling!
How do I store leftover Fruity Pebbles Sushi?
You can store the sushi in an airtight container at room temperature for 2-3 days, in the refrigerator for up to a week, or in the freezer for up to a month (though the texture may change after freezing).
What can I do if the marshmallow mixture is too sticky?
If the mixture is too sticky, try adding a little more Fruity Pebbles cereal to balance the consistency.
Can I use something other than Fruity Pebbles to make this recipe?
Yes, you can substitute any crispy rice cereal (like Rice Krispies), Cocoa Pebbles, or even a mixture of cereals.
How can I prevent the Fruity Pebbles mixture from sticking when pressing it into the baking dish?
Line the baking dish with parchment paper or lightly grease it. When pressing the mixture, lightly grease your hands with butter or cooking spray, or dampen them with water.
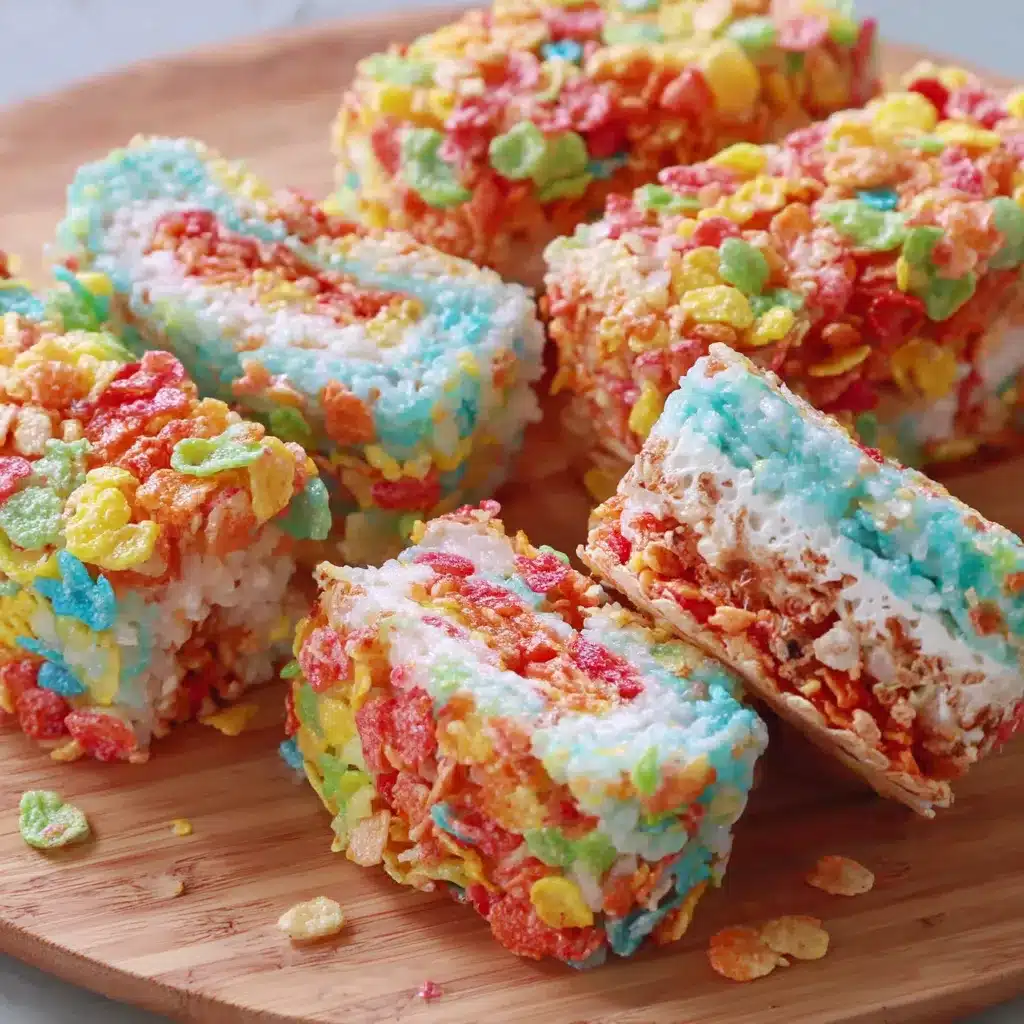
Fruity Pebbles Sushi Rolls
Ingredients
Equipment
Method
- Line a 9×13 inch baking dish with parchment paper or lightly grease it.
- In a large, microwave-safe bowl, melt the butter in the microwave. This should take about 30-45 seconds.
- Add the marshmallows to the melted butter.
- Microwave on high for 1-2 minutes, stirring halfway through, until the marshmallows are completely melted and smooth.
- Immediately pour the Fruity Pebbles into the melted marshmallow mixture. Stir gently but thoroughly until the cereal is evenly coated.
- Pour the mixture into the prepared baking dish.
- Use a spatula or lightly greased/dampened hands to press the mixture firmly and evenly into the dish.
- Let the mixture cool completely for at least 30 minutes to an hour. Refrigeration can speed up the process.
- Once cooled, lift the mixture out of the dish using the parchment paper and place it on a cutting board.
- Cut the mixture into long strips, about 1-2 inches wide. These will be your “sushi rolls.”
- If using fruit leather, place a strip of fruit leather on your workspace. Take one strip of the Fruity Pebbles mixture and place it on the fruit leather.
- Place a gummy worm or other candy in the middle of the Fruity Pebbles strip (optional).
- Carefully roll the Fruity Pebbles mixture around the candy, using the fruit leather as a wrapper (optional).
- Using a sharp knife, cut each strip into bite-sized “sushi” pieces.
- Arrange the Fruity Pebbles Sushi on a platter and serve immediately.


