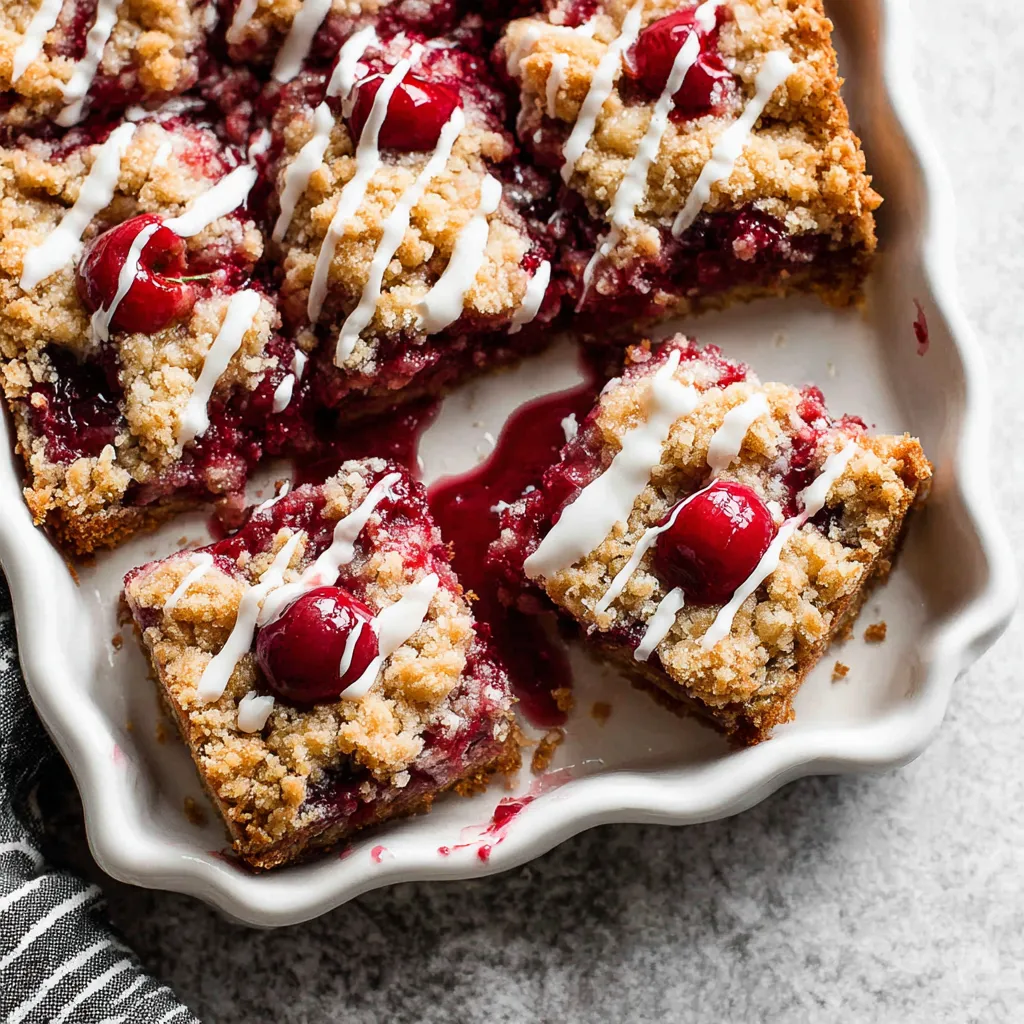
I vividly remember the first time my grandmother made cherry pie. The aroma alone was intoxicating – a warm, sweet, slightly tart scent that filled her entire kitchen. While I adored her pies, they always felt like a special occasion treat. That’s why I got so excited when I figured out how to create something that captured that same amazing flavor in a simple, everyday format. Get ready to discover how to make these incredible Easy Cherry Pie Bars, a dessert that delivers all the classic cherry pie goodness without all the fuss. Today, I’m sharing all my secrets for the most amazing Easy Cherry Pie Bars you’ll ever make!
Why You’ll ADORE These Easy Cherry Pie Bars
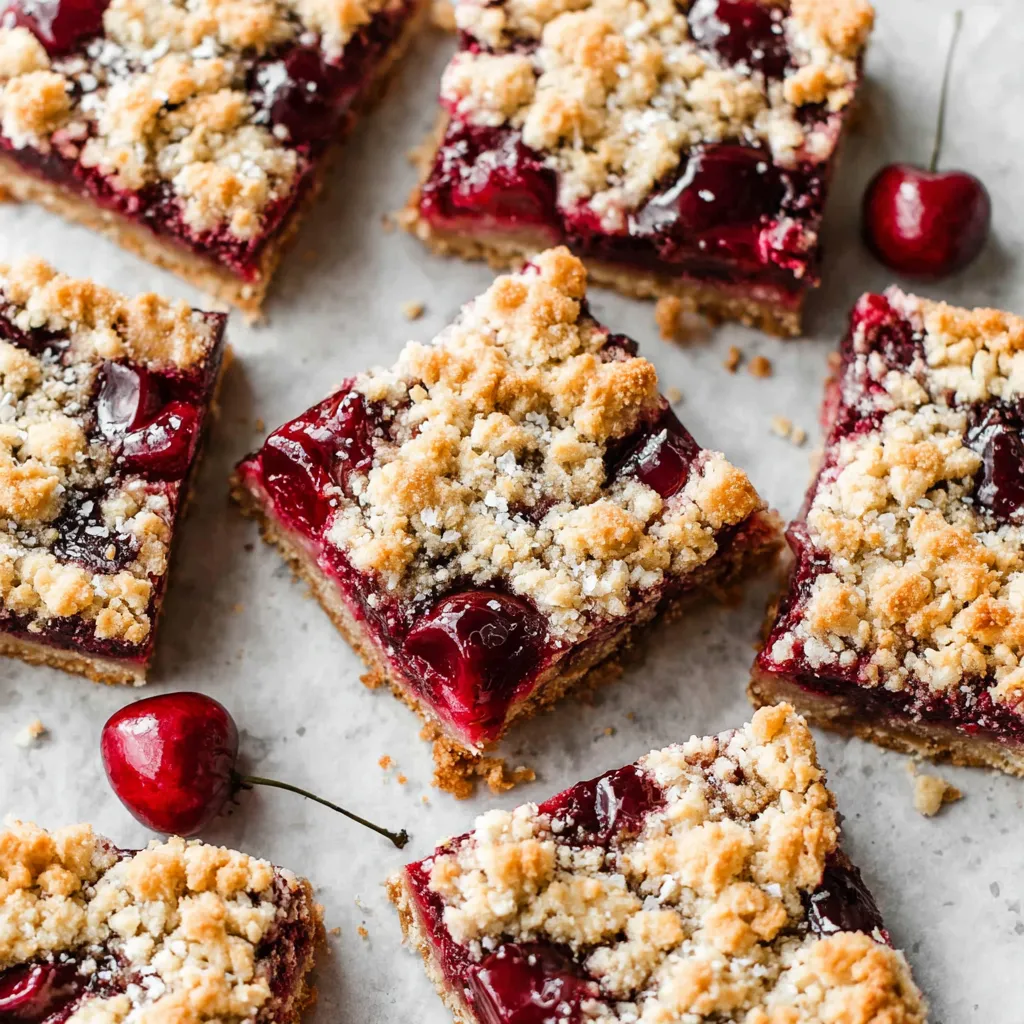
Okay, friend, let’s be real. Sometimes, you just want that comforting, delicious taste of cherry pie without spending hours in the kitchen crimping crusts and worrying about soggy bottoms. These Easy Cherry Pie Bars are the answer to your dessert prayers! Here’s why you’re going to fall head-over-heels in love with them:
- Seriously Simple: No fancy techniques or pastry chef skills required. We’re talking basic baking at its finest.
- Quick Prep: From start to oven, you’ll be amazed at how quickly these come together. Perfect for a last-minute dessert craving or when you need something impressive for a potluck but are short on time.
- Portable Perfection: Bars are naturally easier to transport and serve than a pie. Slice ’em up, pack ’em in a container, and you’re good to go!
- Customizable: Want to add a little almond extract to the filling? Go for it! Prefer a different kind of fruit? You can easily adapt this recipe to your liking.
- Crowd-Pleasing Flavor: That sweet-tart cherry filling nestled between a buttery, crumbly crust is a flavor combination that everyone loves.
The Secret Ingredients for Cherry Pie Bar Success
While the recipe is simple, a few key ingredients really make these bars sing. Don’t skimp on quality here – it makes all the difference!
- Good Quality Cherry Pie Filling: This is the star of the show, so choose a filling that you love. I personally prefer one that’s not overly sweet and has plenty of whole cherries. You can even make your own from scratch if you’re feeling ambitious!
- Real Butter: Don’t even think about using margarine! Real butter is essential for that rich, buttery flavor and perfect crumbly texture in the crust.
- A Touch of Almond Extract (Optional): A tiny bit of almond extract enhances the cherry flavor and adds a subtle, sophisticated note. But if you are not a big fan, it is totally ok to skip this ingredient.
Easy Cherry Pie Bars Recipe
Alright, let’s get down to business! Here’s my go-to recipe for Easy Cherry Pie Bars. I promise, it’s foolproof!
Ingredients:
For the Crust and Topping:
- 2 ½ cups all-purpose flour
- 1 cup (2 sticks) cold unsalted butter, cut into cubes
- ¾ cup granulated sugar
- ½ teaspoon salt
- 1 teaspoon vanilla extract
- 1 large egg
For the Filling:
- (2) 21-ounce cans cherry pie filling
- 1 tablespoon cornstarch (if your filling seems too runny)
- ½ teaspoon almond extract (optional)
Equipment:
- 9×13 inch baking pan
- Mixing bowls
- Pastry blender or food processor (optional)
- Measuring cups and spoons
Instructions:
- Preheat your oven to 375°F (190°C). Grease and lightly flour a 9×13 inch baking pan. This prevents sticking and ensures easy removal of the bars.
- Make the crust/topping: In a large bowl, whisk together the flour, sugar, and salt. The sugar adds sweetness and helps with browning, while the salt balances the flavors.
- Cut in the butter: Add the cold, cubed butter to the flour mixture. Use a pastry blender or your fingers to cut the butter into the flour until the mixture resembles coarse crumbs. You can also use a food processor for this step. Just pulse until the mixture is crumbly. The key here is to keep the butter cold so it does not melt and that creates the best texture for the bars
- Add egg and vanilla: Beat in the vanilla extract and egg until just combined. The dough will be crumbly and may seem a little dry, and that’s okay!
- Press half of the mixture into the pan: Press about half of the crumb mixture evenly into the prepared baking pan. Use the bottom of a measuring cup or your fingers to create a firm, even crust.
- Prepare the filling: In a bowl, combine the cherry pie filling with cornstarch (if using) and almond extract (if using). Stir gently to combine.
- Pour the filling over the crust: Spread the cherry pie filling evenly over the crust in the pan. Make sure to get the filling edge to edge so you have cherry goodness in every bite.
- Sprinkle the remaining crumb mixture over the filling: Crumble the remaining dough evenly over the cherry pie filling. Don’t worry about completely covering the filling – some exposed cherries are perfectly fine!
- Bake: Bake for 30-35 minutes, or until the crust is golden brown and the filling is bubbly.
- Cool completely: Let the bars cool completely in the pan before cutting into squares. This is crucial! If you try to cut them while they’re still warm, they’ll be a gooey mess. I usually put them in the refrigerator to cool down faster.
- Cut and serve: Once cooled, cut the bars into squares and serve. These are delicious on their own, but you can also top them with a scoop of vanilla ice cream or a dollop of whipped cream.
Success Tips for Perfect Cherry Pie Bars
These tips are what separate good cherry pie bars from *amazing* cherry pie bars. Pay attention, my friend!
- Keep the Butter COLD: This is the most important tip! Cold butter is key to creating a flaky, tender crust. If your butter starts to get too soft while you’re working with it, pop it back in the fridge for a few minutes.
- Don’t Overmix the Dough: Overmixing develops the gluten in the flour, resulting in a tough crust. Mix just until the dough comes together.
- Use Parchment Paper for Easy Removal: Line your baking pan with parchment paper, leaving an overhang on the sides. After baking, you can simply lift the bars out of the pan using the parchment paper. This makes cutting and serving a breeze.
- Adjust Baking Time as Needed: Every oven is different, so keep an eye on your bars while they’re baking. If the crust starts to brown too quickly, tent the pan with foil.
- Make Ahead & Freezing Instructions: These bars can be made ahead of time and stored in an airtight container at room temperature for up to 3 days. For longer storage, you can freeze them for up to 2 months. Wrap them tightly in plastic wrap and then in foil. Thaw in the refrigerator before serving.
Variations to Spice Things Up
One of the best things about this recipe is how easily you can customize it. Here are a few ideas to get you started:
- Different Fruit Filling: Try using apple, blueberry, or peach pie filling instead of cherry. Each will give you a unique and delicious flavor profile. You could even try mixing different fruits together!
- Add Nuts: Mix chopped pecans, walnuts, or almonds into the crust or sprinkle them on top before baking. This adds a nice crunch and nutty flavor.
- Chocolate Chips: Add chocolate chips to the filling for a decadent twist. Dark, milk, or white chocolate chips all work well.
- Lemon Zest: Add a teaspoon of lemon zest to the crust for a bright, citrusy flavor that complements the cherry filling beautifully.
- Spice It Up: Add a pinch of cinnamon, nutmeg, or ginger to the crust or filling for a warm, comforting flavor.
Serving Suggestions That Will Wow
These Easy Cherry Pie Bars are delicious on their own, but here are a few serving suggestions to take them to the next level:
- Vanilla Ice Cream: A classic pairing that never disappoints. The cold, creamy ice cream complements the warm, fruity bars perfectly.
- Whipped Cream: A dollop of homemade whipped cream adds a light and airy touch.
- Caramel Sauce: Drizzle with caramel sauce for an extra touch of sweetness.
- Chocolate Sauce: If you’re a chocolate lover, a drizzle of chocolate sauce is a must.
- Fresh Fruit: Garnish with fresh cherries or other berries for a beautiful presentation and a burst of fresh flavor.
Other Delicious Treats You Might Enjoy
If you love these Easy Cherry Pie Bars, you’re going to adore some of my other easy dessert recipes. Be sure to check these out:
Looking for something with a bit of a tropical twist? You absolutely HAVE to try my BLUEBERRY BOYFRIEND BAIT BARS. They’re bursting with fresh blueberry flavor and a hint of lemon, making them perfect for a summer picnic. Or, for another handheld delight, these CHERRY PIE BITES BLISS are individual servings of pure cherry pie heaven – perfect for parties or portion control! If you want something a bit more substantial, my PEACH COBBLER is a classic for a reason. Sweet, juicy peaches are baked under a golden, buttery crust. You may also like PEACH COBBLER. And if you’re in the mood for something truly decadent, you simply must try these ROASTED CHERRY BROWNIE PERFECTION. The combination of rich, fudgy brownies and sweet, roasted cherries is simply irresistible. Finally, for a no-fuss dessert that’s always a hit, try my PEACH COBBLER. It’s the easiest dessert you’ll ever make!
Conclusion
There you have it! My super simple, utterly delicious Easy Cherry Pie Bars recipe. I truly hope you give these a try. They’re the perfect way to satisfy your sweet tooth without spending hours in the kitchen. Happy baking, my friend! And remember, don’t be afraid to experiment and make this recipe your own. After all, the best recipes are the ones that are made with love!
What makes these cherry pie bars easier to make than a traditional cherry pie?
These bars are simpler because they don’t require fancy techniques, crimping crusts, or worrying about soggy bottoms. The recipe is designed for basic baking and quick preparation.
Can I use a different fruit filling besides cherry?
Yes, you can easily customize the recipe with other fruit fillings like apple, blueberry, or peach to create different flavor profiles.
How do I store these cherry pie bars?
You can store the bars in an airtight container at room temperature for up to 3 days. For longer storage, freeze them for up to 2 months, wrapped tightly in plastic wrap and then in foil. Thaw in the refrigerator before serving.
Why is it important to use cold butter when making the crust?
Cold butter is key to creating a flaky, tender crust. If the butter gets too soft while you’re working with it, pop it back in the fridge for a few minutes.
Easiest Cherry Pie Bars
Ingredients
Equipment
Method
- Preheat your oven to 375°F (190°C). Grease and lightly flour a 9×13 inch baking pan.
- In a large bowl, whisk together the flour, sugar, and salt.
- Add the cold, cubed butter to the flour mixture. Use a pastry blender or your fingers to cut the butter into the flour until the mixture resembles coarse crumbs. You can also use a food processor for this step. Just pulse until the mixture is crumbly. Keep the butter cold for the best texture.
- Beat in the vanilla extract and egg until just combined. The dough will be crumbly and may seem a little dry, and that’s okay!
- Press about half of the crumb mixture evenly into the prepared baking pan. Use the bottom of a measuring cup or your fingers to create a firm, even crust.
- In a bowl, combine the cherry pie filling with cornstarch (if using) and almond extract (if using). Stir gently to combine.
- Spread the cherry pie filling evenly over the crust in the pan. Make sure to get the filling edge to edge.
- Crumble the remaining dough evenly over the cherry pie filling. Don’t worry about completely covering the filling – some exposed cherries are perfectly fine!
- Bake for 30-35 minutes, or until the crust is golden brown and the filling is bubbly.
- Let the bars cool completely in the pan before cutting into squares. I usually put them in the refrigerator to cool down faster.
- Once cooled, cut the bars into squares and serve. These are delicious on their own, but you can also top them with a scoop of vanilla ice cream or a dollop of whipped cream.


