
I can still remember the first time my grandmother made caramelized onions. The sweet, savory aroma filled her tiny kitchen, promising something truly special. I was hooked from that first bite, a revelation of how simple ingredients, treated with patience and love, could transform into something extraordinary. Today, I’m sharing all my secrets for the most amazing Caramelized Onions Recipe – Melt-in-Your-Mouth Flavor Bomb you’ll ever make! Get ready for a flavor explosion!
The Magic of Caramelized Onions: A Flavor Journey

Caramelized onions. The name itself conjures images of deep, rich flavor, a sweet and savory dance on the tongue. But what exactly is caramelization, and why does it make onions taste so incredible? It’s all about chemistry, my friend! When onions are cooked low and slow, their natural sugars break down and brown, creating hundreds of complex flavor compounds. This process takes time and patience, but the reward is a flavor bomb that will elevate everything it touches.
Think about it: caramelized onions on a juicy burger, nestled into a creamy French onion soup, topping a crispy pizza, or even as a surprising element in a savory tart. They’re incredibly versatile and can add depth and complexity to countless dishes. Once you master this simple technique, you’ll find yourself adding caramelized onions to everything! And trust me, you won’t regret it.
So, are you ready to embark on this flavor journey with me? Let’s get started!
Caramelized Onions Recipe: The Melt-in-Your-Mouth Guide
This isn’t just a recipe; it’s a roadmap to onion nirvana. Follow these steps, and you’ll be rewarded with the most luscious, flavorful caramelized onions you’ve ever tasted. Don’t be intimidated by the time involved – most of it is hands-off cooking. Just a little stirring and a whole lot of patience is all you need.
Ingredients:
- 2 large yellow onions (about 1.5 pounds), thinly sliced
- 2 tablespoons olive oil
- 2 tablespoons butter
- 1/2 teaspoon salt
- 1/4 teaspoon black pepper
- 1 tablespoon balsamic vinegar (optional, but highly recommended!)
- 1 teaspoon brown sugar (optional, enhances sweetness)
Equipment:
- Large, heavy-bottomed skillet (cast iron is ideal)
- Wooden spoon or spatula
Instructions:
- Prepare the Onions: Peel the onions and cut them in half from root to stem. Then, thinly slice each half into half-moons. Aim for consistent thickness so they cook evenly.
- Heat the Fat: In a large, heavy-bottomed skillet (cast iron is best for even heat distribution), melt the olive oil and butter over medium-low heat. The fat should shimmer but not smoke. This combination of oil and butter gives the onions a lovely flavor and helps prevent them from burning.
- Add the Onions: Add the sliced onions to the skillet, spreading them out in an even layer. Don’t overcrowd the pan; if necessary, cook the onions in batches. Overcrowding will steam the onions instead of allowing them to caramelize.
- Season and Stir: Sprinkle the onions with salt and pepper. Stir to coat them evenly with the oil and butter. The salt will help draw out moisture from the onions, which is essential for the caramelization process.
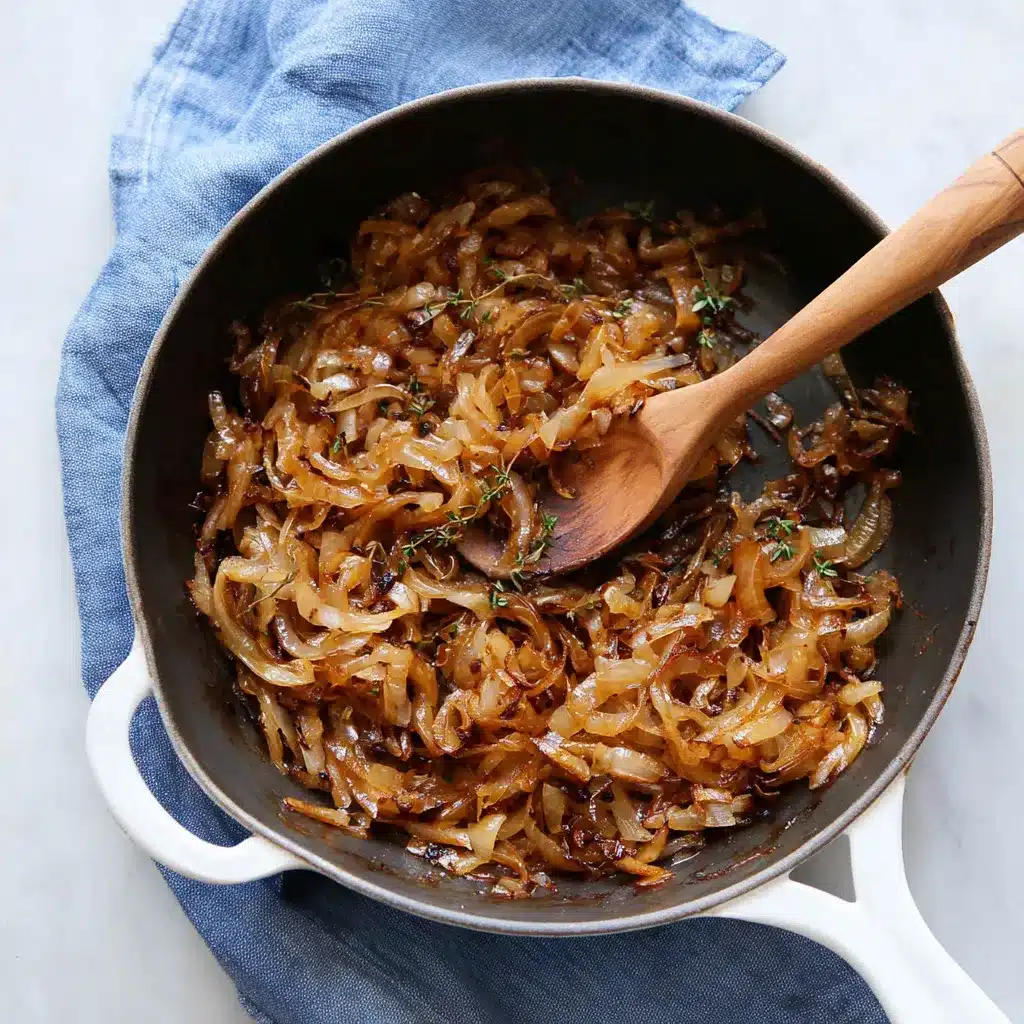
- The Long Slow Cook: Reduce the heat to low – this is crucial! The key to perfect caramelized onions is low and slow cooking. Cook the onions, stirring occasionally (every 10-15 minutes), for 45-60 minutes, or until they are a deep golden brown color and incredibly soft.
- Observe the Transformation: Initially, the onions will release a lot of moisture and seem like they are boiling. As the water evaporates, they will begin to soften and turn translucent. Be patient! As they continue to cook, they will start to brown and develop a sweet, complex aroma. Keep stirring to prevent sticking and ensure even browning.
- Deglaze (Optional): In the last 5-10 minutes of cooking, add the balsamic vinegar and brown sugar (if using). The balsamic vinegar adds a tangy depth of flavor that complements the sweetness of the onions. Stir well to combine and scrape up any browned bits from the bottom of the pan. These browned bits are packed with flavor!
- Final Check: The onions are done when they are a deep, rich brown color, very soft, and have a sweet and savory flavor. Taste them and adjust the seasoning if needed.
- Serve and Enjoy: Remove the caramelized onions from the heat and let them cool slightly before serving. They can be used immediately or stored in the refrigerator for up to 5 days.
Success Tips: Your Caramelized Onion Secrets
Want to guarantee caramelized onion perfection every single time? Here are my top tips for success:
- Low and Slow is Key: I can’t stress this enough! Rushing the process will result in burnt, bitter onions instead of sweet, caramelized goodness. Patience is your best friend here.
- Use a Heavy-Bottomed Skillet: A heavy-bottomed skillet, especially cast iron, distributes heat evenly, preventing hot spots and ensuring that the onions caramelize evenly.
- Don’t Overcrowd the Pan: If you have a lot of onions, cook them in batches. Overcrowding will cause the onions to steam instead of caramelize.
- Stir Occasionally: Stirring the onions occasionally prevents them from sticking to the pan and ensures even browning.
- Deglaze for Extra Flavor: Adding a splash of balsamic vinegar, red wine vinegar, or even a little beer towards the end of cooking can add a wonderful depth of flavor.
Ways to Use Your Melt-in-Your-Mouth Caramelized Onions
Now that you’ve created a batch of these flavor bombs, it’s time to put them to good use! Here are just a few ideas to get you started:
- Burgers: Top your burgers with a generous spoonful of caramelized onions for a sweet and savory kick. They’re especially delicious on CRACK BURGERS!
- Pizza: Add caramelized onions to your homemade or store-bought pizza for a gourmet touch. They pair perfectly with goat cheese, balsamic glaze, and fresh herbs.
- Sandwiches: Elevate your sandwiches with a layer of caramelized onions. They’re fantastic with grilled cheese, roast beef, or turkey.
- Soups: Stir caramelized onions into soups for added flavor and depth. They’re a classic addition to French onion soup, but they also work well in creamy tomato soup or potato soup.
- Dips and Spreads: Blend caramelized onions into dips and spreads for a savory sweetness. Try them in hummus, spinach dip, or even a simple cream cheese spread.
- Tarts and Quiches: Use caramelized onions as a filling for tarts and quiches. They pair well with cheese, bacon, and vegetables.
- Steak: Serve caramelized onions as a side with a perfectly cooked steak. They add a touch of sweetness that complements the richness of the beef. Consider them with Sizzling Chinese Pepper Steak for a truly memorable meal.
- Pasta Dishes: Toss caramelized onions with your favorite pasta for a simple but satisfying meal. They’re delicious with browned butter and Parmesan cheese.
Variations and Creative Twists
Once you’ve mastered the basic caramelized onions recipe, feel free to experiment with different variations and creative twists. Here are a few ideas to get you inspired:
- Different Types of Onions: Try using different types of onions, such as red onions, shallots, or leeks, to create different flavor profiles. Red onions will have a slightly sharper flavor, while shallots will be more delicate and sweet.
- Add Herbs and Spices: Experiment with adding different herbs and spices to the onions as they cook. Thyme, rosemary, bay leaf, and garlic are all excellent choices.
- Sweet and Spicy: Add a pinch of red pepper flakes to the onions for a touch of heat. The combination of sweet and spicy is surprisingly delicious.
- Maple Syrup: Instead of brown sugar, try using maple syrup for a more complex sweetness.
- Wine: Deglaze the pan with a splash of red or white wine for added depth of flavor.
Make-Ahead and Storage Instructions
One of the great things about caramelized onions is that they can be made ahead of time. This makes them a perfect ingredient for meal prepping or for entertaining. Here’s how to store them:
- Refrigerating: Store caramelized onions in an airtight container in the refrigerator for up to 5 days.
- Freezing: For longer storage, freeze the caramelized onions in a single layer on a baking sheet lined with parchment paper. Once frozen, transfer them to a freezer-safe bag or container. They can be stored in the freezer for up to 3 months. To thaw, simply transfer them to the refrigerator overnight or heat them in a skillet over low heat.
Troubleshooting: Common Caramelizing Challenges (and How to Fix Them!)
Even with the best recipe, things can sometimes go wrong. Here are a few common problems you might encounter when caramelizing onions, and how to fix them:
- Onions are Burning: If the onions are burning, reduce the heat immediately. You may also need to add a tablespoon or two of water or broth to the pan to prevent further burning. Be sure to stir them more frequently.
- Onions are Not Browning: If the onions are not browning, make sure the heat is not too low. You may need to increase the heat slightly, but be careful not to burn them. Also, make sure you are not overcrowding the pan.
- Onions are Too Mushy: If the onions are too mushy, it could be because they were cooked at too high of a temperature or for too long. Next time, use lower heat and check them more frequently.
- Onions Lack Flavor: If the onions lack flavor, make sure you are using enough salt and pepper. You can also add other flavor enhancers, such as balsamic vinegar, brown sugar, or herbs. Perhaps you could make Sizzling Chinese Pepper Steak With Onions to boost your flavor profile.
Caramelized Onions: More Than Just a Recipe, It’s an Experience
Making caramelized onions is more than just following a recipe; it’s an experience. It’s about slowing down, taking your time, and watching simple ingredients transform into something truly special. The aroma that fills your kitchen as the onions slowly caramelize is intoxicating, and the flavor is simply unforgettable. I have used these for years when I’m making Sizzling Chinese Pepper Steak With Onions. It elevates it to a whole new level.
So, take a deep breath, put on some music, and get ready to create a flavor bomb that will elevate your cooking to new heights. You got this!
Conclusion: Unleash the Flavor with Caramelized Onions
There you have it – your complete guide to making the most delicious, melt-in-your-mouth caramelized onions! I hope you’ve enjoyed this journey with me and are feeling confident and excited to try this recipe. Remember, patience is key, and the reward is a flavor explosion that will transform your dishes. Now go forth and caramelize! Your taste buds will thank you.
What makes caramelized onions taste so good?
When onions are cooked low and slow, their natural sugars break down and brown, creating hundreds of complex flavor compounds. This process, called caramelization, results in a sweet and savory flavor explosion.
What’s the most important tip for making perfect caramelized onions?
Low and slow cooking is key! Rushing the process will result in burnt, bitter onions instead of sweet, caramelized goodness. Patience is essential.
Can I make caramelized onions ahead of time?
Yes! Caramelized onions can be stored in an airtight container in the refrigerator for up to 5 days, or frozen for up to 3 months.
What kind of pan is best for caramelizing onions?
A large, heavy-bottomed skillet, especially cast iron, is ideal for even heat distribution, preventing hot spots and ensuring that the onions caramelize evenly.
Caramelized Onions: Melt-in-Your-Mouth Flavor Bomb
Ingredients
Equipment
Method
- Peel the onions and cut them in half from root to stem. Thinly slice each half into half-moons, aiming for consistent thickness.
- In a large, heavy-bottomed skillet (cast iron is ideal), melt the olive oil and butter over medium-low heat. The fat should shimmer but not smoke.
- Add the sliced onions to the skillet, spreading them out in an even layer. Avoid overcrowding; cook in batches if necessary.
- Sprinkle the onions with salt and pepper. Stir to coat them evenly with the oil and butter.
- Reduce the heat to low. Cook the onions, stirring occasionally (every 10-15 minutes), for 45-60 minutes, or until they are a deep golden brown color and incredibly soft.
- Initially, the onions will release moisture. As the water evaporates, they will soften and turn translucent. Be patient as they brown and develop a sweet aroma.
- In the last 5-10 minutes of cooking, add the balsamic vinegar and brown sugar (if using). Stir well to combine and scrape up any browned bits from the bottom of the pan.
- The onions are done when they are a deep, rich brown color, very soft, and have a sweet and savory flavor. Taste and adjust seasoning if needed.
- Remove the caramelized onions from the heat and let them cool slightly before serving. They can be used immediately or stored for later.


