
I’ll never forget the first time I tried Chicken Kiev; it was at a fancy restaurant, and the anticipation of that buttery explosion was almost unbearable. But, let’s be honest, recreating that restaurant-quality experience at home always felt a bit intimidating. Now, after countless attempts and tweaks, I’ve cracked the code to making **Easy Chicken Kiev – Crispy & Buttery** that’s not only incredibly delicious but also surprisingly straightforward. Today, I’m sharing my ultimate guide, and I promise you’ll be serving up a Kiev that rivals any you’ve had before!
The Secret to Perfect Chicken Kiev: It’s Easier Than You Think!

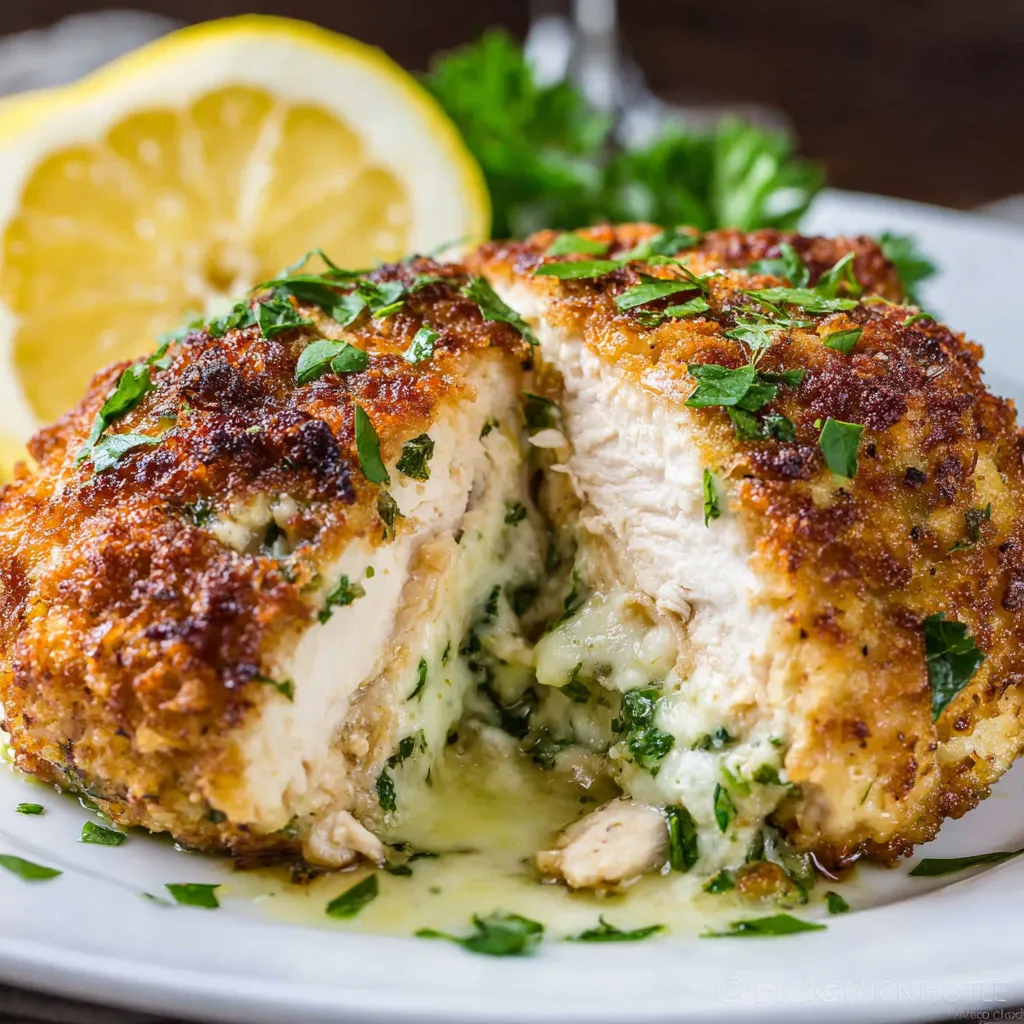
Chicken Kiev. Just the name conjures up images of golden-brown, perfectly crisp chicken oozing with fragrant, herbed butter. It sounds complicated, right? Wrong! My version simplifies the process without sacrificing any of the incredible flavor and satisfying crunch. Forget fancy techniques and hours in the kitchen. This is about making restaurant-worthy food accessible to everyone, even on a busy weeknight. Let’s dive in and unlock the secrets to this classic dish.
What Makes This Recipe So Special?
- Simplified Process: We’re streamlining the traditional method, making it achievable for home cooks of all skill levels.
- Maximum Flavor: Every element, from the herbed butter to the crispy breading, is designed to deliver a burst of deliciousness.
- Perfectly Crispy: We’ll use techniques to ensure a golden-brown, incredibly crispy crust every single time.
- No Butter Blowout: Learn the secrets to prevent the dreaded butter leak, ensuring a satisfyingly buttery interior.
Ingredients You’ll Need
Here’s a breakdown of the key ingredients for our Easy Chicken Kiev:
- Chicken Breasts: Boneless, skinless chicken breasts are the star of the show. Look for thicker breasts for the best results.
- Butter: Unsalted butter, softened to room temperature, is the foundation of our flavorful filling.
- Fresh Herbs: Parsley, chives, and dill create a bright and aromatic butter. Feel free to experiment with your favorites!
- Garlic: A clove or two of minced garlic adds a subtle savory note to the butter.
- Lemon Juice: A squeeze of fresh lemon juice brightens the butter and complements the herbs.
- All-Purpose Flour: Used for the first layer of breading, helping the egg adhere properly.
- Eggs: Beaten eggs create a crucial binding layer for the breadcrumbs.
- Panko Breadcrumbs: Panko breadcrumbs are the key to achieving an ultra-crispy crust. They are lighter and airier than regular breadcrumbs.
- Salt and Pepper: To season both the chicken and the butter. Don’t skimp on the seasoning!
- Vegetable Oil: For frying. Choose an oil with a high smoke point, like vegetable or canola oil.
Step-by-Step Instructions: Let’s Make Chicken Kiev!
Alright, let’s get cooking! Follow these steps carefully, and you’ll be amazed at how easy it is to create impressive Chicken Kiev at home.
- Prepare the Herbed Butter: In a medium bowl, combine the softened butter, minced garlic, chopped parsley, chives, dill, lemon juice, salt, and pepper. Mix well until everything is evenly distributed. The butter should be fragrant and soft enough to mold.
- Shape the Butter: Place the herbed butter mixture onto a sheet of plastic wrap. Form it into a log shape, about 1-inch in diameter. Wrap tightly and refrigerate for at least 30 minutes, or until firm. This is crucial for preventing the butter from melting too quickly during cooking.
- Prepare the Chicken: Place a chicken breast on a cutting board. Cover it with plastic wrap and pound it with a meat mallet until it’s about 1/4-inch thick. Be gentle to avoid tearing the chicken. Repeat with the remaining chicken breasts. The goal is to create a thin, even cutlet.
- Season the Chicken: Season both sides of each chicken cutlet with salt and pepper. Don’t be shy – proper seasoning is key to a flavorful final product!
- Assemble the Kiev: Unwrap the chilled herbed butter and cut it into 4 equal portions. Place one portion of butter in the center of each chicken cutlet.
- Wrap the Butter: Carefully fold the sides of the chicken cutlet over the butter, then roll it up tightly, ensuring the butter is completely sealed inside. Use toothpicks to secure the seams if needed. This step is vital to prevent butter leakage.
- Prepare the Breading Station: Set up three shallow dishes. In the first, place the all-purpose flour. In the second, whisk the eggs with a tablespoon of water. In the third, place the panko breadcrumbs.
- Bread the Chicken: Dredge each chicken Kiev in the flour, shaking off any excess. Then, dip it into the egg mixture, ensuring it’s fully coated. Finally, coat it thoroughly with the panko breadcrumbs, pressing gently to help them adhere. This triple-layer breading is what gives us that amazing crispy texture.
- Chill the Breaded Kievs: Place the breaded chicken Kievs on a plate or baking sheet and refrigerate for at least 30 minutes. This allows the breading to set and helps prevent it from falling off during frying. You can even chill them for longer, up to a few hours.
- Fry the Chicken: Fill a large, heavy-bottomed skillet with about 1 inch of vegetable oil. Heat the oil over medium-high heat until it reaches 350°F (175°C). Use a thermometer to ensure accurate temperature.
- Cook to Golden Perfection: Carefully place the chicken Kievs into the hot oil, being careful not to overcrowd the pan. Cook for about 5-7 minutes per side, or until golden brown and cooked through. The internal temperature of the chicken should reach 165°F (74°C).
- Drain and Serve: Remove the chicken Kievs from the skillet and place them on a wire rack lined with paper towels to drain any excess oil. Remove the toothpicks, if used.
- Serve Immediately: Serve the Chicken Kiev immediately while it’s hot and crispy. The best part is watching that buttery goodness ooze out as you cut into it!
Success Tips for the Best Chicken Kiev
Want to guarantee perfect Chicken Kiev every time? Here are my top tips for success:
- Chill the Butter! This is the most important step. The colder the butter, the less likely it is to melt and leak out during cooking. Don’t skip this step!
- Seal it Tight! Make sure the chicken is tightly wrapped around the butter, and use toothpicks if needed. This will help prevent any butter from escaping.
- Don’t Overcrowd the Pan! Frying too many chicken Kievs at once will lower the oil temperature and result in soggy, greasy chicken. Cook in batches if necessary.
- Use a Thermometer! Using a thermometer to check the oil temperature is crucial for even cooking and a crispy crust. Aim for 350°F (175°C).
- Rest Before Slicing! Let the Chicken Kiev rest for a minute or two after frying before slicing into it. This allows the juices to redistribute and prevents it from drying out.
Serving Suggestions: Complete the Meal
Chicken Kiev is delicious on its own, but it’s even better when paired with the right side dishes. Here are a few of my favorite serving suggestions:
- Mashed Potatoes: Creamy mashed potatoes are a classic pairing for Chicken Kiev.
- Roasted Vegetables: Roasted asparagus, broccoli, or Brussels sprouts add a healthy and flavorful touch.
- Rice Pilaf: A simple rice pilaf is a great way to soak up all that delicious buttery sauce.
- Salad: A fresh green salad provides a refreshing contrast to the richness of the Chicken Kiev.
Variations and Adaptations
Want to put your own spin on Chicken Kiev? Here are a few ideas to get you started:
- Different Herbs: Experiment with different herbs in the butter, such as tarragon, rosemary, or thyme.
- Cheese: Add a small cube of cheese, such as Gruyere or Parmesan, to the butter filling for an extra layer of flavor.
- Spices: Add a pinch of red pepper flakes to the butter for a touch of heat.
- Air Fryer: For a healthier option, you can air fry the Chicken Kiev instead of frying it in oil. Preheat your air fryer to 375°F (190°C) and cook for about 15-20 minutes, or until golden brown and cooked through, flipping halfway through.
Make-Ahead and Storage Instructions
Chicken Kiev is best served immediately, but here’s how to prepare it ahead of time and store leftovers:
- Make-Ahead: You can prepare the Chicken Kiev up to the point of frying and store it in the refrigerator for up to 24 hours. Make sure to wrap it tightly to prevent it from drying out.
- Storage: Leftover Chicken Kiev can be stored in the refrigerator for up to 3 days. Reheat it in the oven or air fryer to maintain its crispiness.
- Freezing: For longer storage, you can freeze the Chicken Kiev. Wrap it individually in plastic wrap and then place it in a freezer-safe bag or container. It can be stored in the freezer for up to 2 months. Thaw it in the refrigerator overnight before cooking.
Craving More Delicious Chicken Recipes?
If you’re a chicken lover like me, you’re always on the lookout for exciting new recipes. And boy, do I have some winners for you! If you want something quick and easy, you absolutely must try Lemon Garlic Chicken Bites & Pasta. It’s a guaranteed weeknight winner! Or, for something a little more indulgent, the CHICKEN BACON PASTA is a creamy, dreamy delight. And for those nights when you need something comforting and satisfying, look no further than BBQ CHICKEN MAC HEAVEN. It’s pure comfort food bliss! And don’t forget the Marry Me Chicken , so creamy you will say yes! If you are feeling adventurous, the BANG BANG CHICKEN BOWLS are packed with flavor and are perfect for a quick and healthy meal. If you are looking for a healthier option, you should check out KOHLRABI CHICKEN
Recipe: Easy Chicken Kiev
Here’s the complete recipe for my Easy Chicken Kiev, ready for you to print or save:
Ingredients:
- 4 boneless, skinless chicken breasts
- 1/2 cup unsalted butter, softened
- 2 tablespoons chopped fresh parsley
- 2 tablespoons chopped fresh chives
- 1 tablespoon chopped fresh dill
- 1 clove garlic, minced
- 1 tablespoon lemon juice
- Salt and pepper to taste
- 1/2 cup all-purpose flour
- 2 large eggs, beaten
- 1 1/2 cups panko breadcrumbs
- Vegetable oil, for frying
Instructions:
- Prepare the herbed butter: In a medium bowl, combine the softened butter, minced garlic, chopped parsley, chives, dill, lemon juice, salt, and pepper. Mix well until everything is evenly distributed.
- Shape the butter: Place the herbed butter mixture onto a sheet of plastic wrap. Form it into a log shape, about 1-inch in diameter. Wrap tightly and refrigerate for at least 30 minutes, or until firm.
- Prepare the chicken: Place a chicken breast on a cutting board. Cover it with plastic wrap and pound it with a meat mallet until it’s about 1/4-inch thick. Repeat with the remaining chicken breasts.
- Season the chicken: Season both sides of each chicken cutlet with salt and pepper.
- Assemble the Kiev: Unwrap the chilled herbed butter and cut it into 4 equal portions. Place one portion of butter in the center of each chicken cutlet.
- Wrap the butter: Carefully fold the sides of the chicken cutlet over the butter, then roll it up tightly, ensuring the butter is completely sealed inside. Use toothpicks to secure the seams if needed.
- Prepare the breading station: Set up three shallow dishes. In the first, place the all-purpose flour. In the second, whisk the eggs with a tablespoon of water. In the third, place the panko breadcrumbs.
- Bread the chicken: Dredge each chicken Kiev in the flour, shaking off any excess. Then, dip it into the egg mixture, ensuring it’s fully coated. Finally, coat it thoroughly with the panko breadcrumbs, pressing gently to help them adhere.
- Chill the breaded Kievs: Place the breaded chicken Kievs on a plate or baking sheet and refrigerate for at least 30 minutes.
- Fry the chicken: Fill a large, heavy-bottomed skillet with about 1 inch of vegetable oil. Heat the oil over medium-high heat until it reaches 350°F (175°C).
- Cook to golden perfection: Carefully place the chicken Kievs into the hot oil, being careful not to overcrowd the pan. Cook for about 5-7 minutes per side, or until golden brown and cooked through. The internal temperature of the chicken should reach 165°F (74°C).
- Drain and serve: Remove the chicken Kievs from the skillet and place them on a wire rack lined with paper towels to drain any excess oil. Remove the toothpicks, if used.
- Serve immediately: Serve the Chicken Kiev immediately while it’s hot and crispy.
Enjoy!
Ready to Impress?
There you have it! My foolproof guide to making Easy Chicken Kiev – Crispy & Buttery that’s guaranteed to impress. Don’t be intimidated; just follow the steps, remember my success tips, and get ready to enjoy a truly spectacular meal. This isn’t just a recipe; it’s an experience. So, gather your ingredients, put on some music, and get ready to create something amazing. You’ve got this!
What is the most important tip for preventing butter from leaking out of the Chicken Kiev during cooking?
Chilling the herbed butter log before assembling the Chicken Kiev is the most crucial step. The colder the butter, the less likely it is to melt and leak out during cooking.
Why are panko breadcrumbs recommended over regular breadcrumbs for this Chicken Kiev recipe?
Panko breadcrumbs are lighter and airier than regular breadcrumbs, which helps create an ultra-crispy crust for the Chicken Kiev.
Can Chicken Kiev be prepared in advance?
Yes, you can prepare the Chicken Kiev up to the point of frying and store it in the refrigerator for up to 24 hours, wrapped tightly to prevent drying. It can also be frozen for longer storage.
What temperature should the oil be when frying the Chicken Kiev?
The oil should be heated to 350°F (175°C) before carefully placing the chicken Kievs into the skillet.
Ultimate Crispy Chicken Kiev
Ingredients
Equipment
Method
- Prepare the herbed butter: In a medium bowl, combine the softened butter, minced garlic, chopped parsley, chives, dill, lemon juice, salt, and pepper. Mix well until everything is evenly distributed.
- Shape the butter: Place the herbed butter mixture onto a sheet of plastic wrap. Form it into a log shape, about 1-inch in diameter. Wrap tightly and refrigerate for at least 30 minutes, or until firm.
- Prepare the chicken: Place a chicken breast on a cutting board. Cover it with plastic wrap and pound it with a meat mallet until it’s about 1/4-inch thick. Repeat with the remaining chicken breasts.
- Season the chicken: Season both sides of each chicken cutlet with salt and pepper.
- Assemble the Kiev: Unwrap the chilled herbed butter and cut it into 4 equal portions. Place one portion of butter in the center of each chicken cutlet.
- Wrap the butter: Carefully fold the sides of the chicken cutlet over the butter, then roll it up tightly, ensuring the butter is completely sealed inside. Use toothpicks to secure the seams if needed.
- Prepare the breading station: Set up three shallow dishes. In the first, place the all-purpose flour. In the second, whisk the eggs with a tablespoon of water. In the third, place the panko breadcrumbs.
- Bread the chicken: Dredge each chicken Kiev in the flour, shaking off any excess. Then, dip it into the egg mixture, ensuring it’s fully coated. Finally, coat it thoroughly with the panko breadcrumbs, pressing gently to help them adhere.
- Chill the breaded Kievs: Place the breaded chicken Kievs on a plate or baking sheet and refrigerate for at least 30 minutes.
- Fry the chicken: Fill a large, heavy-bottomed skillet with about 1 inch of vegetable oil. Heat the oil over medium-high heat until it reaches 350°F (175°C).
- Cook to golden perfection: Carefully place the chicken Kievs into the hot oil, being careful not to overcrowd the pan. Cook for about 5-7 minutes per side, or until golden brown and cooked through. The internal temperature of the chicken should reach 165°F (74°C).
- Drain and serve: Remove the chicken Kievs from the skillet and place them on a wire rack lined with paper towels to drain any excess oil. Remove the toothpicks, if used.
- Serve immediately: Serve the Chicken Kiev immediately while it’s hot and crispy.


